> ## Documentation Index
> Fetch the complete documentation index at: https://help.privy.com/llms.txt
> Use this file to discover all available pages before exploring further.
# Create a Banner Display
> Capture your visitor's attention and grow your list using a Banner at the top or bottom of your site.
A Banner display appears from the top or bottom of the web page and can remain visible as your visitors navigate around. The dynamic movement is a great way to get your visitors' attention. Simultaneously, the larger display size of a Banner allows you to incorporate an image or multi-field form element, unlike a more streamlined [Bar display](https://help.privy.com/docs/learn/displays/classic-designer/bar-display).
## Create a new Banner
To create a new Banner:
* Navigate to [Displays](https://dashboard.privy.com/displays).
* Click **Create new display**. This will open our Templates page.
* Our Embedded Forms need to be built using our Classic display builder, so navigate to this builder by selecting the **Get started** option in the lower left corner of your screen.
* Name your display in the following prompt, specify whether you want to collect email, phone, or both, and select **Create display**.
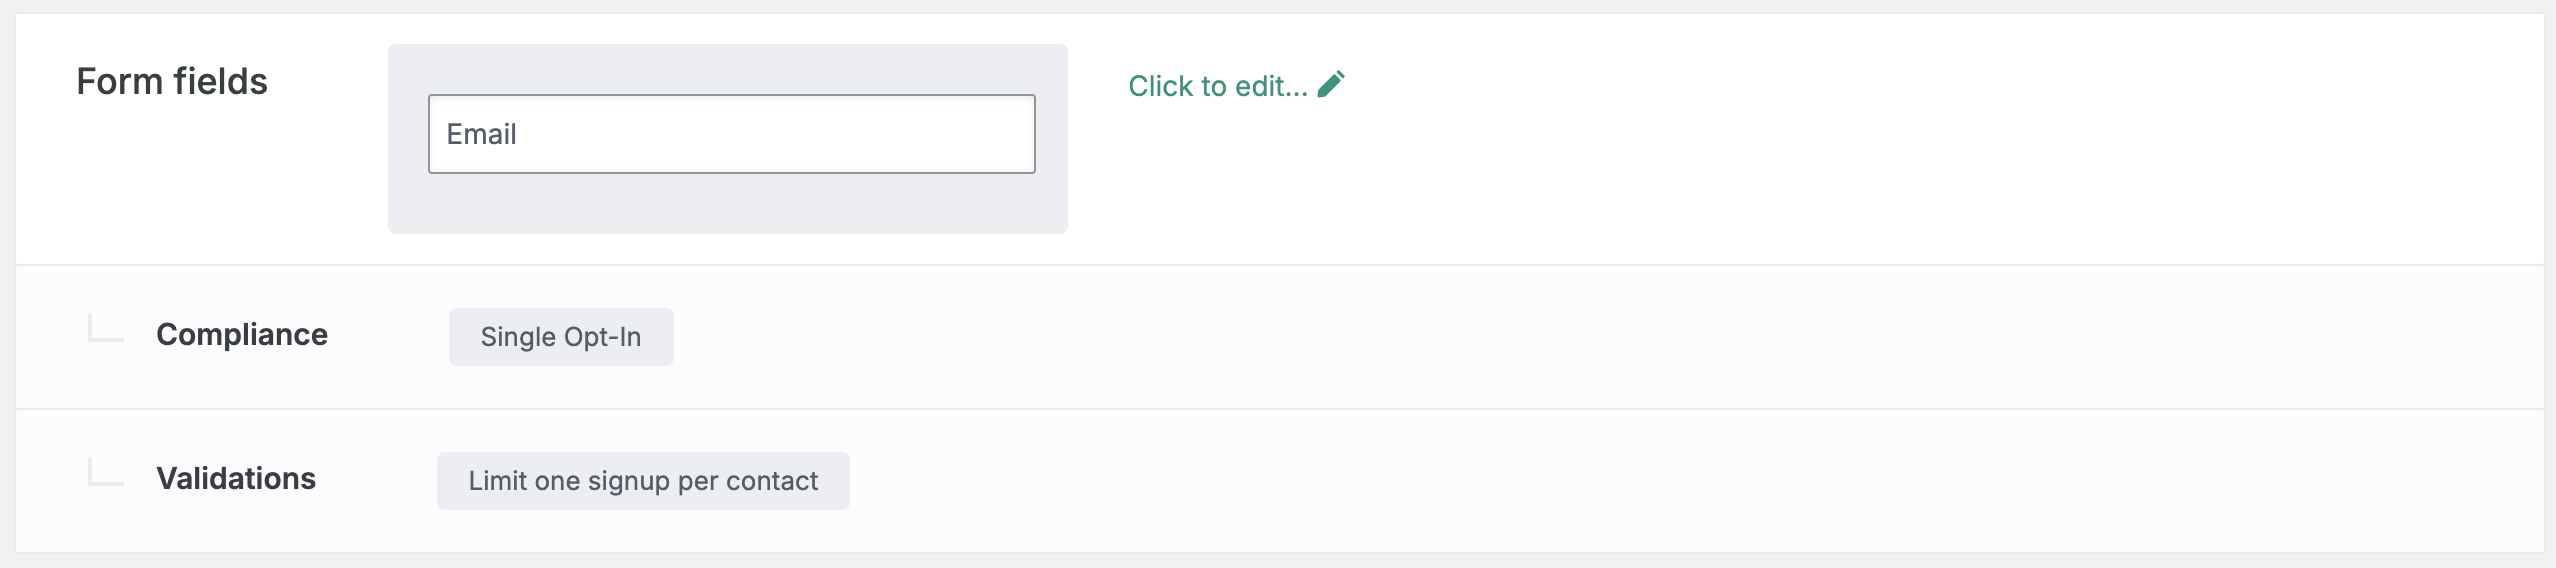
In the *Create* step of the Classic display builder, you can click to edit:
* **Form Fields:** what information you want to collect at sign up.
* **Compliance:** whether you want new sign ups to go through a Single Opt-In or Double Opt-In process.
* **Validations:** set any rules to restrict who may sign up for your display.
 * Click to **Add a display**.
* On the following screen, select **Banner** from the left side. Browse the templates and choose which one you’d like to start with. Press **Choose selected** in the upper right corner to open the designer.
## Customize your Banner
Now that you’ve selected a template to start from, it’s time to customize your display’s appearance.
### Add elements
To add a text box, click **+ Add new element** on the left.
### Edit existing elements
To edit existing elements, click directly on them in your display, or select them from the menu on the left. You can edit their settings, duplicate, or delete the element on the left.
Under your *Elements* on the left, you can also edit your banner's background color, and desktop and mobile tabs.
Once you’re happy with your design, press **Save & Close** in the upper right corner.
## Customize your Thank You Page
After saving your changes, you’ll be brought back to the *Create* step of your display builder. If you’re collecting sign ups with your Banner, you’ll want to customize its Thank You Page to confirm your contact’s sign up.
* Scroll down and click to edit your **Thank You Page Design**.
* If you’re offering a coupon code in exchange for a sign up, be sure to include the `{{ signup.coupon_code }}` merge tag on your Thank You Page.
## Edit your settings
### Attach a coupon
If you are offering a coupon code in exchange for a sign up, be sure to attach your coupon to your display:
* In your display’s *Create* step, scroll to edit the **Coupon** section and select the desired Coupon from the dropdown menu. **Save.**
### Targeting
To customize your Banner’s settings and audience targeting, navigate to the *Target* step of the builder:
* Click to **Add a display**.
* On the following screen, select **Banner** from the left side. Browse the templates and choose which one you’d like to start with. Press **Choose selected** in the upper right corner to open the designer.
## Customize your Banner
Now that you’ve selected a template to start from, it’s time to customize your display’s appearance.
### Add elements
To add a text box, click **+ Add new element** on the left.
### Edit existing elements
To edit existing elements, click directly on them in your display, or select them from the menu on the left. You can edit their settings, duplicate, or delete the element on the left.
Under your *Elements* on the left, you can also edit your banner's background color, and desktop and mobile tabs.
Once you’re happy with your design, press **Save & Close** in the upper right corner.
## Customize your Thank You Page
After saving your changes, you’ll be brought back to the *Create* step of your display builder. If you’re collecting sign ups with your Banner, you’ll want to customize its Thank You Page to confirm your contact’s sign up.
* Scroll down and click to edit your **Thank You Page Design**.
* If you’re offering a coupon code in exchange for a sign up, be sure to include the `{{ signup.coupon_code }}` merge tag on your Thank You Page.
## Edit your settings
### Attach a coupon
If you are offering a coupon code in exchange for a sign up, be sure to attach your coupon to your display:
* In your display’s *Create* step, scroll to edit the **Coupon** section and select the desired Coupon from the dropdown menu. **Save.**
### Targeting
To customize your Banner’s settings and audience targeting, navigate to the *Target* step of the builder:
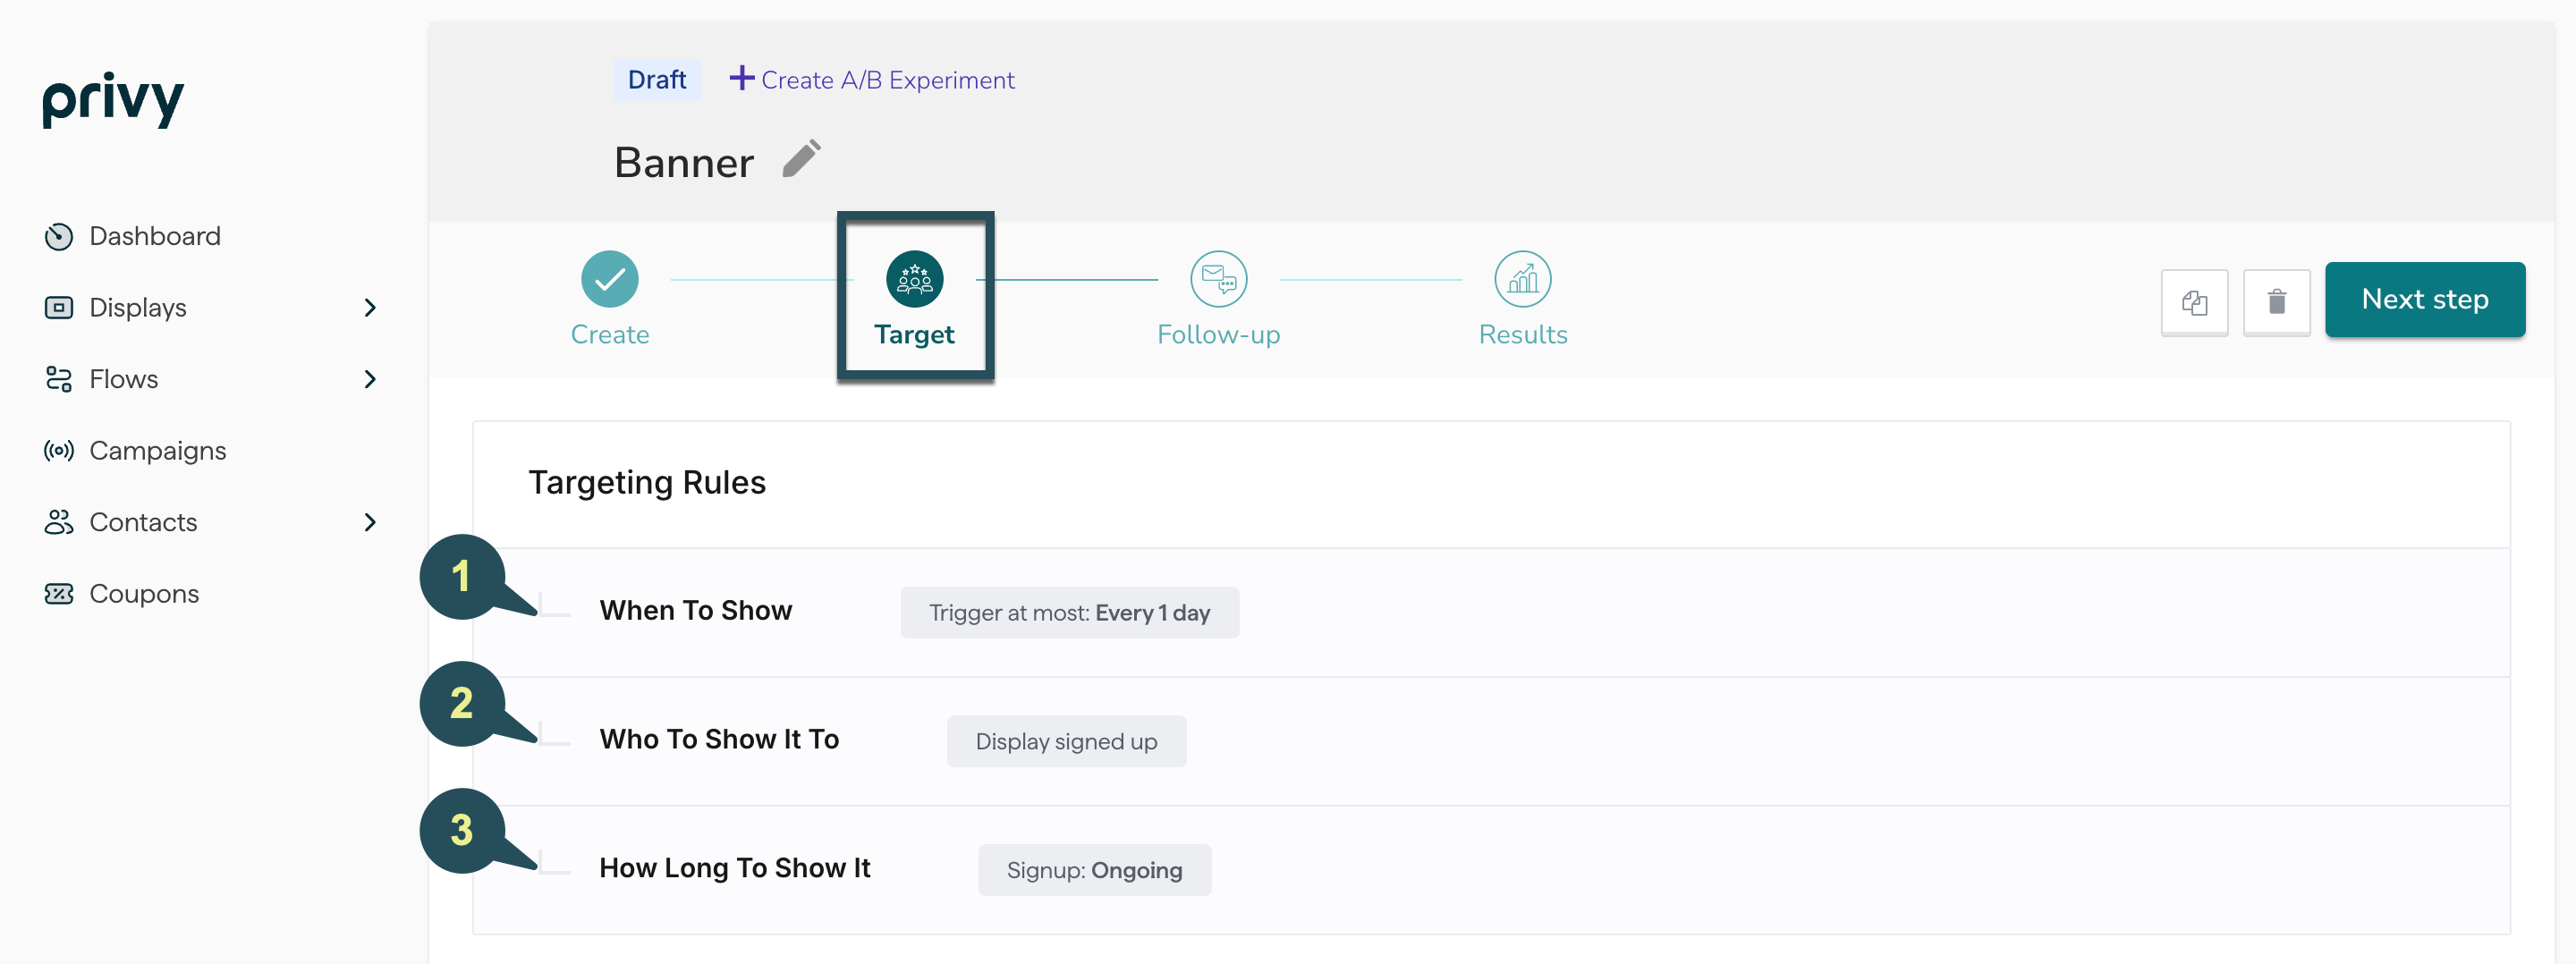 1. **When To Show It:** determine when and how your display triggers.
2. **Who To Show It To:** determine who is eligible to view your display.
3. **How Long To Show It:** specify whether this display should be Ongoing, or set to run on a fixed schedule.
## Edit your Follow-Up actions
Once you’ve finalized your settings and audience targeting, you’ll want to make sure that you’re properly following up with your new sign up. Head to the *Follow-Up* step of your builder.
1. **When To Show It:** determine when and how your display triggers.
2. **Who To Show It To:** determine who is eligible to view your display.
3. **How Long To Show It:** specify whether this display should be Ongoing, or set to run on a fixed schedule.
## Edit your Follow-Up actions
Once you’ve finalized your settings and audience targeting, you’ll want to make sure that you’re properly following up with your new sign up. Head to the *Follow-Up* step of your builder.
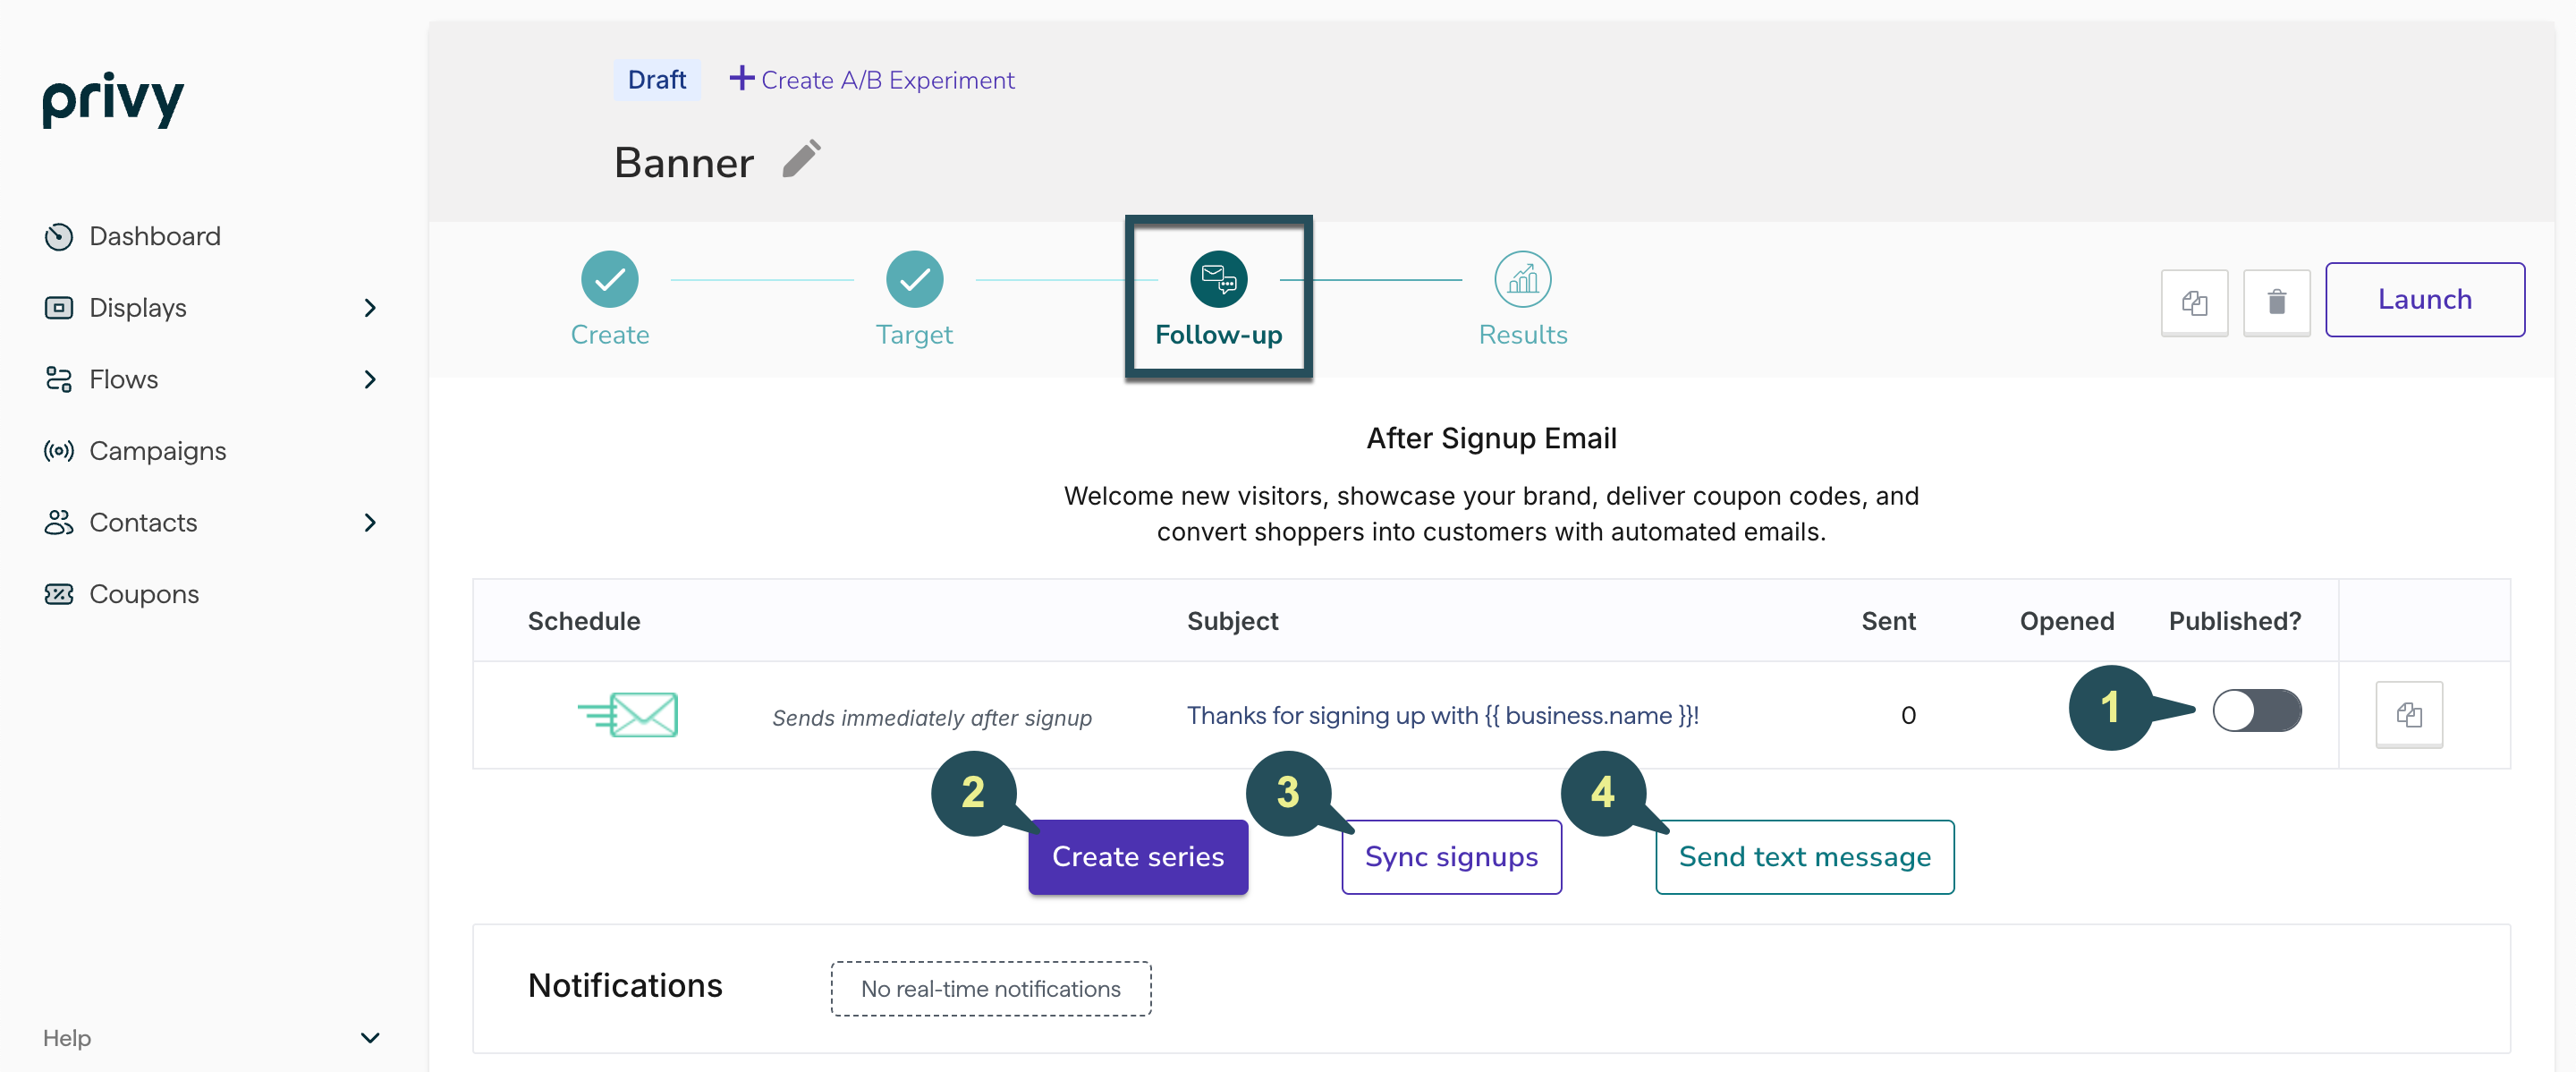 Click on your After Signup Email to view and edit your template, subject line, and sender info. [Learn more about our drag-and-drop email editor.](https://help.privy.com/docs/learn/email-campaigns/email-templates) Make sure that you **Publish** your email so that it sends to new sign ups.
If you want to create a series of more than one After Signup Email for this specific display, select this option.
If you're syncing new sign ups to a [Linked Account](https://help.privy.com/docs/learn/integrations/overview-integrations), be sure to add a sync rule here.
If you're on the Growth Plan and you're collecting SMS contacts with this display, you can create an After Signup Text to deliver to new contacts after they complete their Double Opt-In.
Enable or disable real-time notifications for your users. These notifications will alert the user of new display signups immediately. **Save**.
## Launch your Banner
Once you’ve finalized your design, targeting, and follow-up actions, select the **Publish** button at the upper right of the *Follow-Up* step and confirm your decision in the prompt.
Click on your After Signup Email to view and edit your template, subject line, and sender info. [Learn more about our drag-and-drop email editor.](https://help.privy.com/docs/learn/email-campaigns/email-templates) Make sure that you **Publish** your email so that it sends to new sign ups.
If you want to create a series of more than one After Signup Email for this specific display, select this option.
If you're syncing new sign ups to a [Linked Account](https://help.privy.com/docs/learn/integrations/overview-integrations), be sure to add a sync rule here.
If you're on the Growth Plan and you're collecting SMS contacts with this display, you can create an After Signup Text to deliver to new contacts after they complete their Double Opt-In.
Enable or disable real-time notifications for your users. These notifications will alert the user of new display signups immediately. **Save**.
## Launch your Banner
Once you’ve finalized your design, targeting, and follow-up actions, select the **Publish** button at the upper right of the *Follow-Up* step and confirm your decision in the prompt.
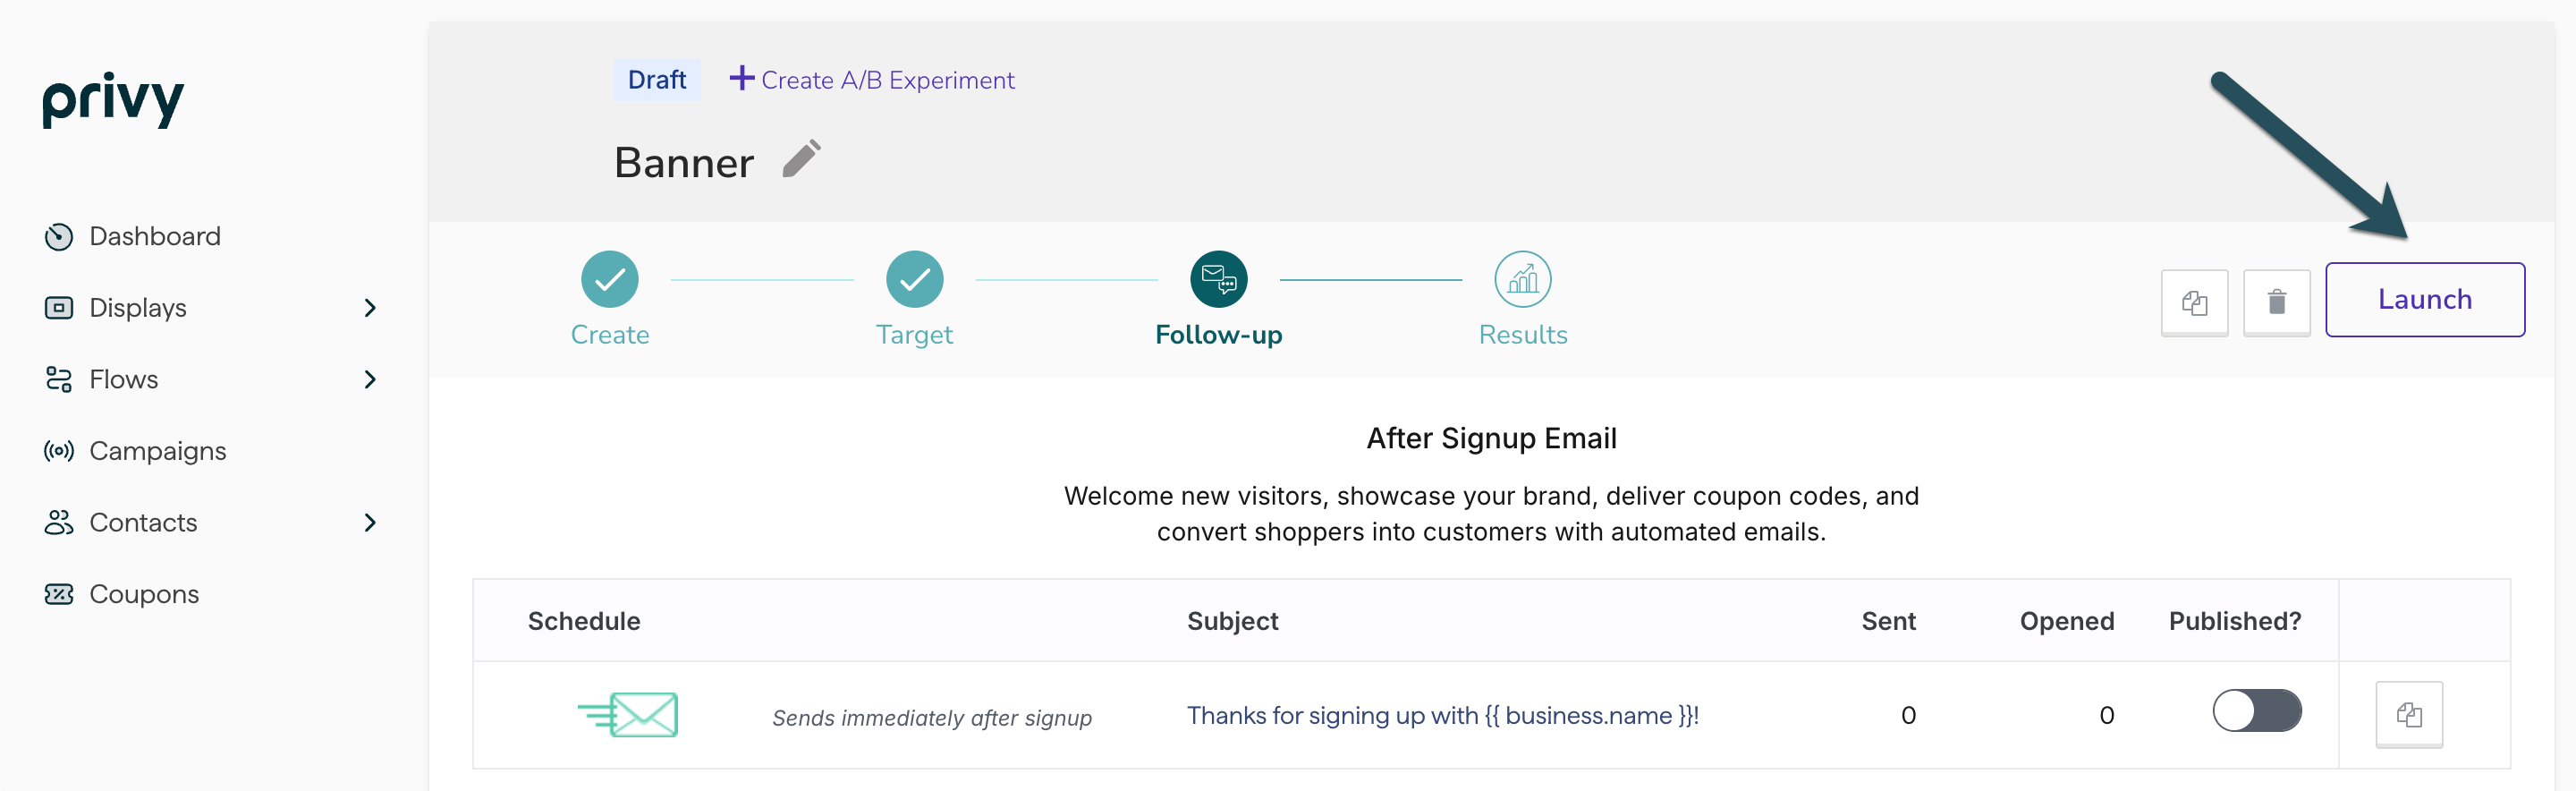 Your Banner is now live on your site! [You can review its reporting at any time.](https://help.privy.com/docs/learn/displays/reporting-overview)