> ## Documentation Index
> Fetch the complete documentation index at: https://help.privy.com/llms.txt
> Use this file to discover all available pages before exploring further.
# Create a Spin To Win Display
> Gamify your sign up experience with this display — everyone wins!
A Spin To Win display encourages site visitors to sign up for a chance to win from several potential prizes via an interactive wheel. Visitors love it because it's a fun, engaging way to get a discount, and you'll love it because it's fully customizable and converts at a high rate.
## Create a new Spin To Win
To create a new Spin To Win:
* Navigate to Displays.
* Click **Create new display**. This will open our Templates page.
* Our Spin To Win needs to be built using our Classic display builder, so navigate to this builder by selecting the **Get started** option in the lower left corner of your screen.
* Name your display in the following prompt, specify whether you want to collect email, phone, or both, and select **Create display**.
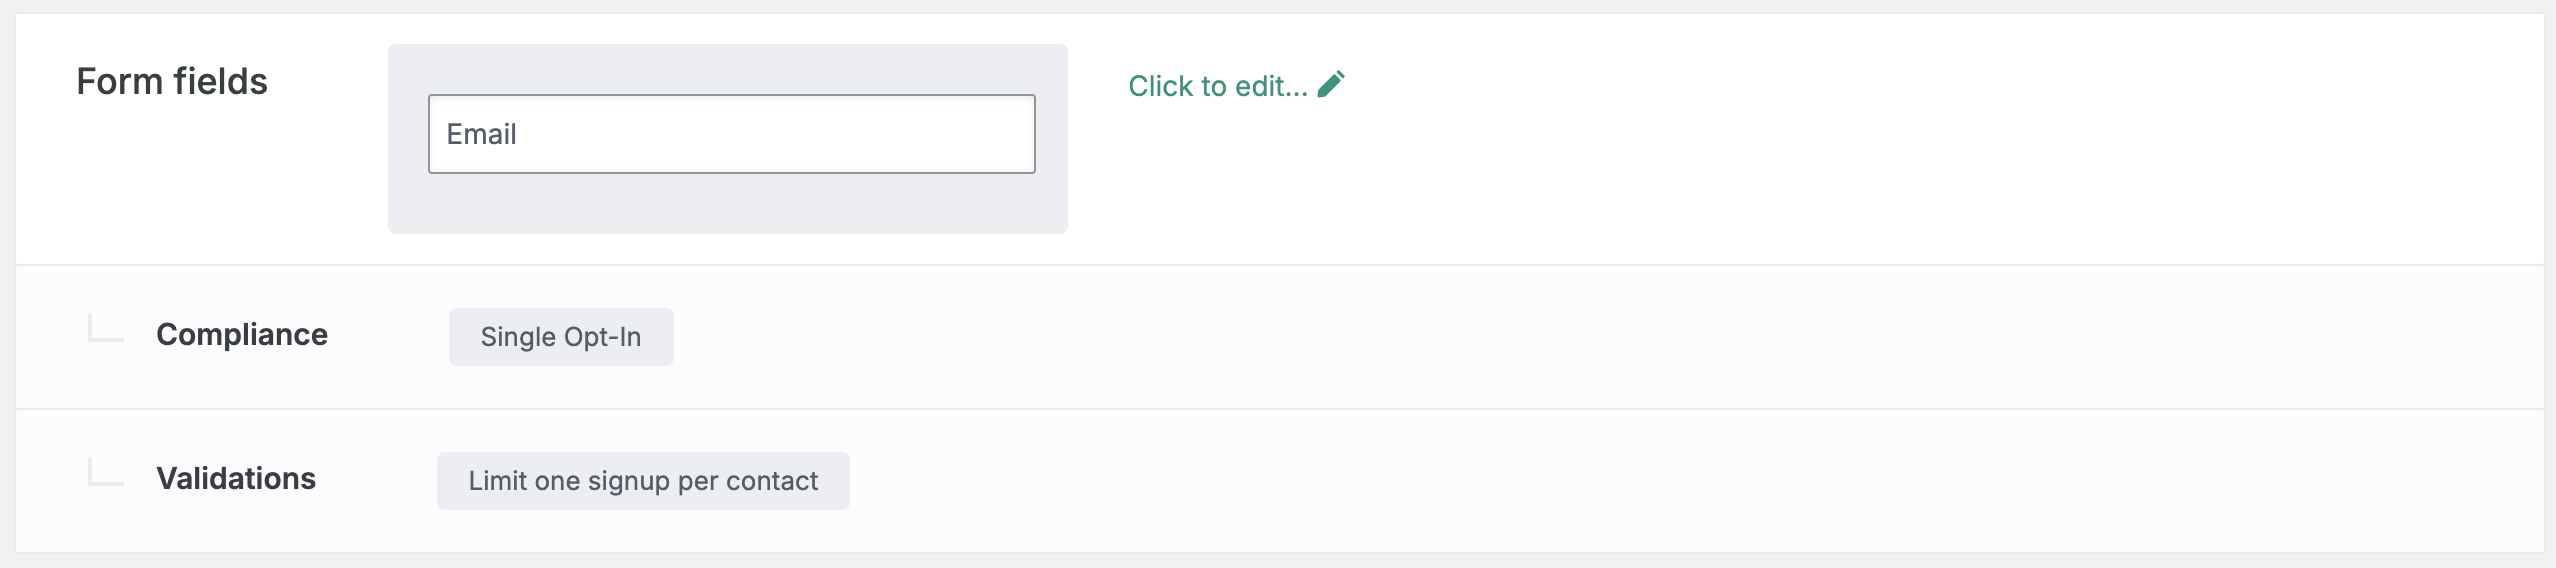
* In the *Create* step of the Classic display builder, you can click to edit:
* **Form Fields:** what information you want to collect at sign up.
* **Compliance:** whether you want new sign ups to go through a Single Opt-In or Double Opt-In process.
* **Validations:** set any rules to restrict who may sign up for your display.
 * Click to **Add a display** at the bottom of the page.
* On the following screen, select **Spin To Win** from the left side. Browse the templates and choose which one you'd like to start with. Press **Choose selected** in the upper right corner to open the designer.
## Customize your Spin To Win
Now that you've selected a template to start from, it's time to customize your display's appearance:
### Add new elements
To add a new text box or image, click **+ Add new element** on the left.
### Edit existing elements
To edit existing elements, click directly on them in your display. You can edit their settings, duplicate, or delete the element on the left.
Under your *Elements* on the left, you can drag your elements to reorder them and edit your display's background, wheel, and desktop and mobile tabs.
## Edit your wheel
In the display editor, select **Wheel** under your *Elements* to customize your wheel's colors, text, and coupon settings.
Select **Configure slices** to edit each slice of your Spin To Win's wheel:
* Click to **Add a display** at the bottom of the page.
* On the following screen, select **Spin To Win** from the left side. Browse the templates and choose which one you'd like to start with. Press **Choose selected** in the upper right corner to open the designer.
## Customize your Spin To Win
Now that you've selected a template to start from, it's time to customize your display's appearance:
### Add new elements
To add a new text box or image, click **+ Add new element** on the left.
### Edit existing elements
To edit existing elements, click directly on them in your display. You can edit their settings, duplicate, or delete the element on the left.
Under your *Elements* on the left, you can drag your elements to reorder them and edit your display's background, wheel, and desktop and mobile tabs.
## Edit your wheel
In the display editor, select **Wheel** under your *Elements* to customize your wheel's colors, text, and coupon settings.
Select **Configure slices** to edit each slice of your Spin To Win's wheel:
 1. **Label:** this is the text that appears on the wheel itself. You can edit both winning and losing slices.
2. **Coupon:** the coupon that is revealed when a sign up lands on this slice.
3. **Win Ratio:** the likelihood of landing on a slice.
4. **Win Text:** the text displayed after landing on this slice. This should specify which prize is associated with the coupon that the sign up won.
### Attach your Coupon Codes
One of the most important parts of creating your Spin To Win is attaching your Coupon Codes to your wheel. You can choose between manually entering **Custom** coupon codes, or attaching **Saved** coupons that have [already been created in your Privy account](https://help.privy.com/docs/learn/content/coupon-codes).
Custom coupons must be Master codes and must be created in your e-commerce platform in order to be valid in your store. You need to manually enter the Master code in each wheel slice. Custom coupons are only recommended to stores where Saved coupons are not a viable option.
To attach a Saved coupon:
* Select **Configure slices** and choose **Saved coupon** from the dropdown under *Coupon*.
* Choose the desired coupon from the following dropdown menu.
* Repeat for each of your slices. Make sure your Label and Win Text match the coupon you've chosen.
* Scroll and click **OK** to save your wheel.
Once you're happy with your Spin To Win's appearance and your wheel's configuration, click **Save & Close** in the upper right corner of the editor.
## Customize your Thank You Page
After saving your changes, you'll be brought back to the *Create* step of your display builder. You'll want to customize your display's Thank You Page to deliver the Win Text and Coupon to your new signup.
* Scroll down and click to edit your **Thank You Page Design**.
* Copy the below merge tags to automatically display your sign up's prize and coupon code:
| Content | Merge Tag |
| ----------- | --------------------------- |
| Coupon Code | \{\{ signup.coupon\_code }} |
| Win Text | \{\{ signup.win\_text }} |
* Once you've made your changes, click **Save & Close** in the upper right corner.
## Edit your settings
To customize your Spin To Win's settings and audience targeting, navigate to the *Target* step of the builder:
1. **Label:** this is the text that appears on the wheel itself. You can edit both winning and losing slices.
2. **Coupon:** the coupon that is revealed when a sign up lands on this slice.
3. **Win Ratio:** the likelihood of landing on a slice.
4. **Win Text:** the text displayed after landing on this slice. This should specify which prize is associated with the coupon that the sign up won.
### Attach your Coupon Codes
One of the most important parts of creating your Spin To Win is attaching your Coupon Codes to your wheel. You can choose between manually entering **Custom** coupon codes, or attaching **Saved** coupons that have [already been created in your Privy account](https://help.privy.com/docs/learn/content/coupon-codes).
Custom coupons must be Master codes and must be created in your e-commerce platform in order to be valid in your store. You need to manually enter the Master code in each wheel slice. Custom coupons are only recommended to stores where Saved coupons are not a viable option.
To attach a Saved coupon:
* Select **Configure slices** and choose **Saved coupon** from the dropdown under *Coupon*.
* Choose the desired coupon from the following dropdown menu.
* Repeat for each of your slices. Make sure your Label and Win Text match the coupon you've chosen.
* Scroll and click **OK** to save your wheel.
Once you're happy with your Spin To Win's appearance and your wheel's configuration, click **Save & Close** in the upper right corner of the editor.
## Customize your Thank You Page
After saving your changes, you'll be brought back to the *Create* step of your display builder. You'll want to customize your display's Thank You Page to deliver the Win Text and Coupon to your new signup.
* Scroll down and click to edit your **Thank You Page Design**.
* Copy the below merge tags to automatically display your sign up's prize and coupon code:
| Content | Merge Tag |
| ----------- | --------------------------- |
| Coupon Code | \{\{ signup.coupon\_code }} |
| Win Text | \{\{ signup.win\_text }} |
* Once you've made your changes, click **Save & Close** in the upper right corner.
## Edit your settings
To customize your Spin To Win's settings and audience targeting, navigate to the *Target* step of the builder:
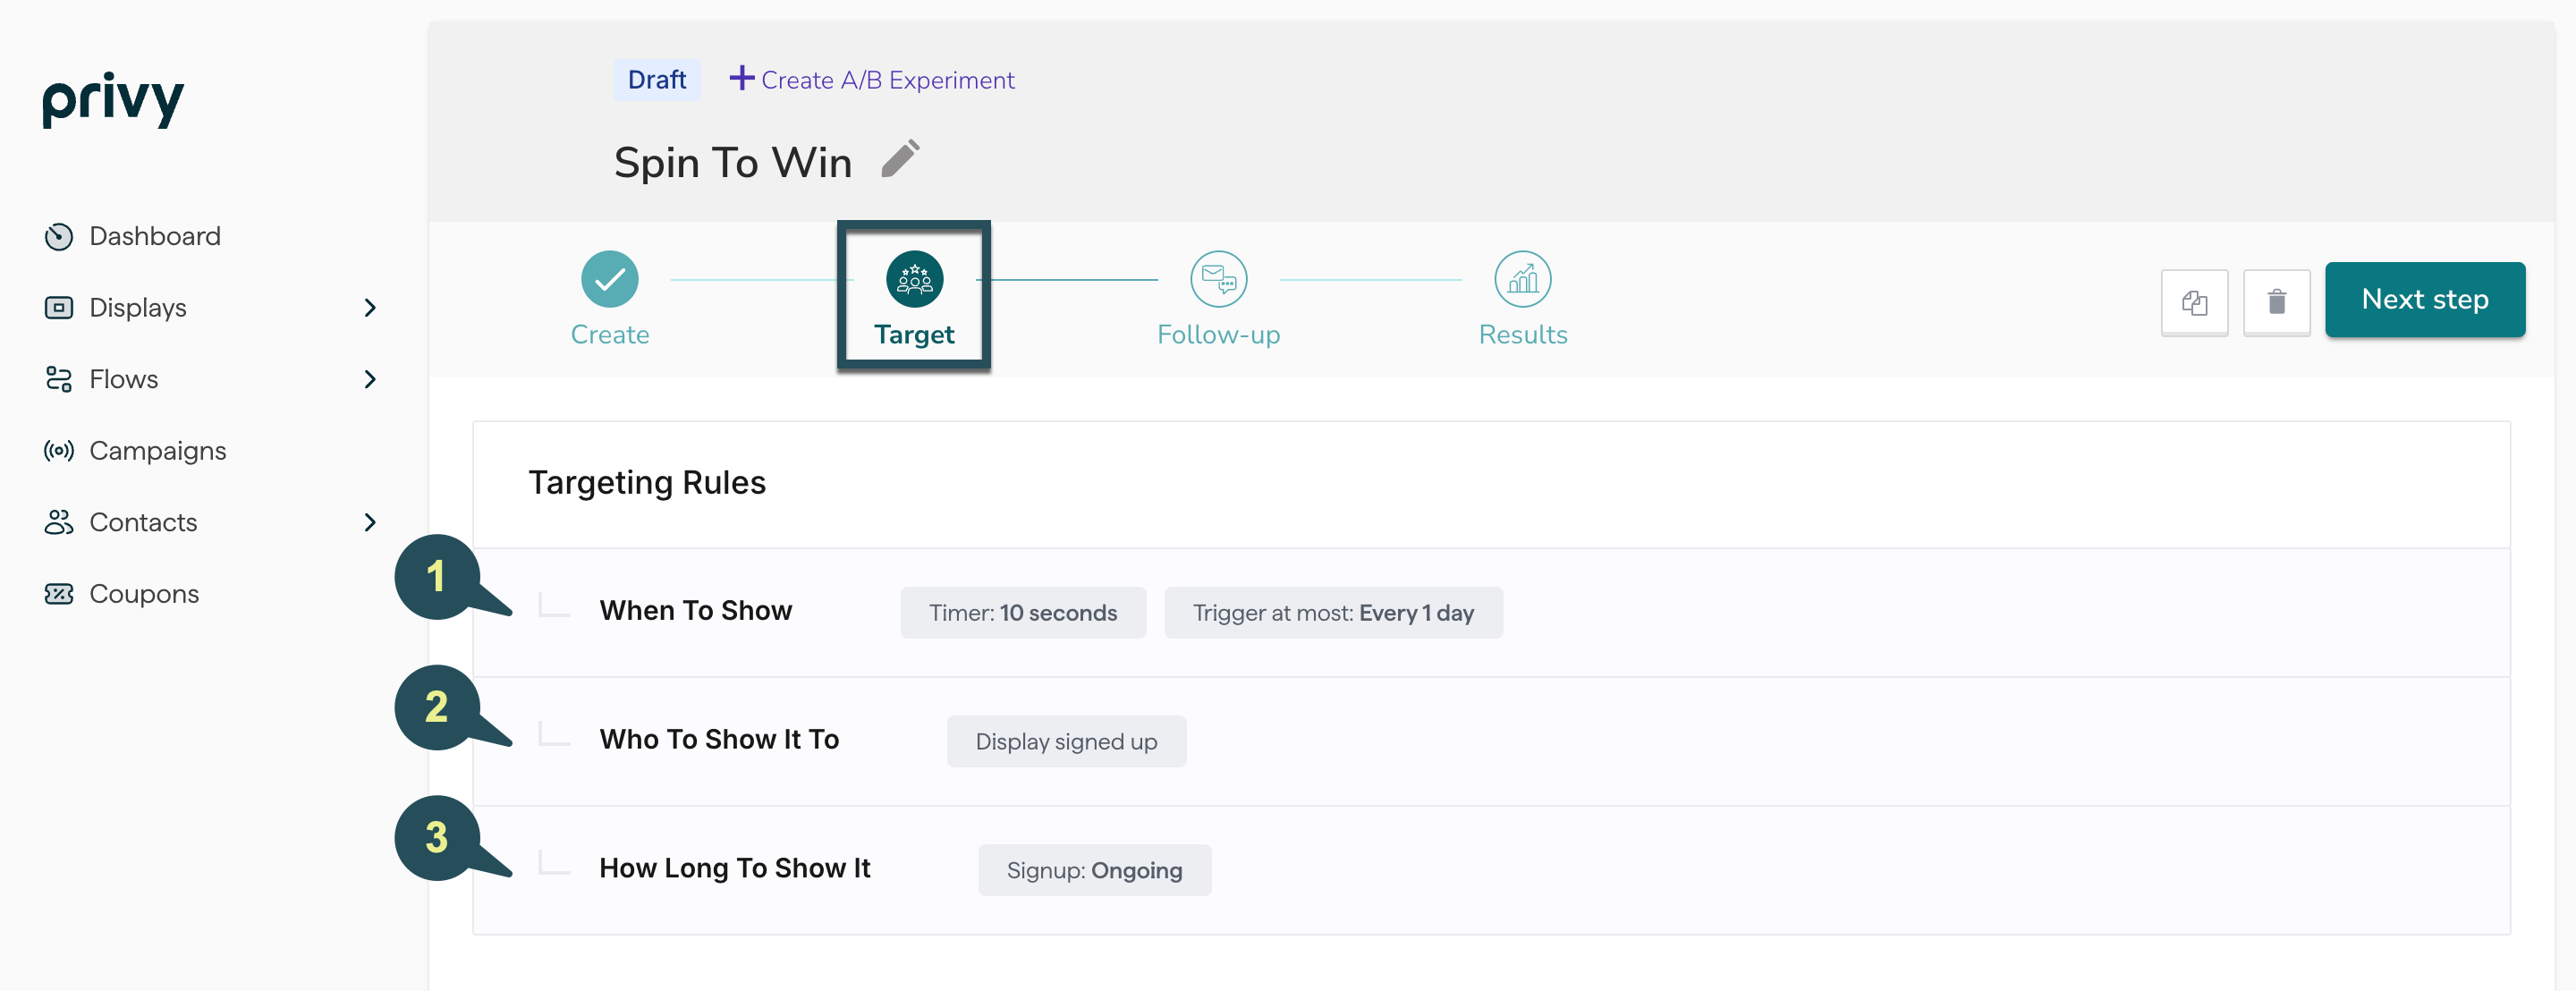 1. **When To Show It:** determine when and how your display triggers.
2. **Who To Show It To:** determine who is eligible to view your display.
3. **How Long To Show It:** specify whether this display should be Ongoing, or set to run on a fixed schedule.
[Learn more about Privy's audience targeting.](https://help.privy.com/docs/learn/displays/settings-overview#basic-settings)
## Edit your Follow-Up actions
Once you've finalized your settings and audience targeting, you'll want to make sure that you're properly following up with your new sign up. Head to the *Follow-Up* step of your builder.
1. **When To Show It:** determine when and how your display triggers.
2. **Who To Show It To:** determine who is eligible to view your display.
3. **How Long To Show It:** specify whether this display should be Ongoing, or set to run on a fixed schedule.
[Learn more about Privy's audience targeting.](https://help.privy.com/docs/learn/displays/settings-overview#basic-settings)
## Edit your Follow-Up actions
Once you've finalized your settings and audience targeting, you'll want to make sure that you're properly following up with your new sign up. Head to the *Follow-Up* step of your builder.
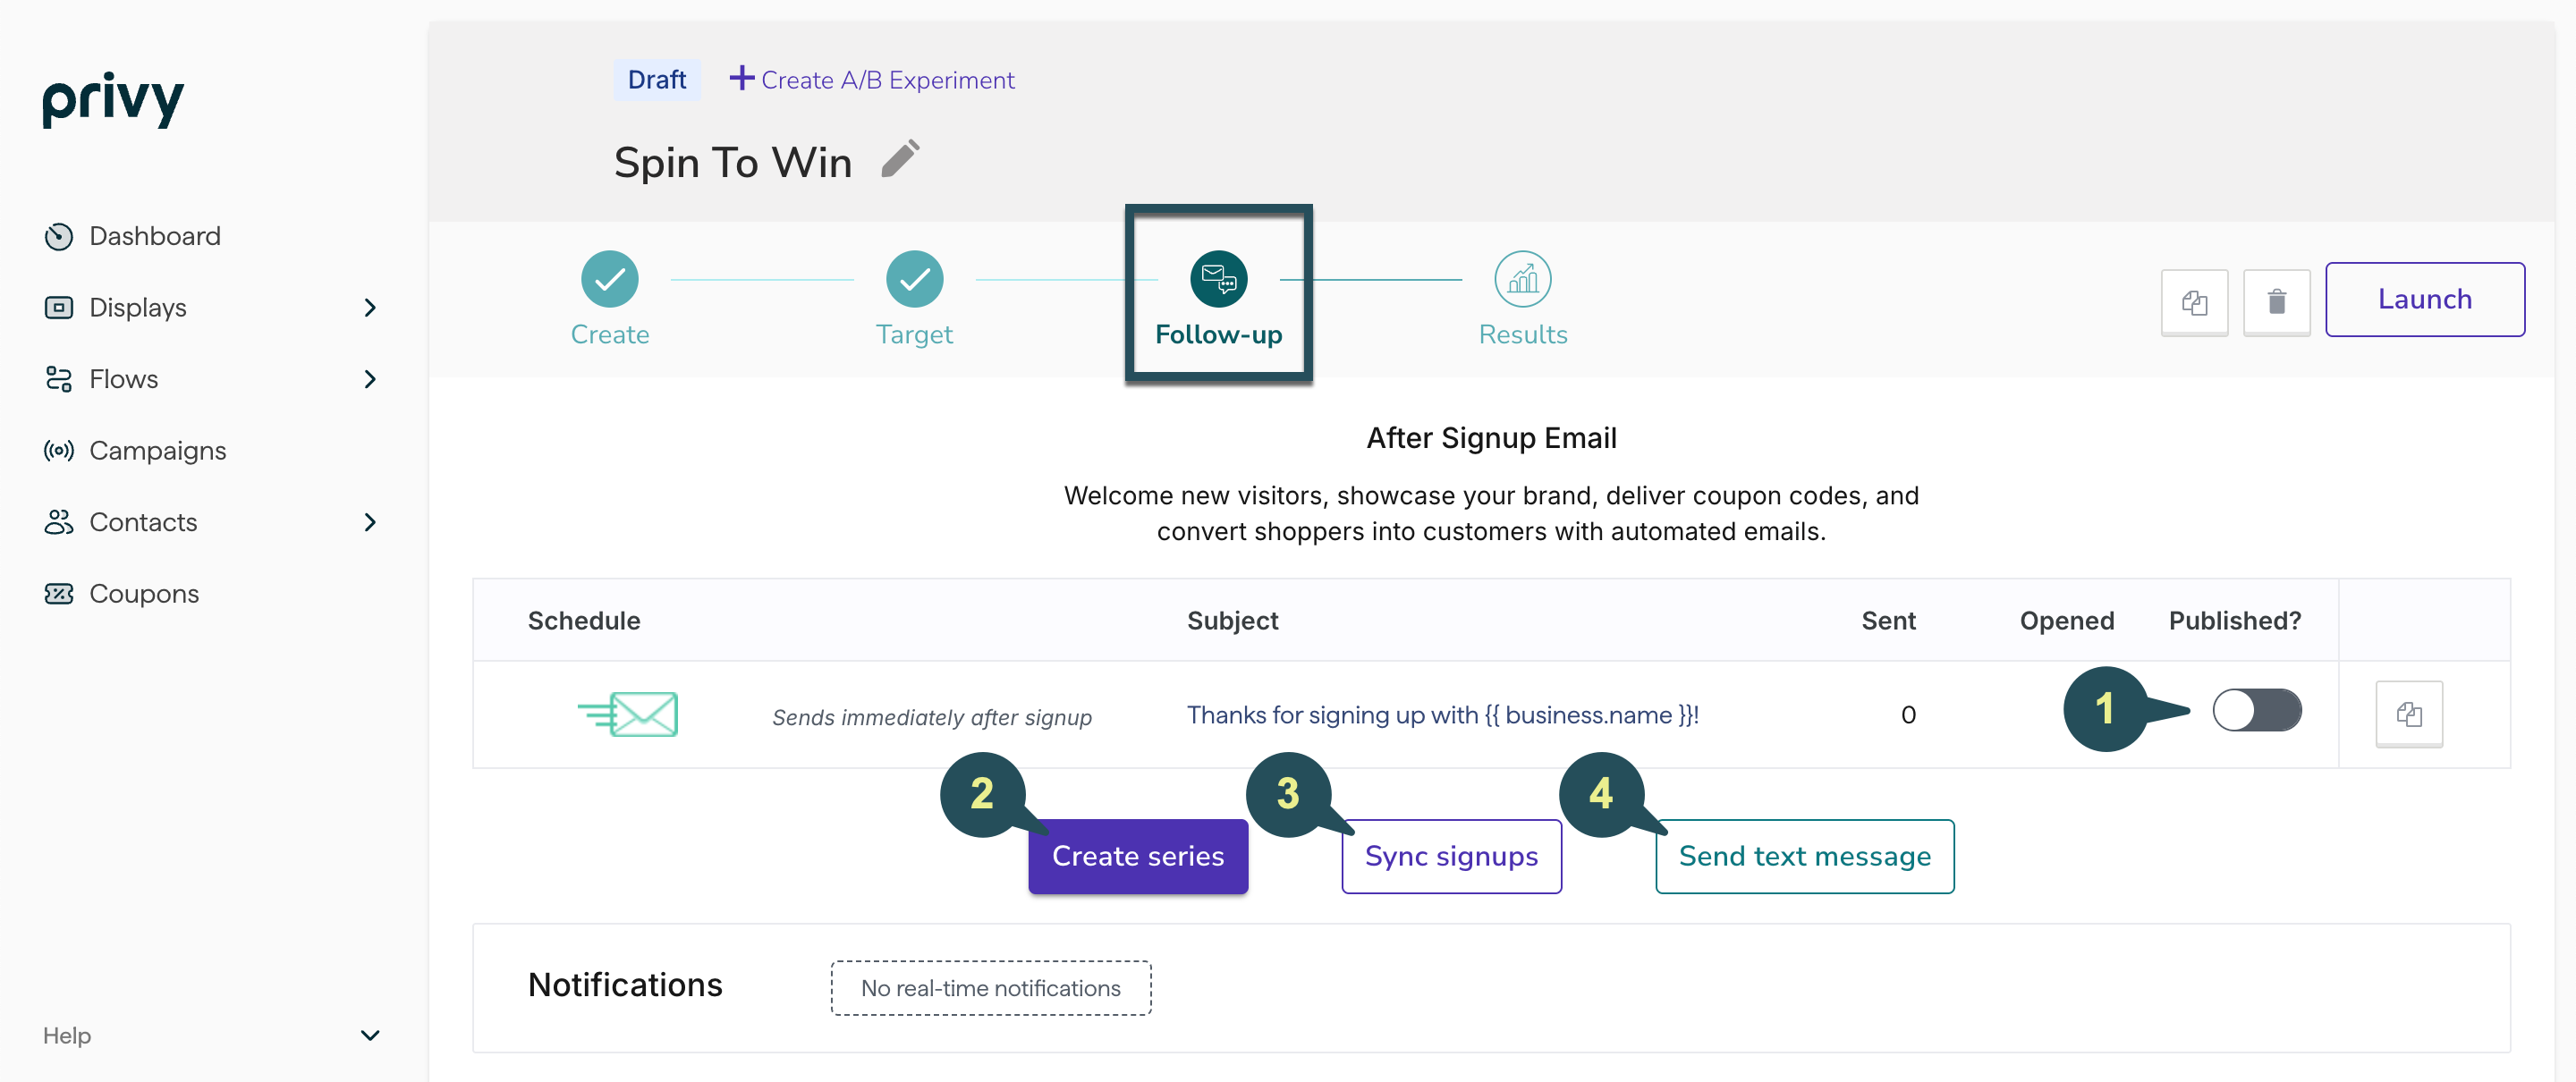 Click on your After Signup Email to view and edit your template, subject line, and sender info. [Learn more about our drag-and-drop email editor.](https://help.privy.com/docs/learn/email-campaigns/email-templates) Make sure that you **Publish** your email so that it sends to new sign ups.
If you want to create a series of more than one After Signup Email for this specific display, select this option.
If you're syncing new sign ups to a [Linked Account](https://help.privy.com/docs/learn/integrations/overview-integrations), be sure to add a sync rule here.
If you're on the Growth Plan and you're collecting SMS contacts with this display, you can create an After Signup Text to deliver to new contacts after they complete their Double Opt-In.
Enable or disable real-time notifications for your users. These notifications will alert the user of new display signups immediately. **Save**.
## Launch your Spin To Win
Once you've finalized your design, targeting, and follow-up actions, select the **Publish** button at the upper right of the *Follow-Up* step and confirm your decision in the prompt.
Click on your After Signup Email to view and edit your template, subject line, and sender info. [Learn more about our drag-and-drop email editor.](https://help.privy.com/docs/learn/email-campaigns/email-templates) Make sure that you **Publish** your email so that it sends to new sign ups.
If you want to create a series of more than one After Signup Email for this specific display, select this option.
If you're syncing new sign ups to a [Linked Account](https://help.privy.com/docs/learn/integrations/overview-integrations), be sure to add a sync rule here.
If you're on the Growth Plan and you're collecting SMS contacts with this display, you can create an After Signup Text to deliver to new contacts after they complete their Double Opt-In.
Enable or disable real-time notifications for your users. These notifications will alert the user of new display signups immediately. **Save**.
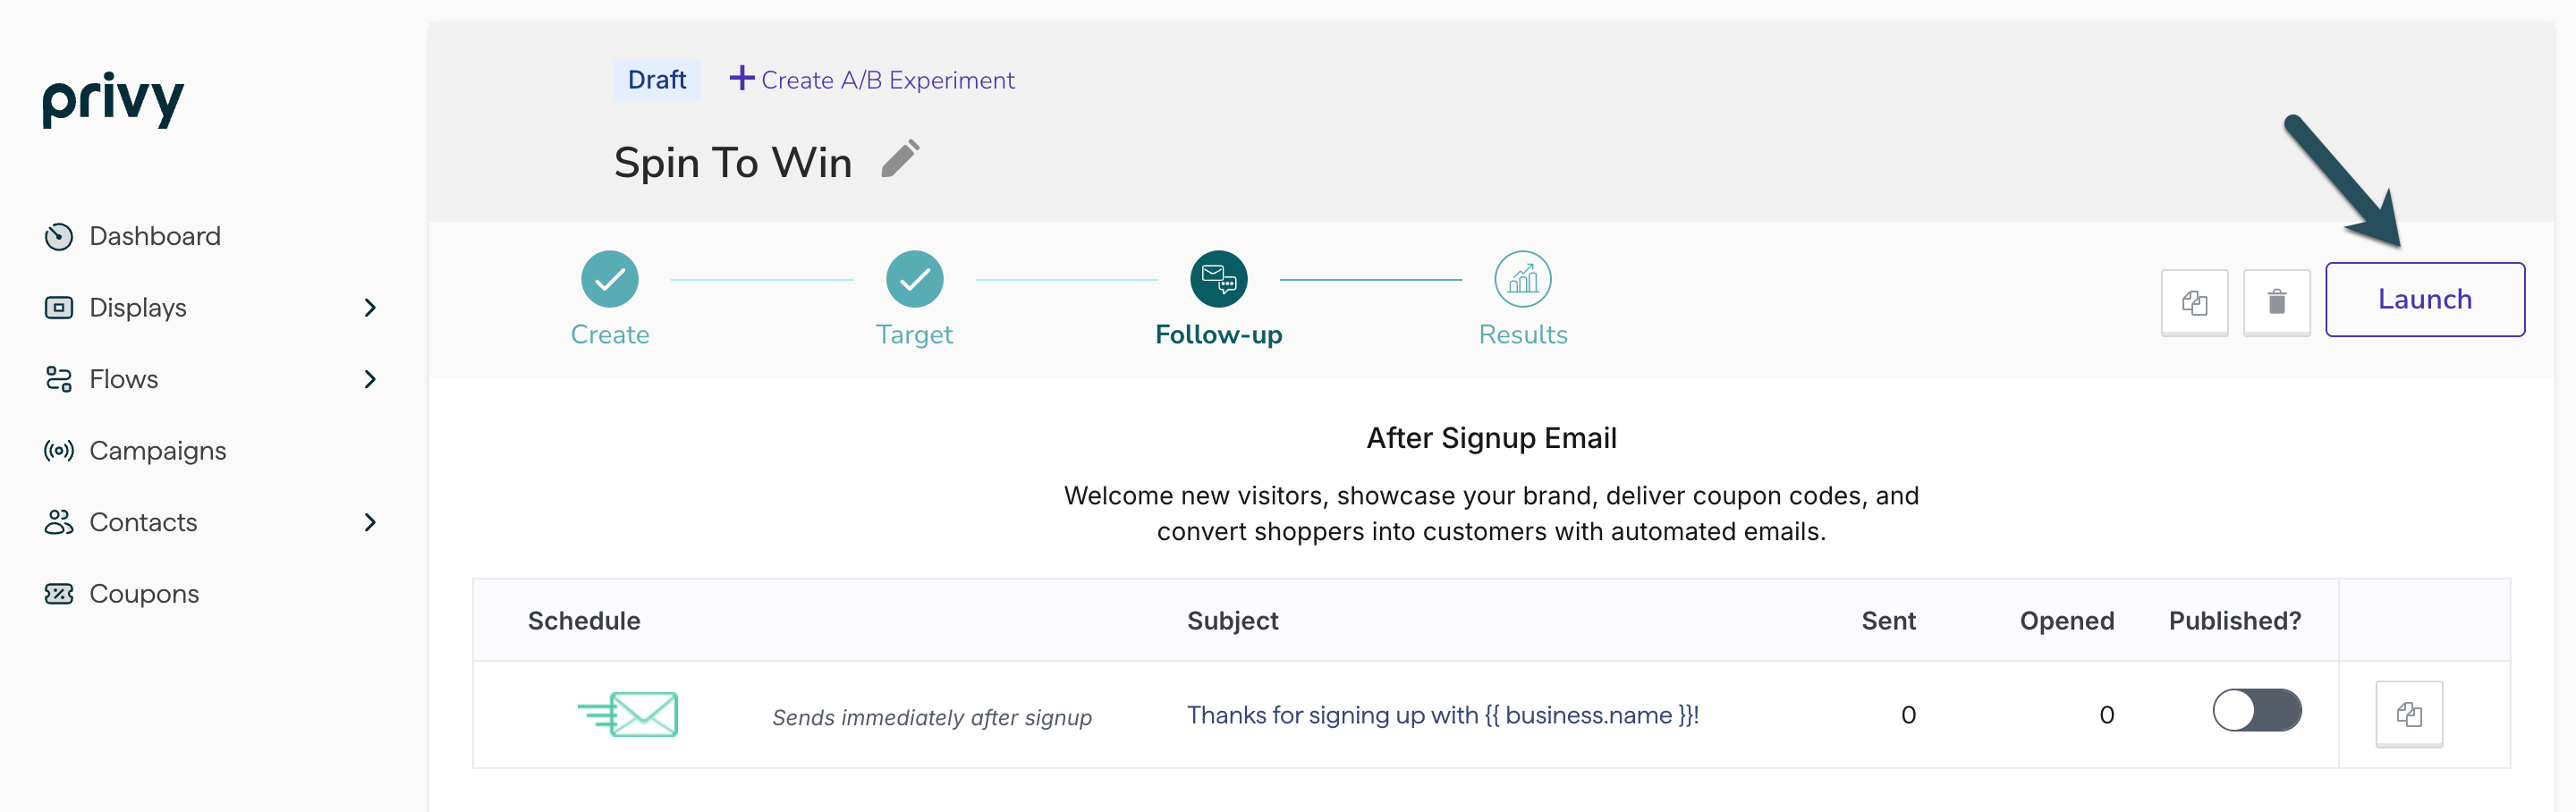
## Launch your Spin To Win
Once you've finalized your design, targeting, and follow-up actions, select the **Publish** button at the upper right of the *Follow-Up* step and confirm your decision in the prompt.
 Your Spin To Win is now live! [You can review its reporting at any time.](https://help.privy.com/docs/learn/displays/reporting-overview)