> ## Documentation Index
> Fetch the complete documentation index at: https://help.privy.com/llms.txt
> Use this file to discover all available pages before exploring further.
# Install Privy with Google Tag Manager
> Install and manage your Privy code through Google.
For users who don't want to install the Privy Code manually or via a supported e-commerce platform, there is a way to install Privy by adding the code to Google Tag Manager (GTM). Utilizing a GTM container allows for the Privy code to be managed through Google and can make adding or removing Privy from multiple sites easier.
## Considerations
Before you begin, please review the guidelines below. Using Google Tag Manager to install and manage your Privy code will result in the loss of some functionality.
* If you've already installed Privy manually or through an integration, you should not also install Privy through Google Tag Manager. These methods are considered mutually exclusive.
* If you install Privy through GTM, the following functionality will be lost within Privy versus installing through your e-commerce platform.
* Google Analytics tracking for view and signup events will not function.
* Abandoned Cart and Purchase Follow-Up emails will not work with Privy installed via GTM.
* Display Revenue will not be detected and displayed on your dashboard.
* Cart Value, Product/Variant ID, and Order Count targeting for Convert displays and newsletter emails will not work.
## Copy the code
To manually install your code, you first need to copy it from your Privy account's settings:
* Navigate to the [Privy Code](https://dashboard.privy.com/settings/widget) page in your account's Settings.
* Locate and select the **Default** or **Asynchronous** tab to reveal its details. The default code is the preferred method to install Privy and will allow it to load in line with everything else on your site. Meanwhile, the asynchronous code will load Privy last.
* Copy the selected code.
## Install the code via Google Tag Manager
To install your Privy code with Google Tag Manager:
* In a new browser tab or window, log in to your [Google Tag Manager](https://marketingplatform.google.com/about/tag-manager/) account.
* Ensure you are in the proper *Workspace*.
* In the left sidebar menu, navigate to **Tags** and click **New**.
* Name your tag by replacing the **Untitled Tag** at the top left of the pane.
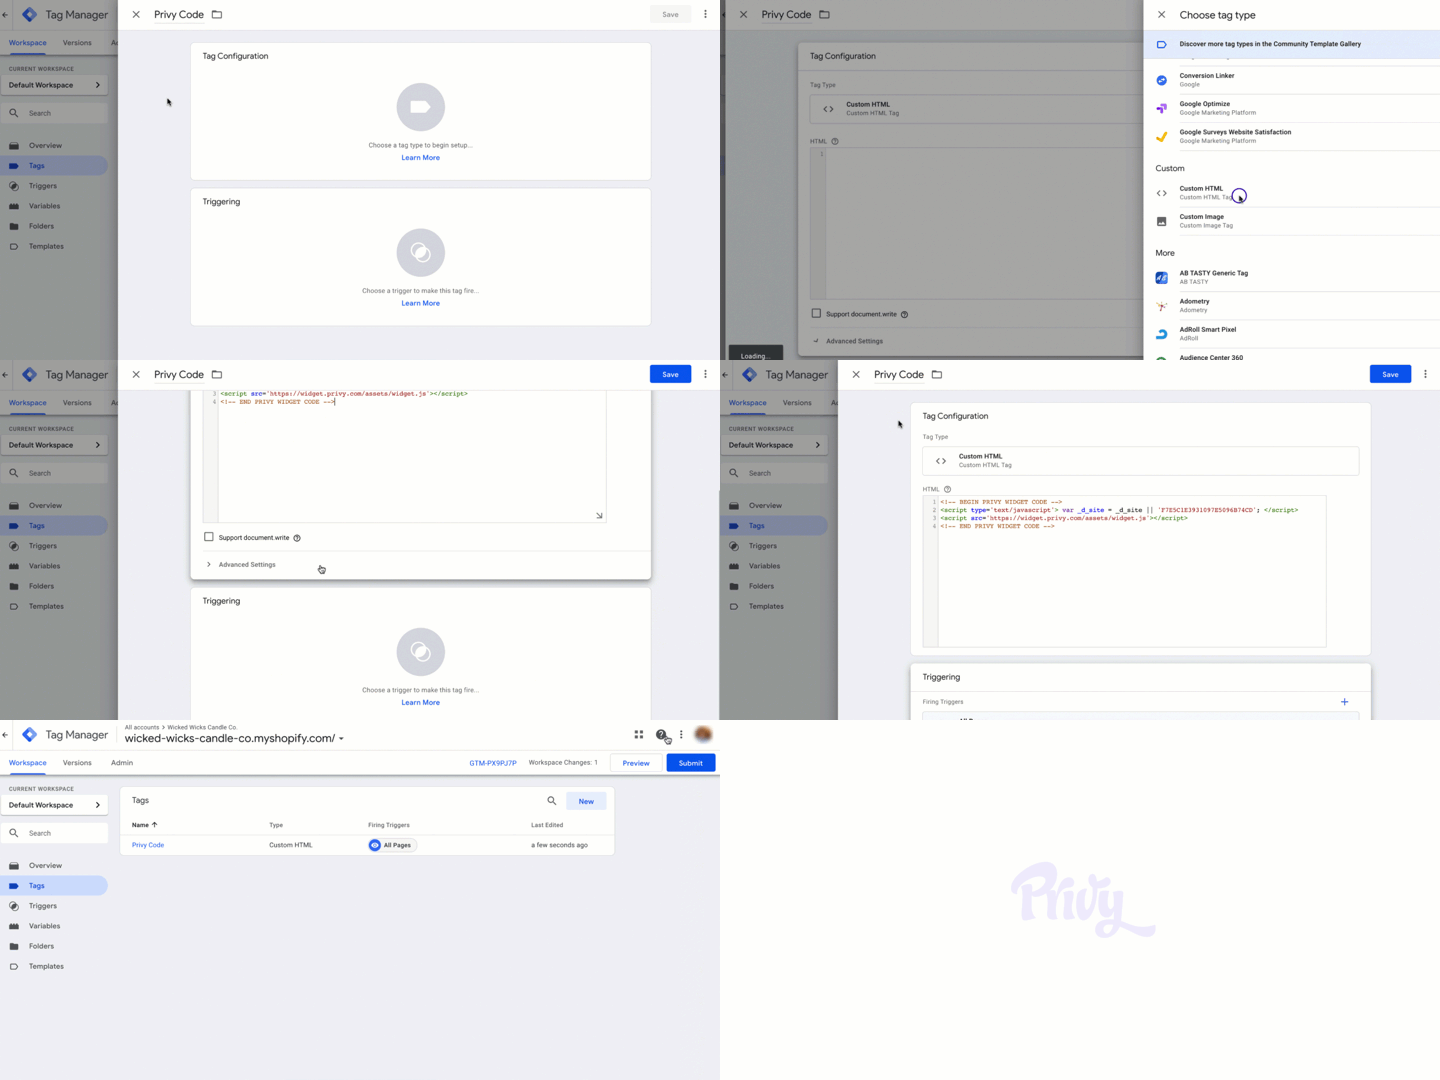
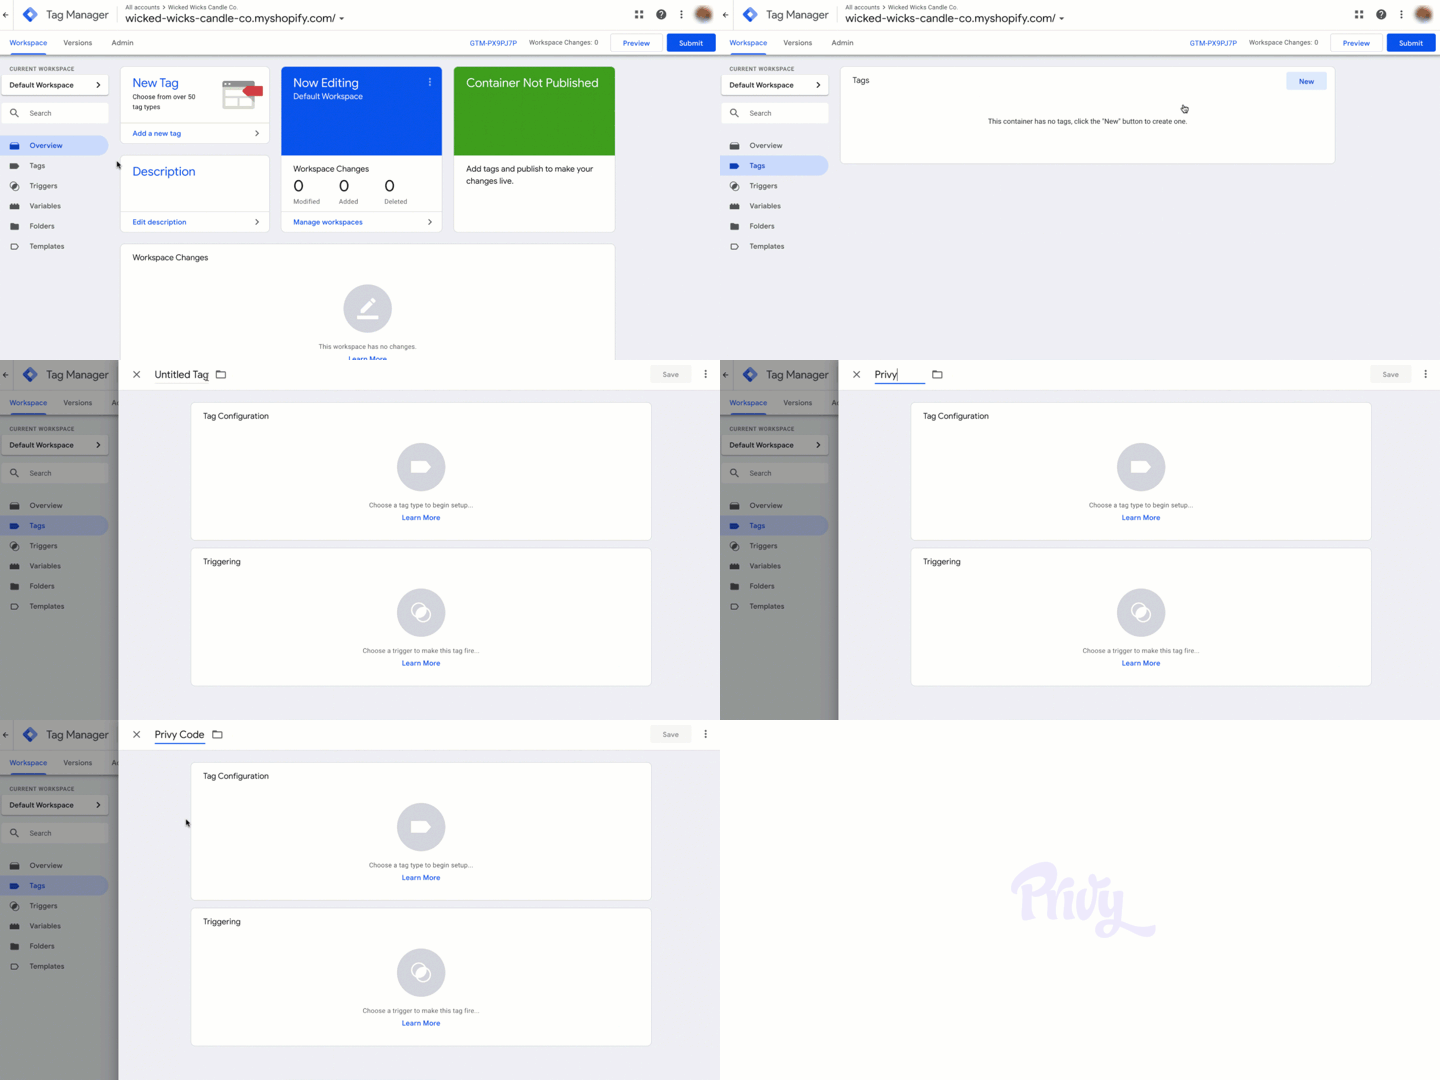 * Select the **Tag Configuration** area and choose **Custom HTML** for the Tag type.
* Paste the Privy code that you retrieved earlier into the *HTML* field.
* Below the *Tag Configuration* area, click **Triggering** to set up a firing rule. If you don't set up a firing rule, the tag will not fire, Privy Convert displays will not function, and Privy Analytics will not be collected.
* Select the **All Pages** (Page view) option for your trigger.
* Click **Save** to save your new tag.
* In the upper right, click **Submit** to save your new tag and trigger.
* Select the **Tag Configuration** area and choose **Custom HTML** for the Tag type.
* Paste the Privy code that you retrieved earlier into the *HTML* field.
* Below the *Tag Configuration* area, click **Triggering** to set up a firing rule. If you don't set up a firing rule, the tag will not fire, Privy Convert displays will not function, and Privy Analytics will not be collected.
* Select the **All Pages** (Page view) option for your trigger.
* Click **Save** to save your new tag.
* In the upper right, click **Submit** to save your new tag and trigger.
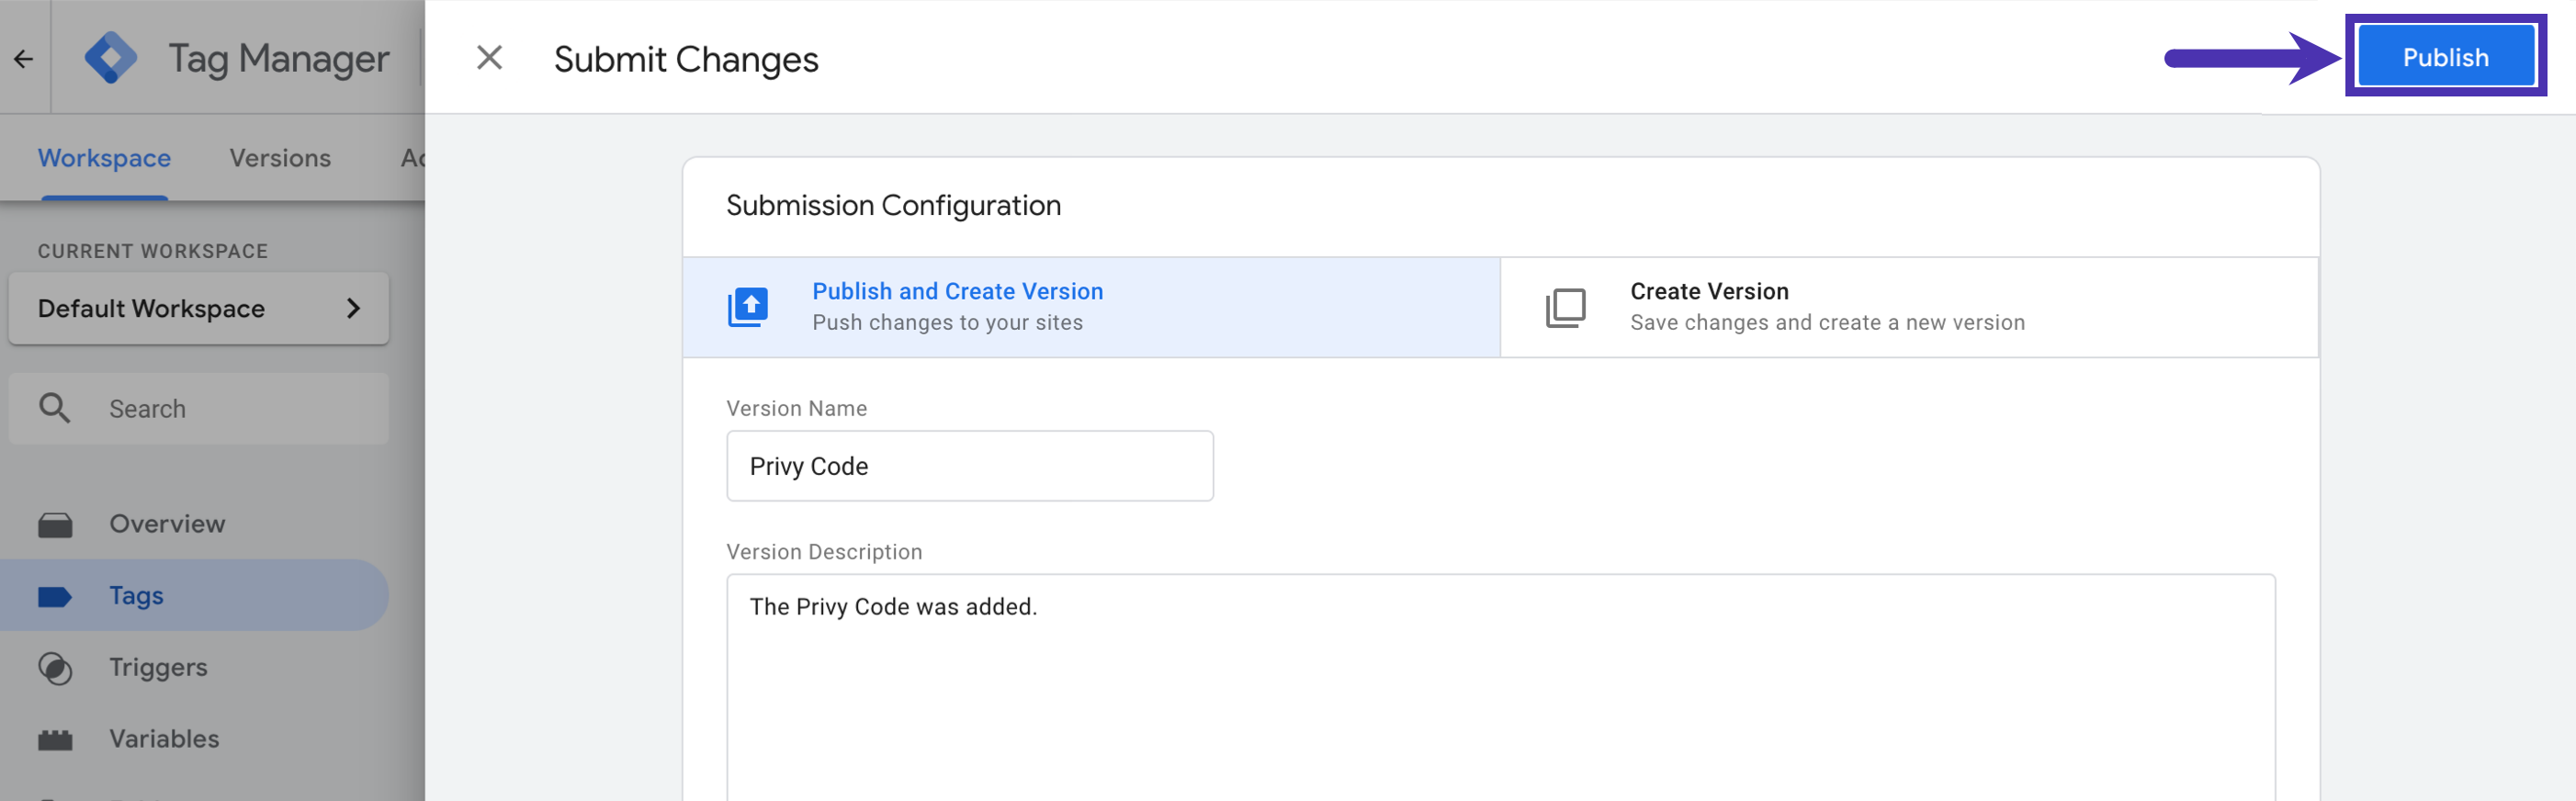
 After submitting, you will have the option to give this version a name and description. You will want this version name and description to indicate the changes you are making to add the Privy Code to your GTM account to install the Privy app on your site. Once you have given your version a name and description, select the **Publish** button at the top right.
 Now, every time someone visits a page on your site (the trigger), the tag (Privy Code) will run so that your Privy Convert displays appear to visitors and analytics are collected.