What is a Cart Saver?
In addition to your Welcome Display, you should also activate a Cart Saver — a Cart Saver is a display that triggers on exit-intent to visitors who have something in their cart and are about to leave your site without (a) signing up for your list, or (b) completing their purchase. This strategy is meant to capture high-intent shoppers and incentivize them to checkout before leaving, or at least allow for the opportunity to engage with them after they’re gone.This strategy guide is going to focus mainly on the targeting you should use, and examples to follow — if you need more step-by-step guidance on how to create a display in Privy, please follow this guide.
Templates
Looking for a great place to start with best practices baked in? Luckily, Privy has many different Cart Saver templates for you to choose and customize! To select a new template:- Head to Convert > All Displays and click Create New Display.
- On the left side, select Stop Abandonment under Goal to filter by Cart Saver templates.
- Hover over the template you’d like to start with and click Get Started.
Settings
The most crucial part of setting up a Cart Saver is setting up the right trigger settings + audience targeting to ensure that you’re showing it to the right people at the right time.If you’re starting from one of Privy’s Cart Saver templates, the following settings might already be in place to save you time.
Exit-Intent
To make sure your display only triggers on Exit-Intent:- Navigate to your display’s Settings at the top of your editor.
- Click on the Triggers & Visibility card and select Show on exit intent.
- Keep the Limit display appearance setting selected and at 1 day. This will ensure that this display will not appear for someone more than once in 24 hours.
Audience Targeting
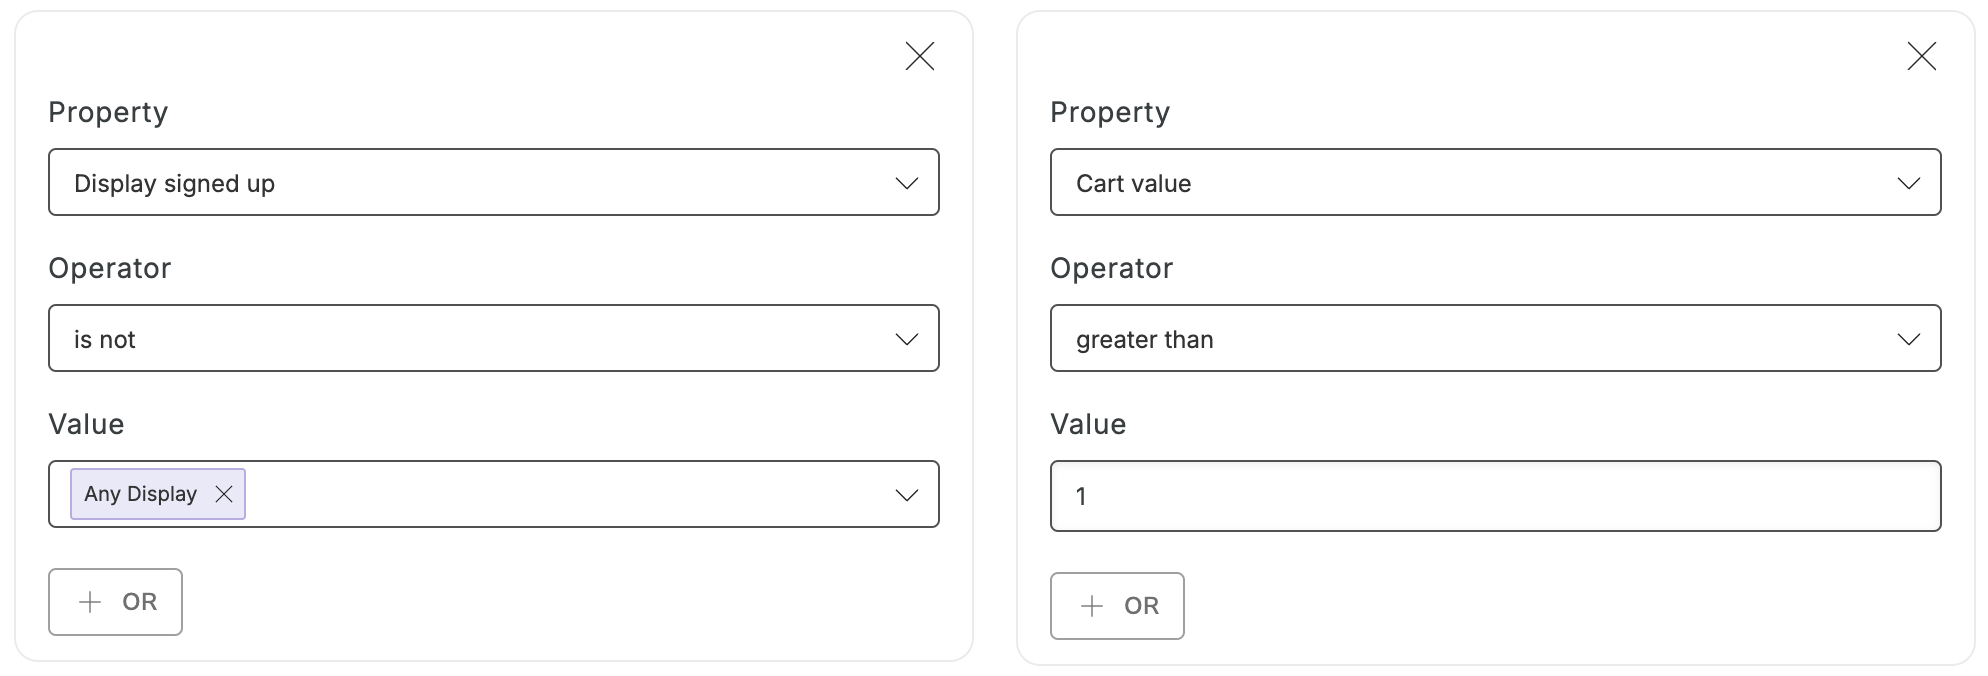
To limit your display to appear only to people with something in their cart + have not already signed up:- In your display’s Settings, click on the Audience Targeting card.
- Add a targeting condition for Display signed up + is not + Any Display.
- Add a targeting condition for Cart value + is greater than + 1.
Coupon
If you’re offering an incentive, be sure to attach the coupon:- In your display’s Settings, click on the Coupon card.
- Select the desired coupon from the dropdown menu and Save.
Best Practices
With the right trigger and targeting settings, your display will be sure to show to the right audience — now it’s time to make sure you have the right message showing! Remember, there’s two things we know about this audience: they’re interested in product(s), and they’re not on your list. Use these to tailor your display’s content. A good Cart Saver: Grabs attention with a playful header. Puts your incentive front & center. Makes it simple to get the offer + checkout ASAP.Examples
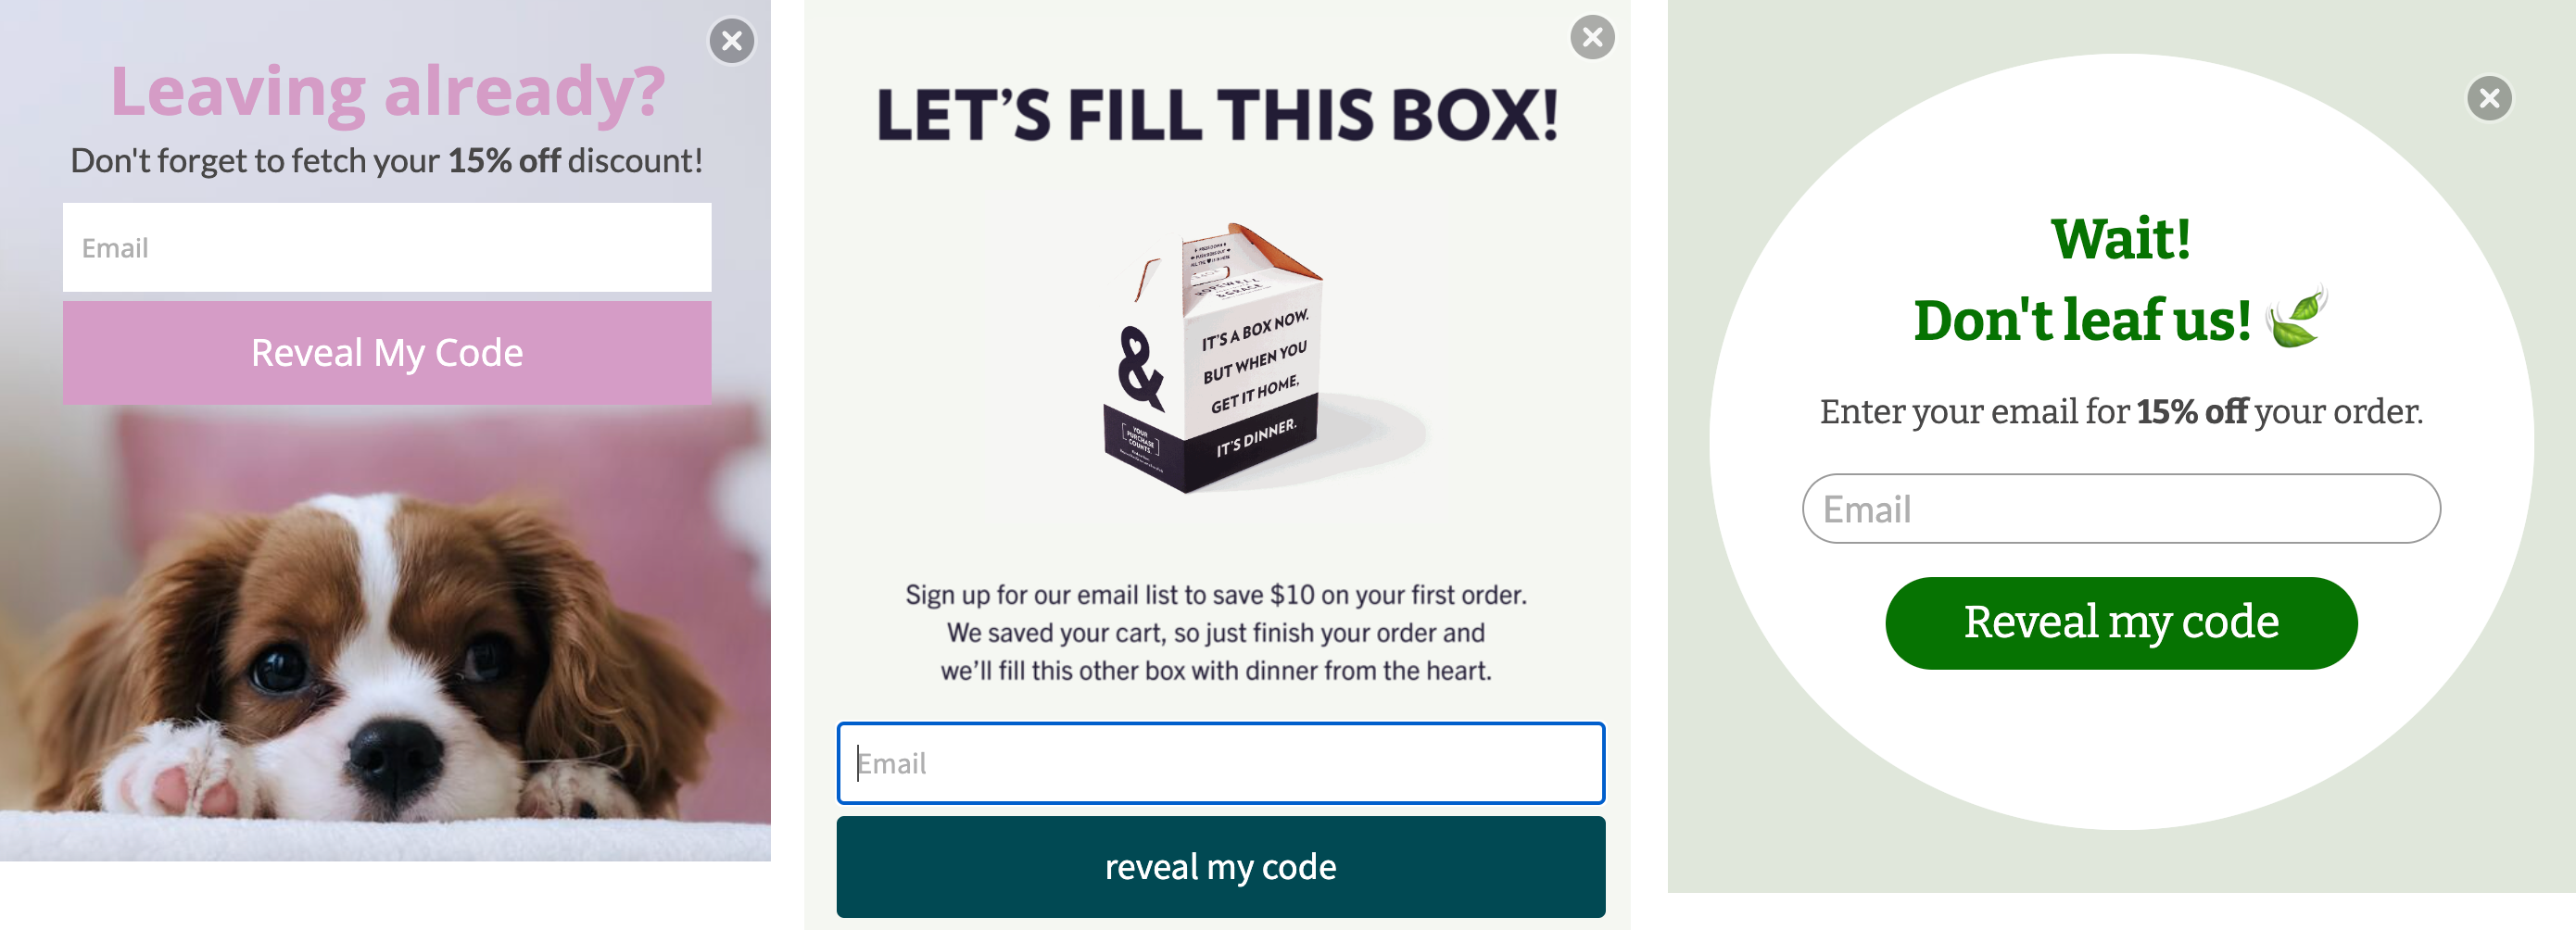
Check out these Cart Saver examples below! Each one is customized to match the brand and has the following best practices in place:- An attention-grabbing header such as “Leaving already?” to acknowledge the action the visitor is about to take.
- Short and sweet copy that draws attention to their offer, and the use of “Reveal my code” on their call-to-action to motivate their shopper.
- Collecting email only to eliminate any potential boundaries preventing your shopper from getting on your list.