Installing the Privy app for Shopify store adds a unique Privy code which allows you to show your displays, track visitor behavior (e.g., display views), and acquire order information for segmentation or targeting, all without the need for coding or development skills.
Features of the integration
Privy will not modify your store theme or change any store settings when installed through the app store. Installing Privy through the Shopify app store will enable the following:
- Privy Displays: displays will show on your store’s site & their data will automatically appear in Shopify’s marketing reports.
- Automatic Contact Syncs:
- New sign ups from Privy sync to Shopify, and customers marked as “accepts marketing” in Shopify will sync to Privy.
- All existing mailable contacts from Shopify will automatically import into Privy.
- Changes to customer records in Shopify will automatically create or update contacts with the corresponding email address in Privy. Deletions are not replicated in either direction.
- Coupon Codes: Creation and management of Shopify coupon codes within Privy.
- Product Catalog: Products + Collections in Shopify automatically sync to Privy and can be used for audience targeting, segmentation, and email content.
- Cart + Order Activity: Contacts’ cart values and order events sync automatically to Privy and can be used for audience targeting, segmentation, and Flows.
These features are only available via the Privy app in Shopify. Performing a manual installation only enables displays to show on your store’s site and allows basic tracking information to be collected about visitors. Due to these limitations, a manual install is not recommended for most users.
How to install the app
To install the Privy app for Shopify:
- Visit Privy’s listing in the Shopify App Store.
- Click the Add app button.
- If you’re not already logged into Shopify, enter your store URL and click Log in.
- On the app’s install page, click the Install app button. If applicable, log into your Privy account and select which account you’d like to link. If you are already logged in and do not have multiple accounts, you’ll automatically be redirected to your Privy homepage.
Enabling the Privy Theme Block in Shopify
Once you add the Privy app to your Shopify store, you’ll need to turn on the Privy Theme Block in your Shopify Theme Builder.
To enable the Privy Theme Block:
- Log into your new Privy account.
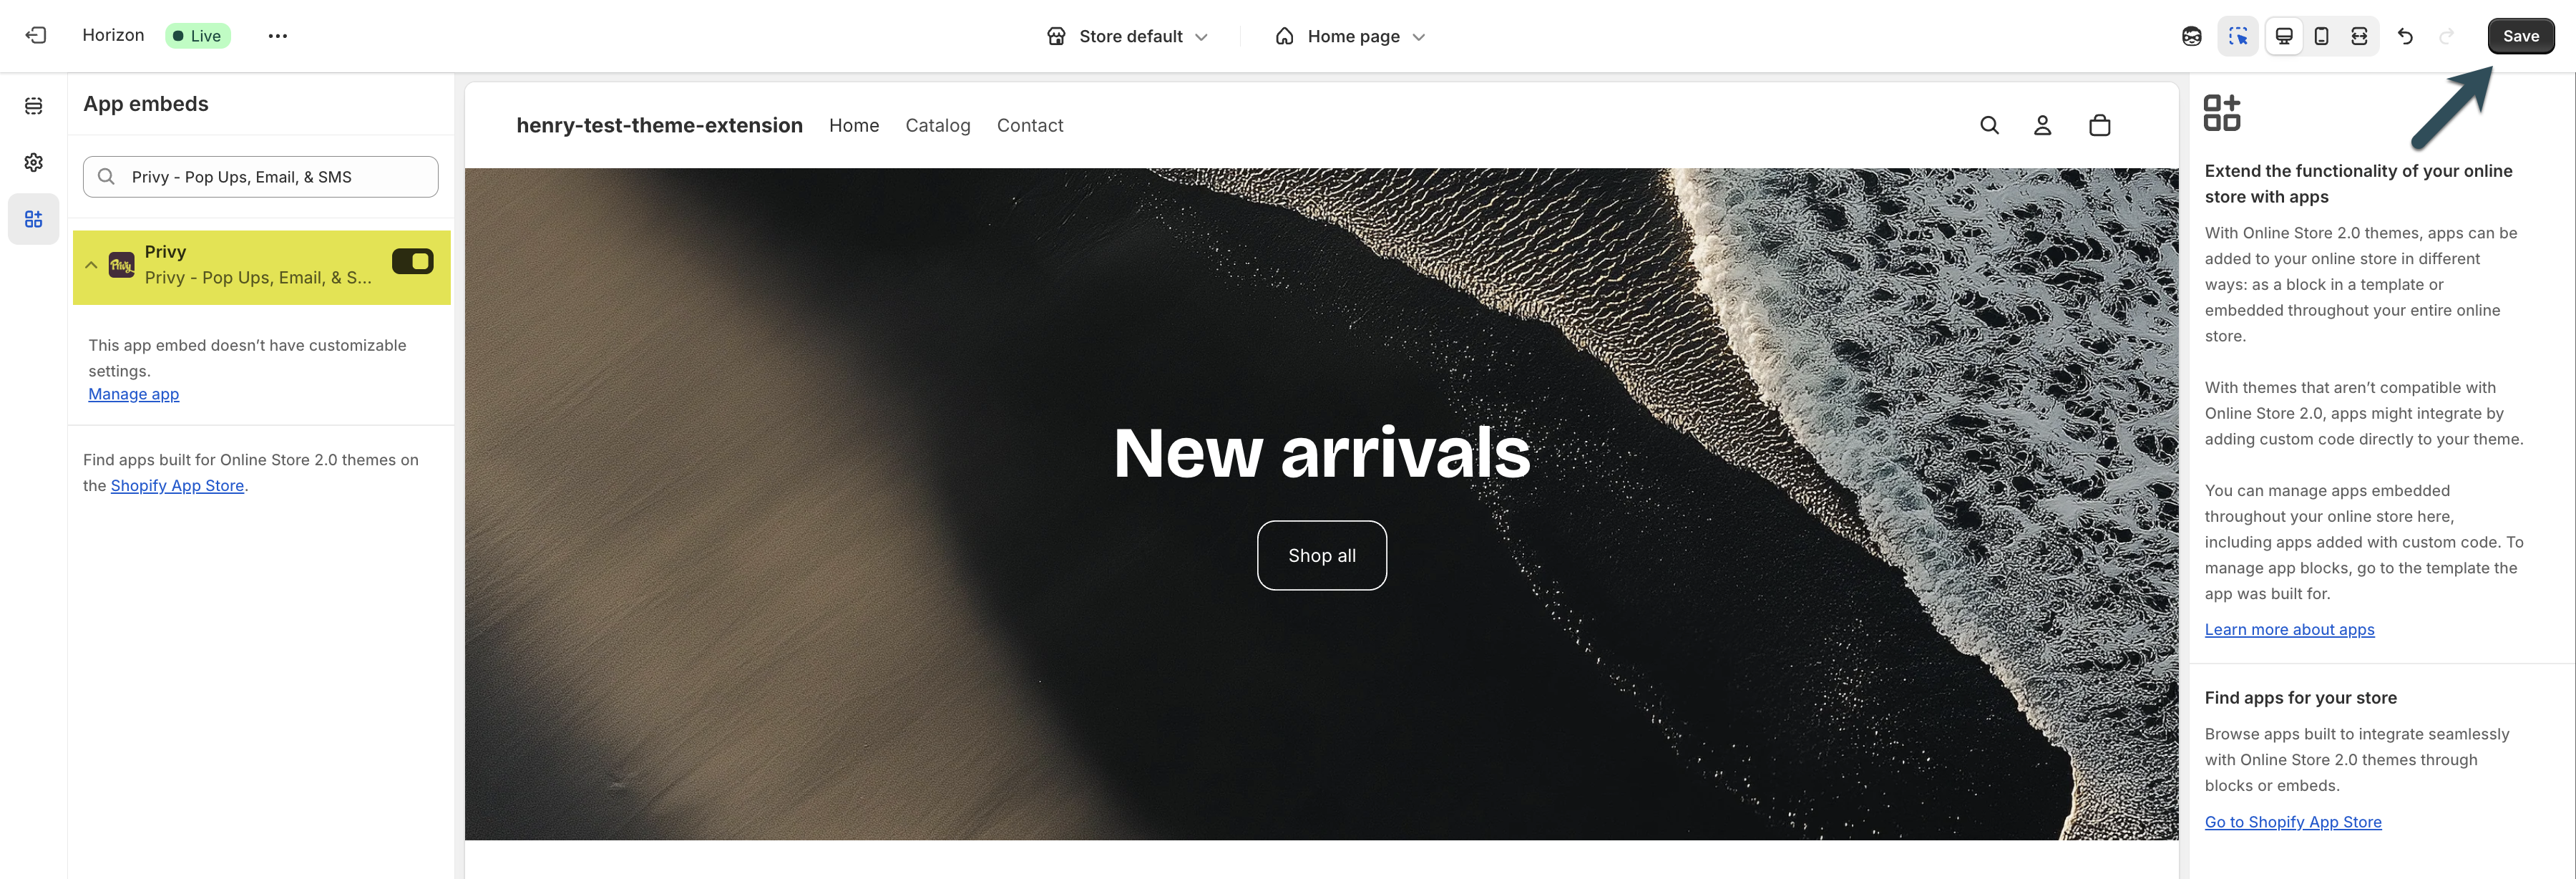
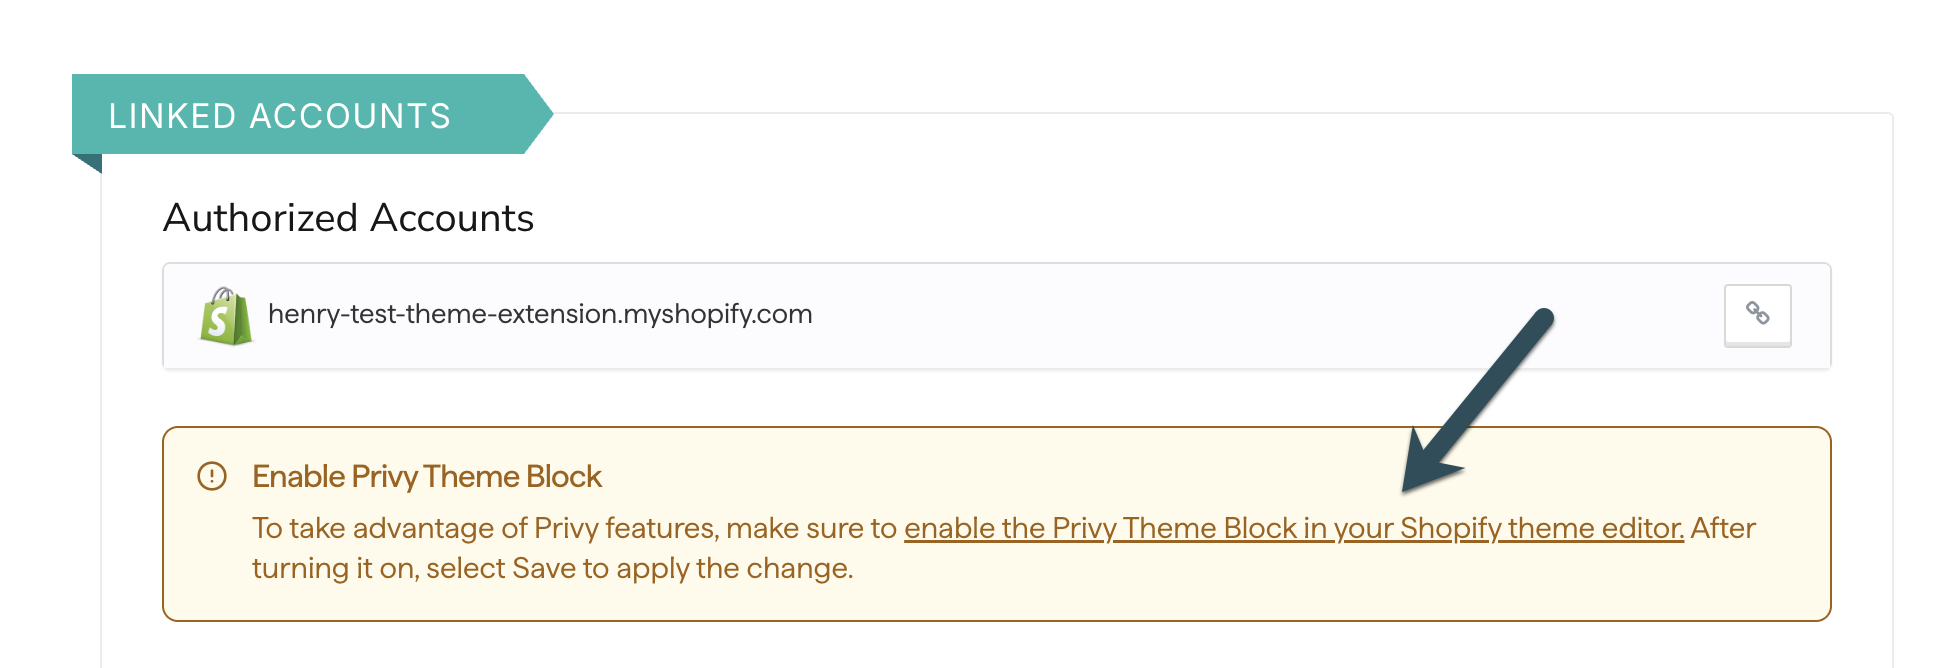
- At the top of your dashboard, you will see the following callout:

- Click enable the Privy Theme Block in your Shopify theme builder.
- You’ll be brought to the following page. On the left, you’ll notice your Privy Theme Block is now toggled ON.
- Click Save in the upper right corner.
Verify the installation
To confirm that your Privy Theme Block has been properly turned on in your Shopify theme builder:
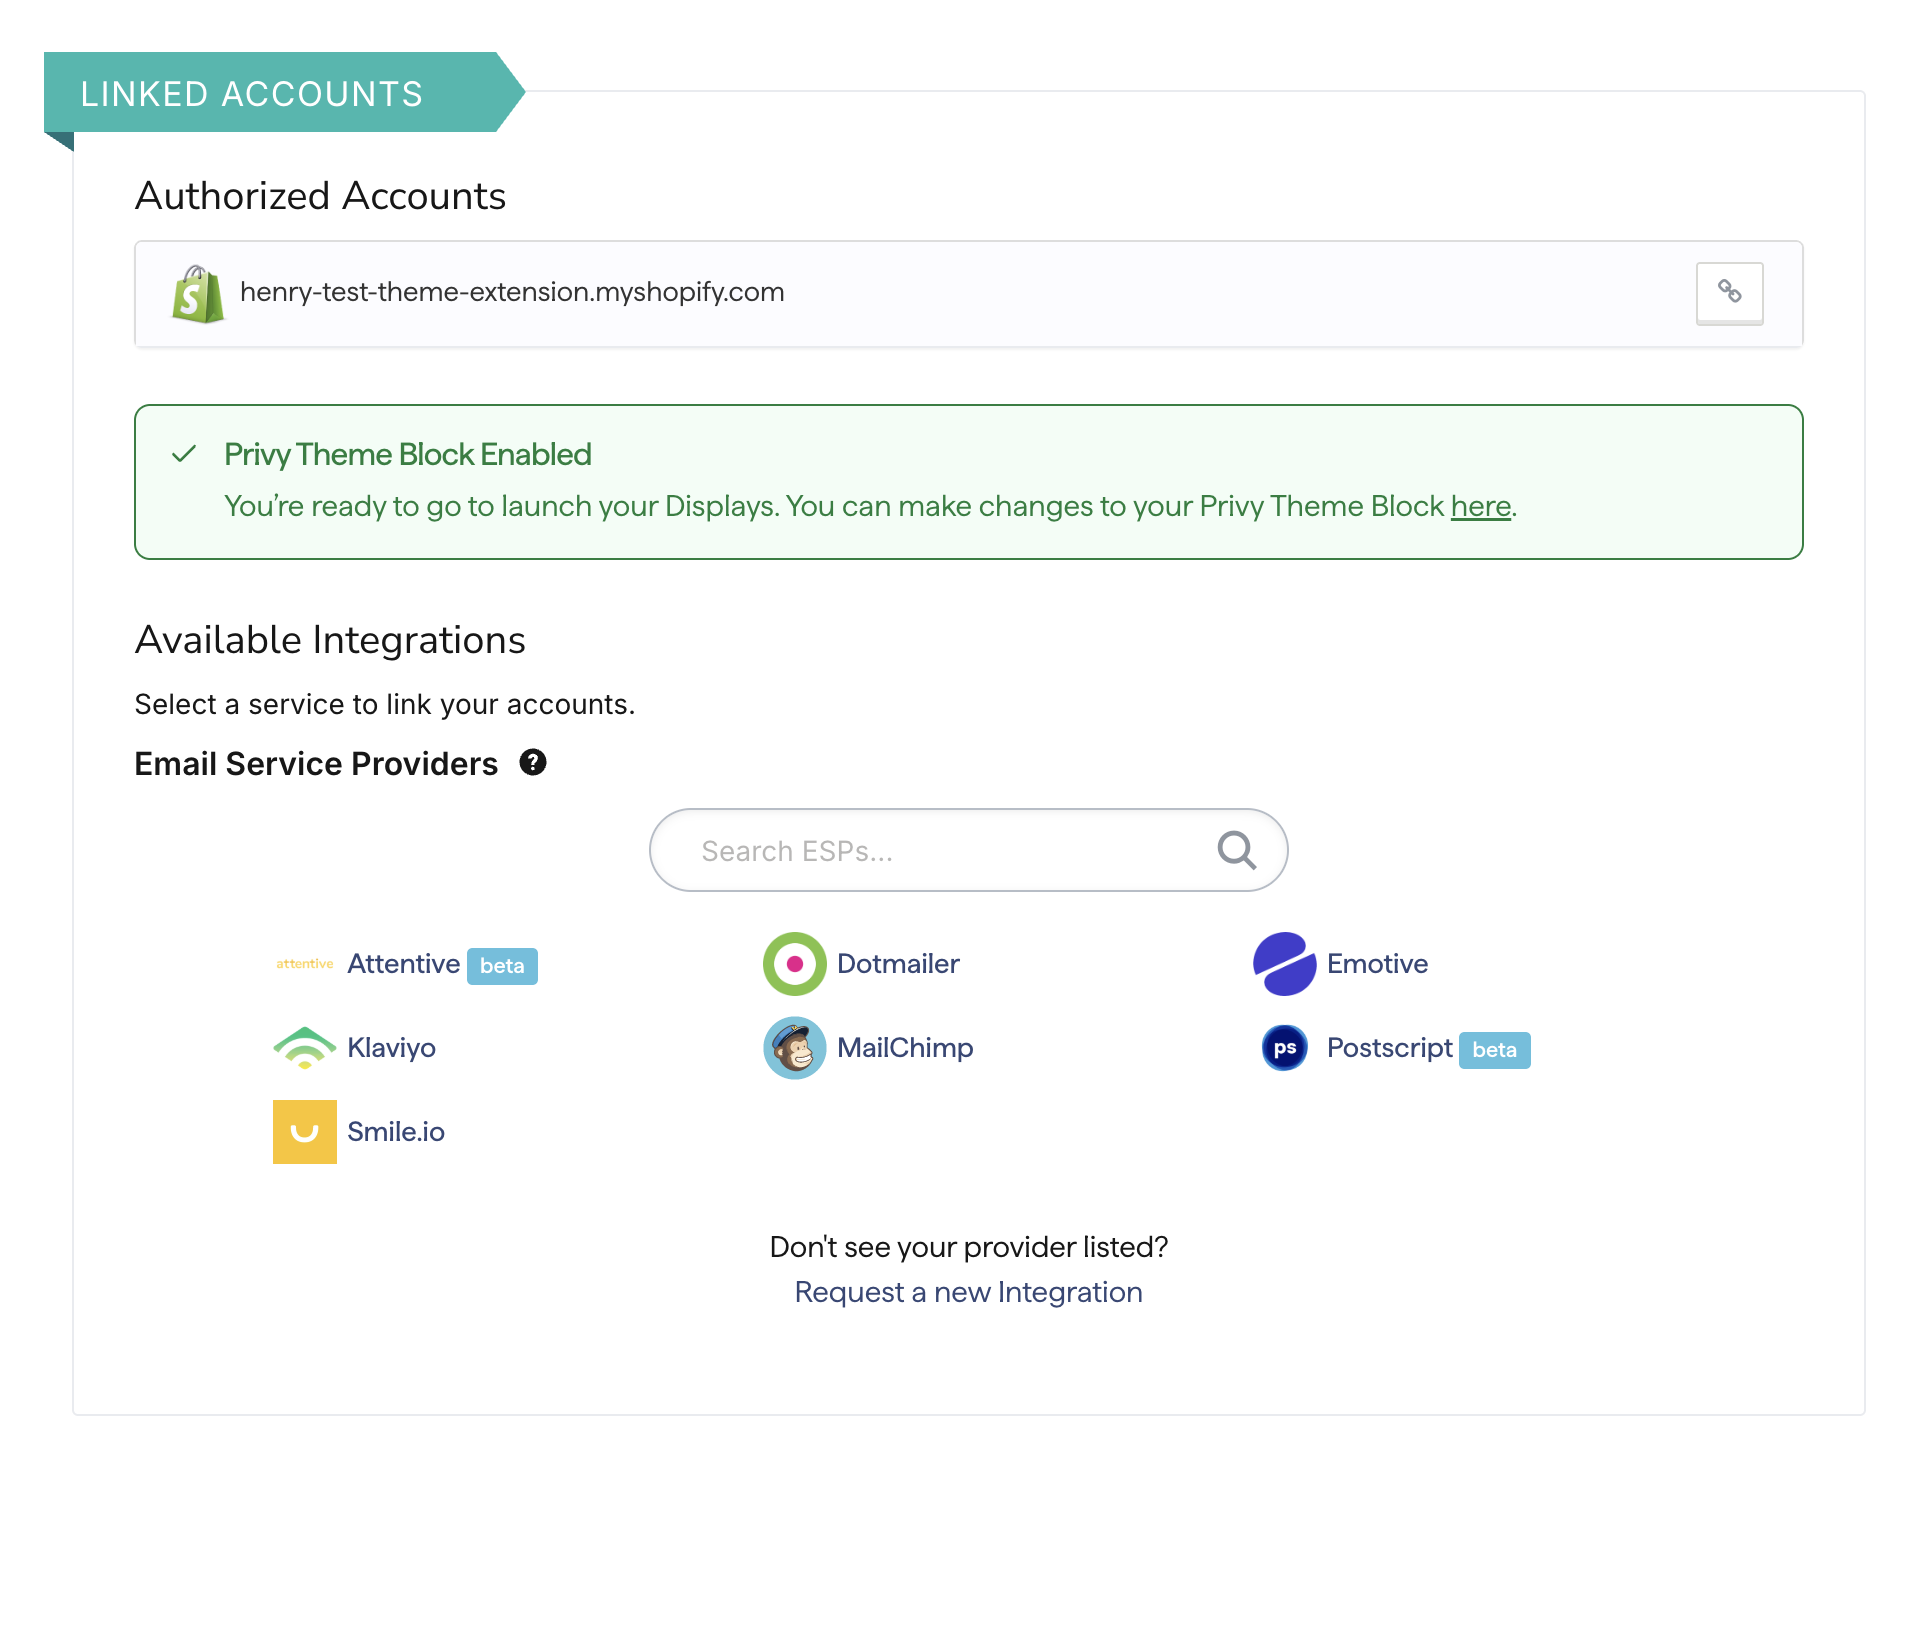 That’s it! Your Privy code is now installed on your store, and your active displays will appear immediately.
Manual Install
The automatic installation of the Privy app for Shopify is recommended for most users. Please confirm that standard installation does not fit your situation before proceeding with a manual install.
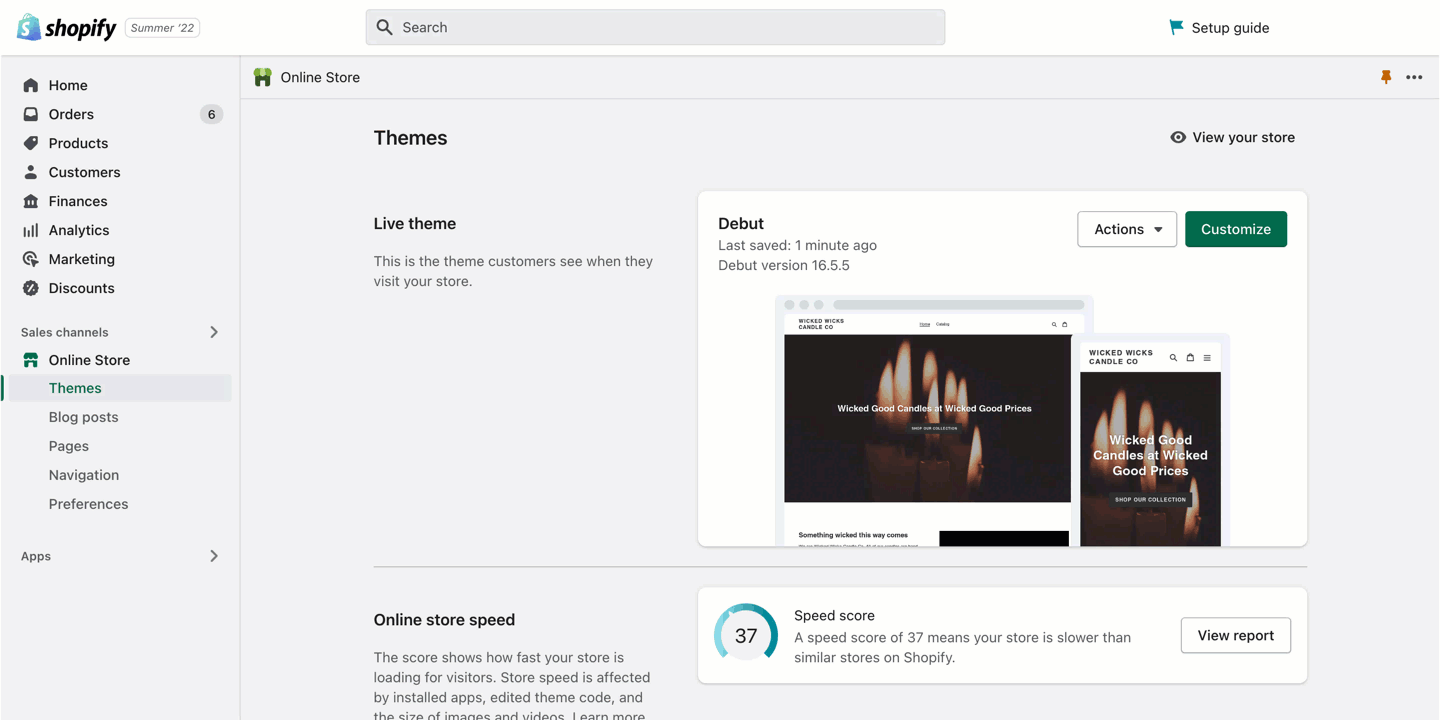
- From your Shopify dashboard, select the Online Store option from the sidebar.
- On the Themes dashboard, click the Actions dropdown menu and select the Edit code option.
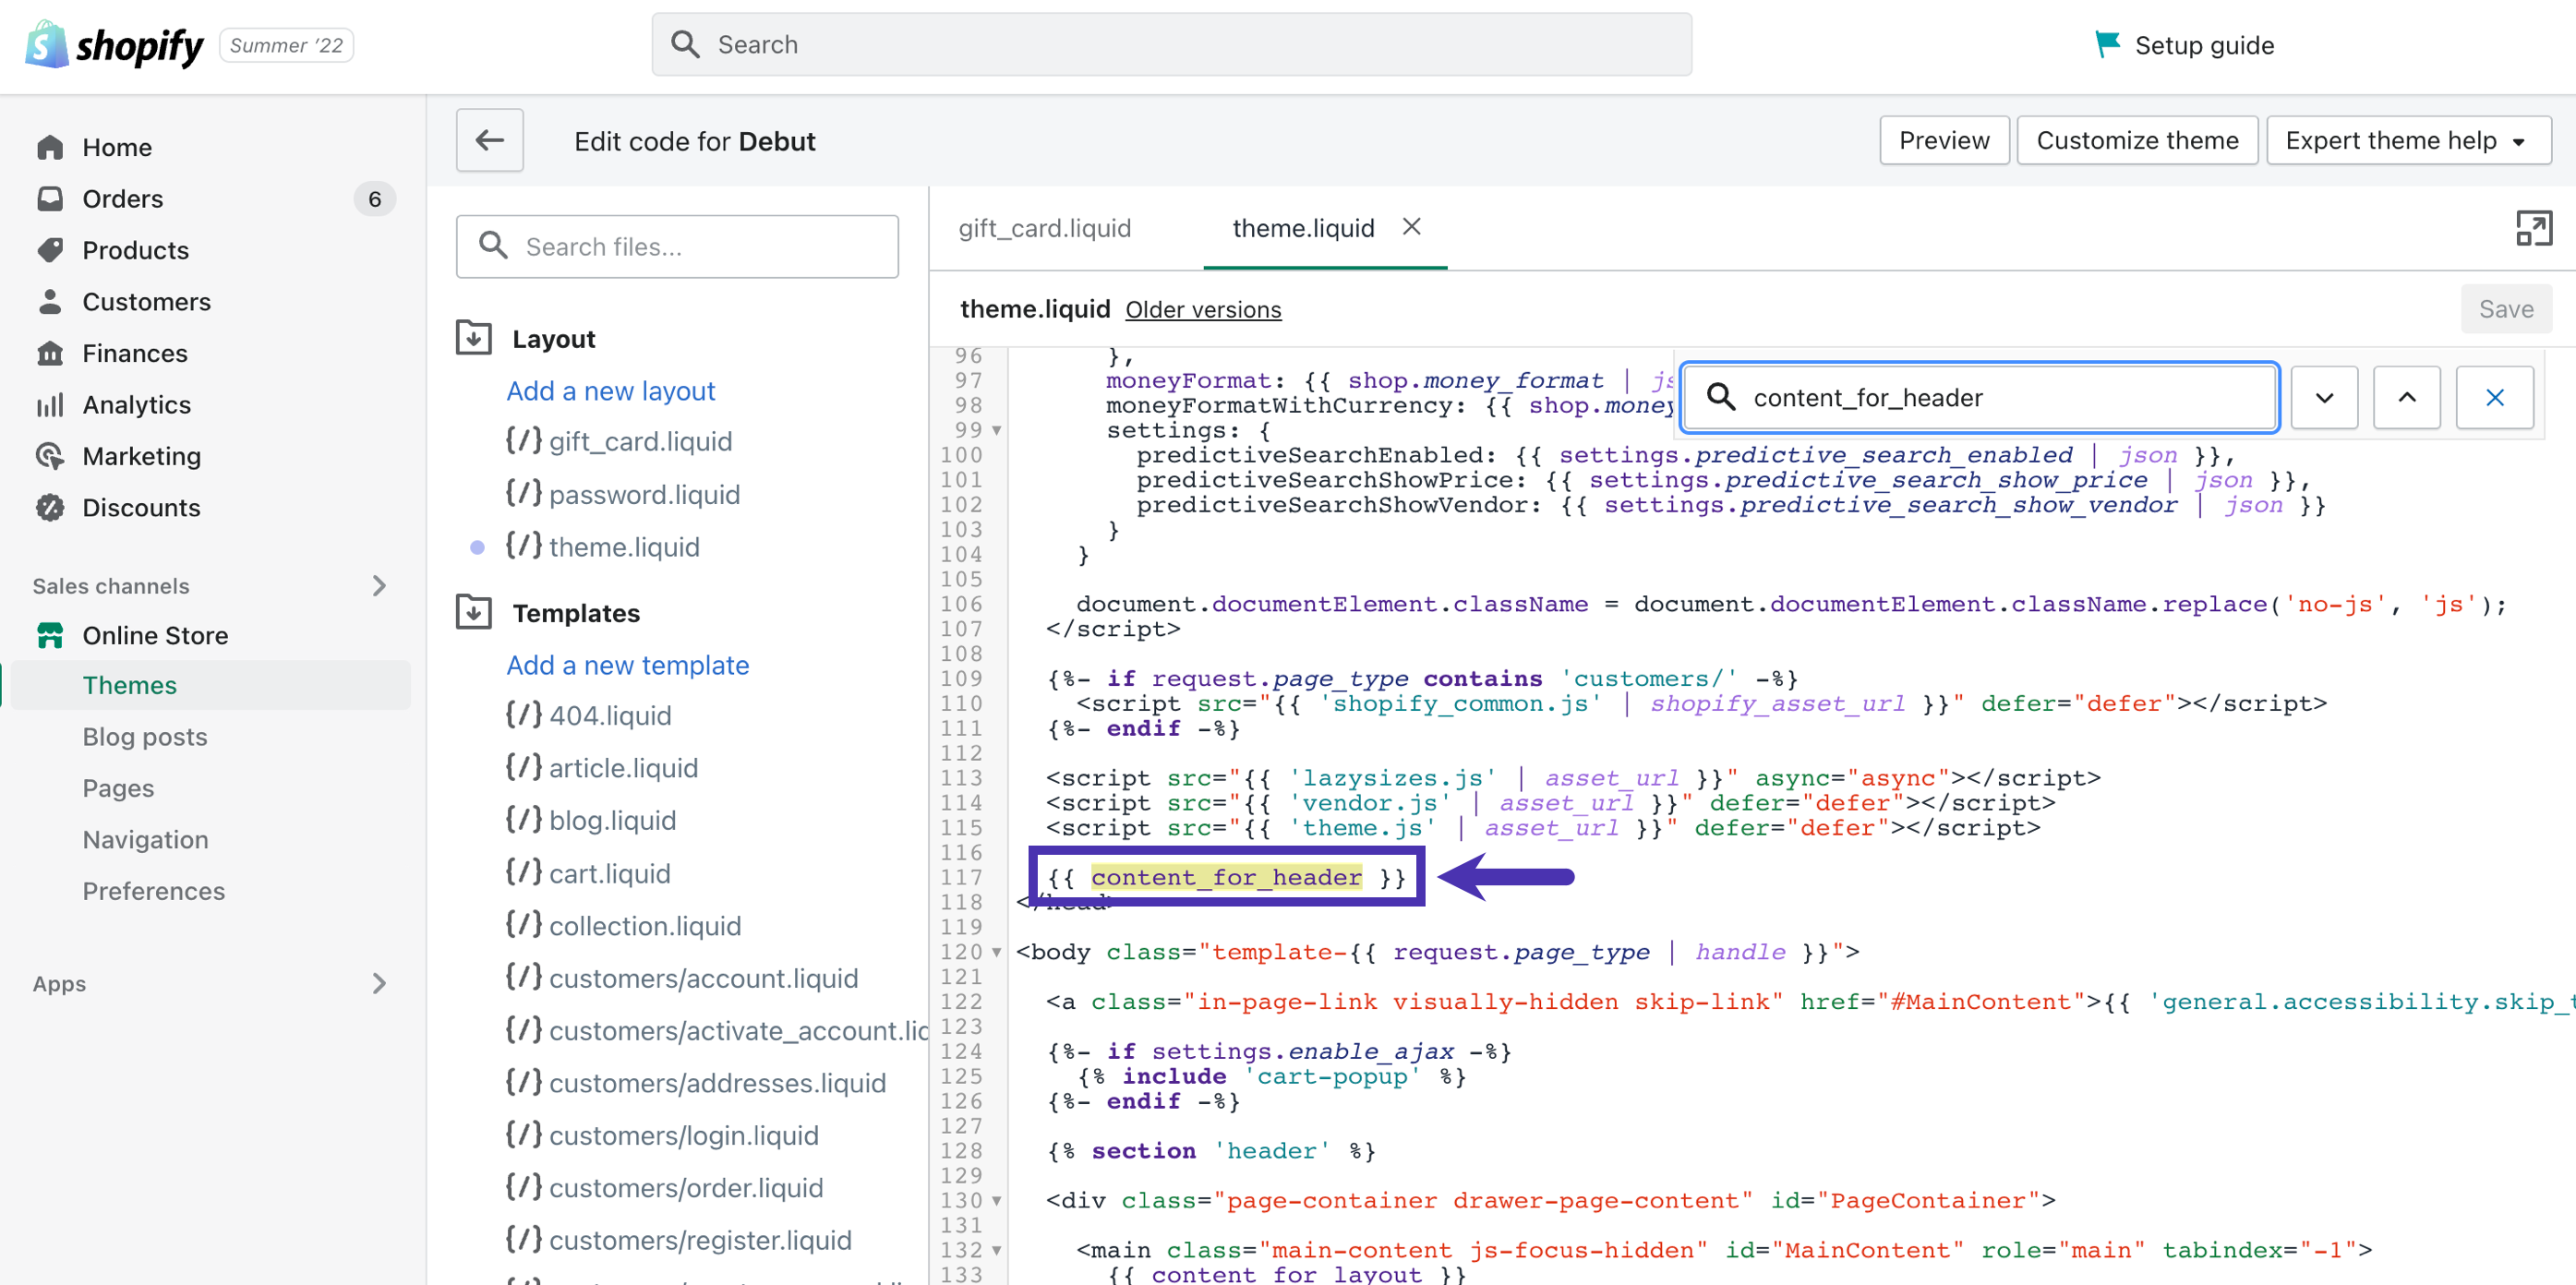
- In the Layout section of the editor’s sidebar, click on theme.liquid.
- Copy and paste your Privy code below the meta and link data in the <head> tag.
- In the upper right of the editor, click the Save button.
 Great work! Privy has been manually installed in your store. Any applicable active displays will appear immediately.
Troubleshooting
The Privy code is missing
Sometimes, the Privy code does not appear in a store theme even though Privy’s app is installed. In that case, it’s possible that the current theme does not include the {{ content_for_header }} liquid variable. This variable is included in Shopify’s default themes but can be removed intentionally or accidentally in custom themes. Privy requires this to inject the Privy code into your store.
I changed my Shopify theme and my popups aren’t appearing
This only applies to accounts who installed the Privy app on their Shopify store on or after July 28, 2025.If you changed your Shopify theme, but installed your Privy app before July 28, 2025, then no further steps are required.
- Head to your Linked Accounts page within your Settings.
- Click on the following callout:
 You’ll be brought to your Shopify Theme Builder. On the left, you should see the Privy Theme Block toggled ON. Click Save in the upper right corner.