Each of your businesses can be associated with either a unique standalone Privy account or a subaccount. Standalone accounts function like any other account, while the primary benefits of adding a subaccount include:
Subaccounts inherit the features, except for Privy Text, associated with the parent account.
Subaccounts share the feature and traffic limits of the parent account.
Subaccounts are collectively billed under the parent account.
However, various limitations must be considered when opting for a subaccount, which is described in more detail below.
Depending on your situation, a subaccount(s) may or may not suit you. You should use subaccounts if:
You have multiple stores or sub-brands, and you want a Privy business for each one.
You want one consolidated bill from Privy for all the accounts except for Privy Text.
You have a single brand and multiple websites—for example, country-specific domains or currency-specific versions of your storefront.
You want a staging or test environment for previewing changes before making them on the business connected to your live store.
You should not use subaccounts if:
You want separate bills for each business. Subaccounts can’t be billed separately.
You want to run and manage identical displays on multiple sites from one account. Displays can be easily copied to additional accounts, but changes to one copy will not affect the others. Instead, install the Privy code for your second business on that website manually.
You are an agency working on behalf of clients. Agencies should create a new business for each client. Subaccounts can’t be billed separately and shouldn’t be resold to third parties without prior agreement from Privy.
Privy Text is not available for subaccounts bundled under parent accounts. To use Privy Text for multiple businesses, you must create multiple unique Privy accounts.
If the parent/primary account adds or removes plans or features (e.g., Email), any subaccounts are automatically updated to reflect the parent account’s plan.
The following features are not shared or inherited between parent accounts and subaccounts: user permissions, custom sending domains, contacts, coupons, linked accounts (integrations), displays, display templates, email templates, design assets, and photos.
Merchants will receive a consolidated bill for all accounts. Subaccounts aren’t billed separately.
Privy subaccounts inherit the traffic enforcement state, trial state, and any supported shared features/settings of the parent account. Review the previous section to learn more about which features/settings are not shared between accounts.
Traffic from subaccounts will be “rolled up” to parent accounts for billing purposes.
Mailable contacts from subaccounts will be rolled up to the parent account for billing purposes. Contacts are counted each time they appear in a subaccount.
Use an alternate email address - not currently associated with Privy - to create the account.
You should now add your primary email address and any other desired users to the new account by following the steps below. Existing as a user in each account allows you to switch between and manage the different businesses seamlessly. To add additional users to your account:
Select the Account option from the navigation bar. Your business name appears here.
Select the Business Information option from the dropdown menu.
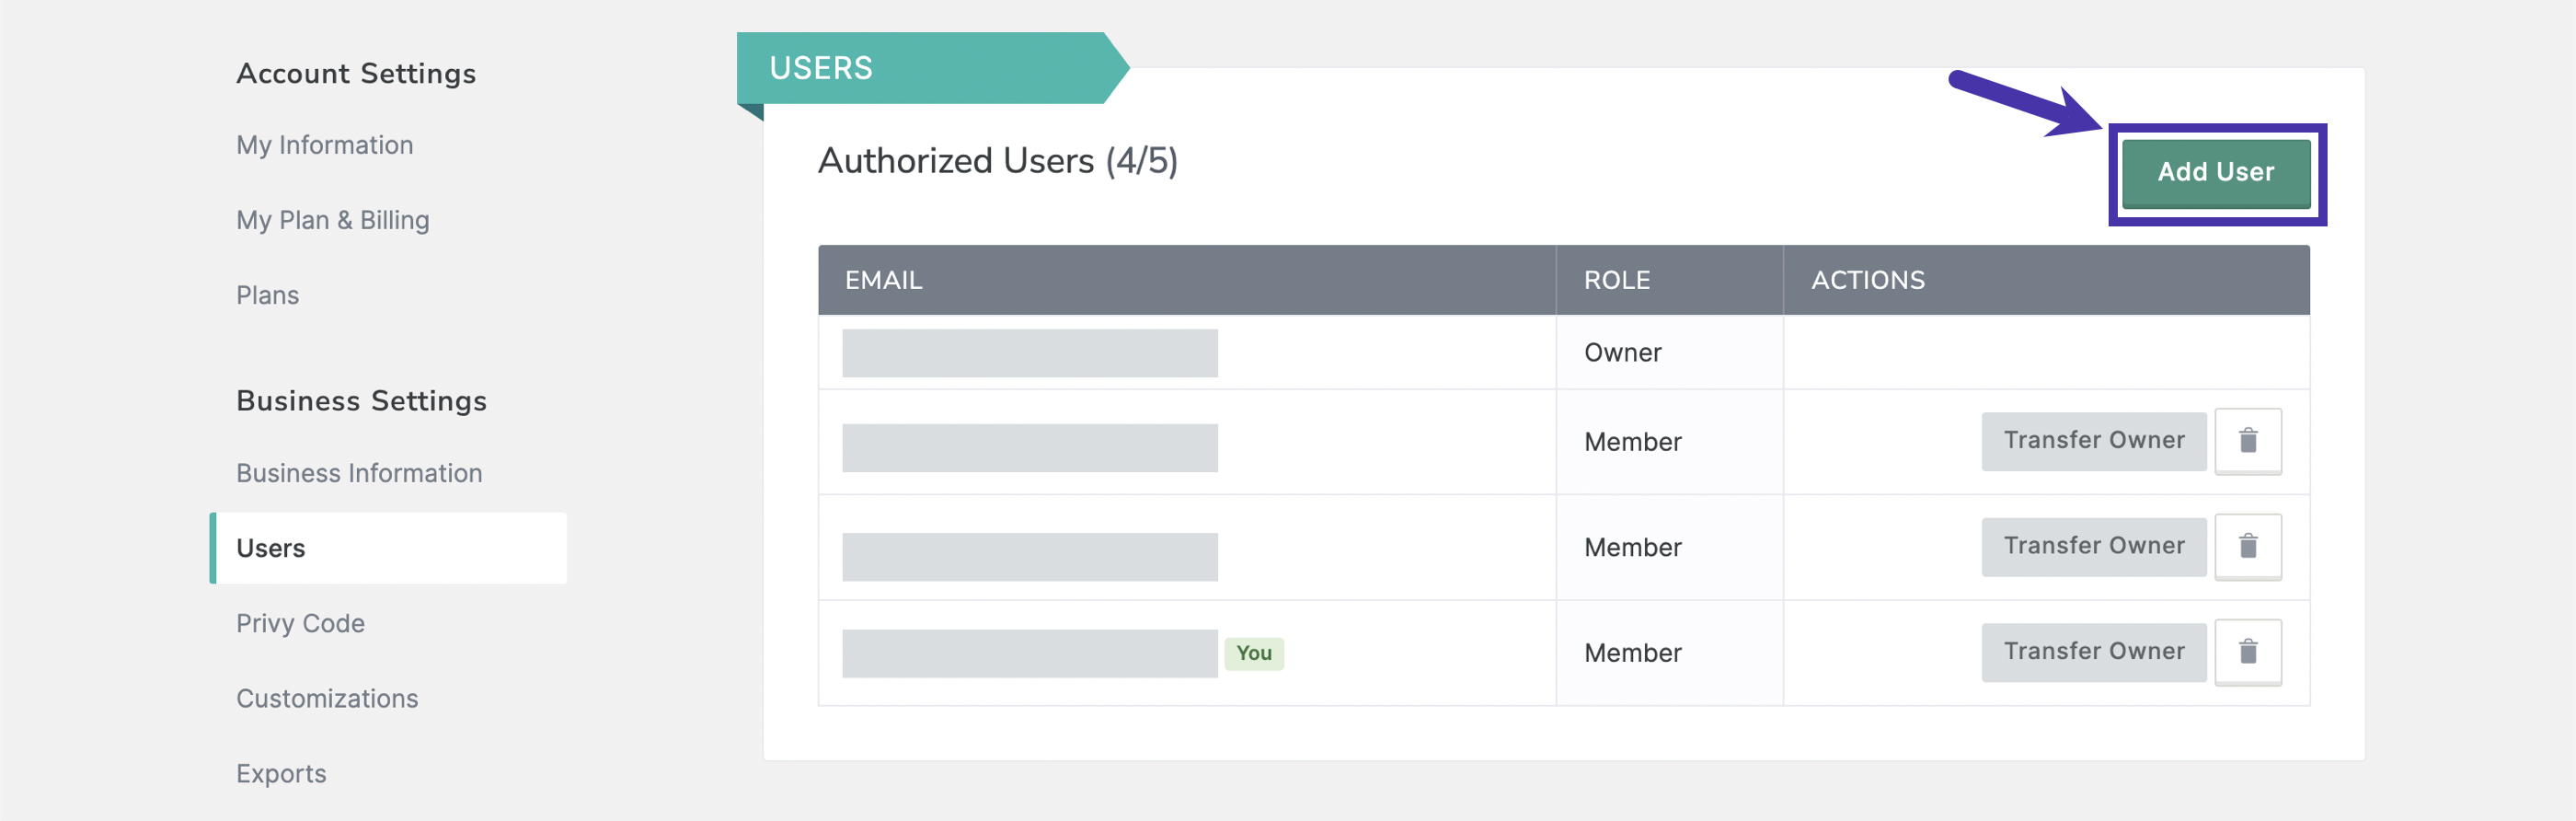
From the left-hand navigation menu, select Users.
Click the +Add User button in the upper right.
The additional user(s) will be sent a password email to configure their login and a confirmation email to confirm they have been added to the account. If you’ve decided to manage the business as a unique standalone account, then you can move on to the next section. However, if you’d like to make the new account a subaccount:
Log into or switch to the account that will be the parent/primary account.
Select the Account option from the navigation bar. Your business name appears here.
Select the My Information option from the dropdown menu.
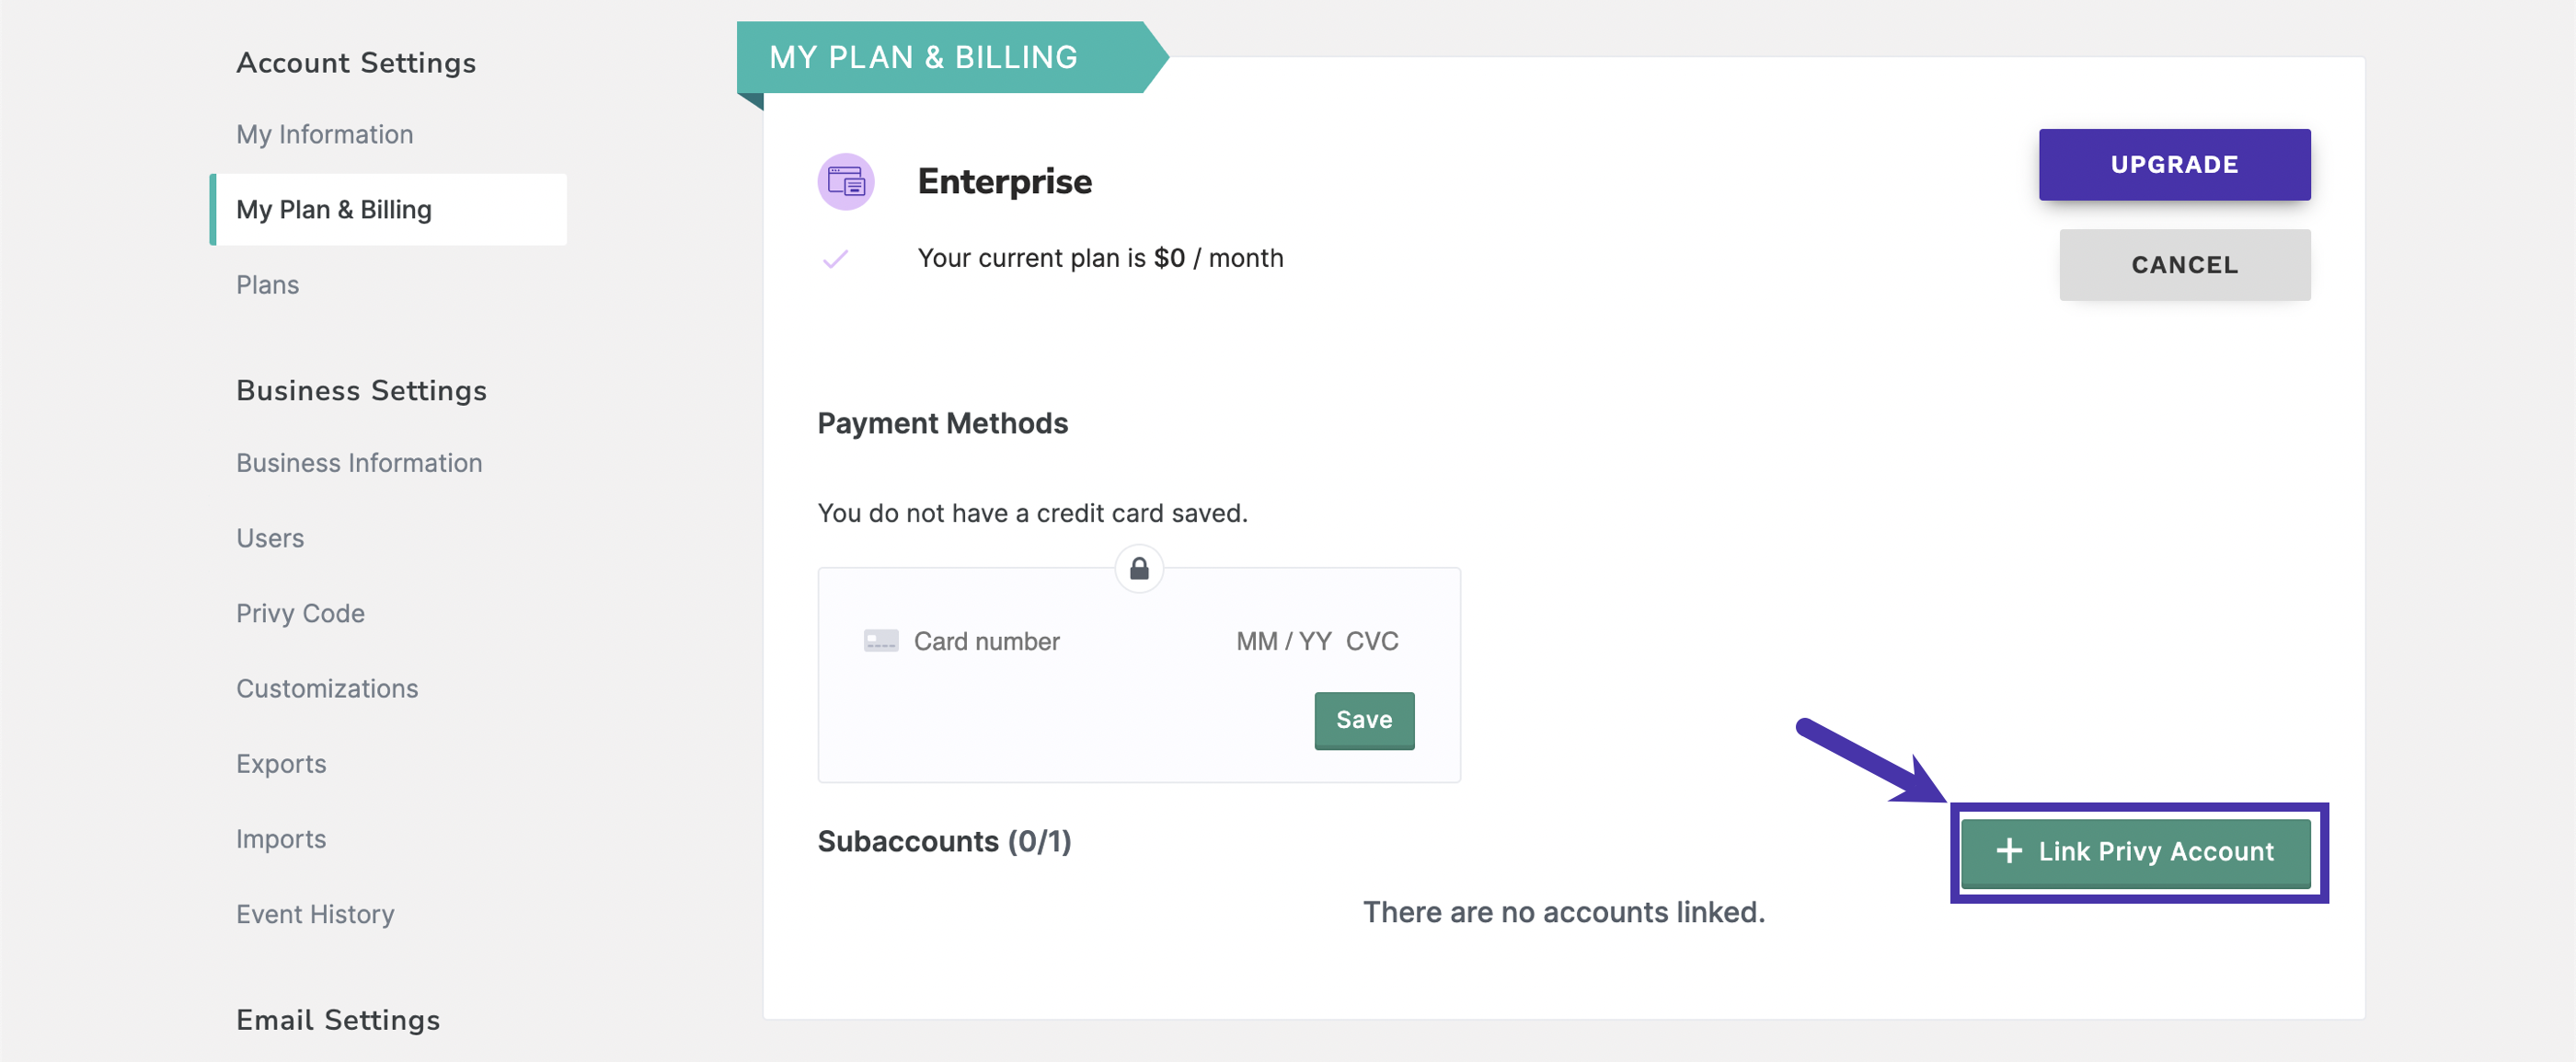
From the left-hand navigation menu, select My Plans & Billing.
In the Subaccounts section, click the Link Privy Account button.
In the prompt, select the desired “child” account from the dropdown menu and then confirm your selection by clicking the Link account button.
The selected account is now a subaccount and will be subject to all of the benefits and limitations associated with that account type. To manage ownership of this account, move to the next section.
Note: Subaccounts that are on a paid plan cannot be linked to another account. Please cancel any paid subscriptions in an account before attempting to make it a subaccount.
By default, the initial user listed on each account will become the Account Owner. In some instances, such as when creating a new account with an alternate email address, you may want to transfer the account ownership to another user or member of your team. The user must exist in the account at the time of the transfer. To change account ownership:
Select the Account option from the navigation bar. Your business name appears here.
Select the Business Information option from the dropdown menu.
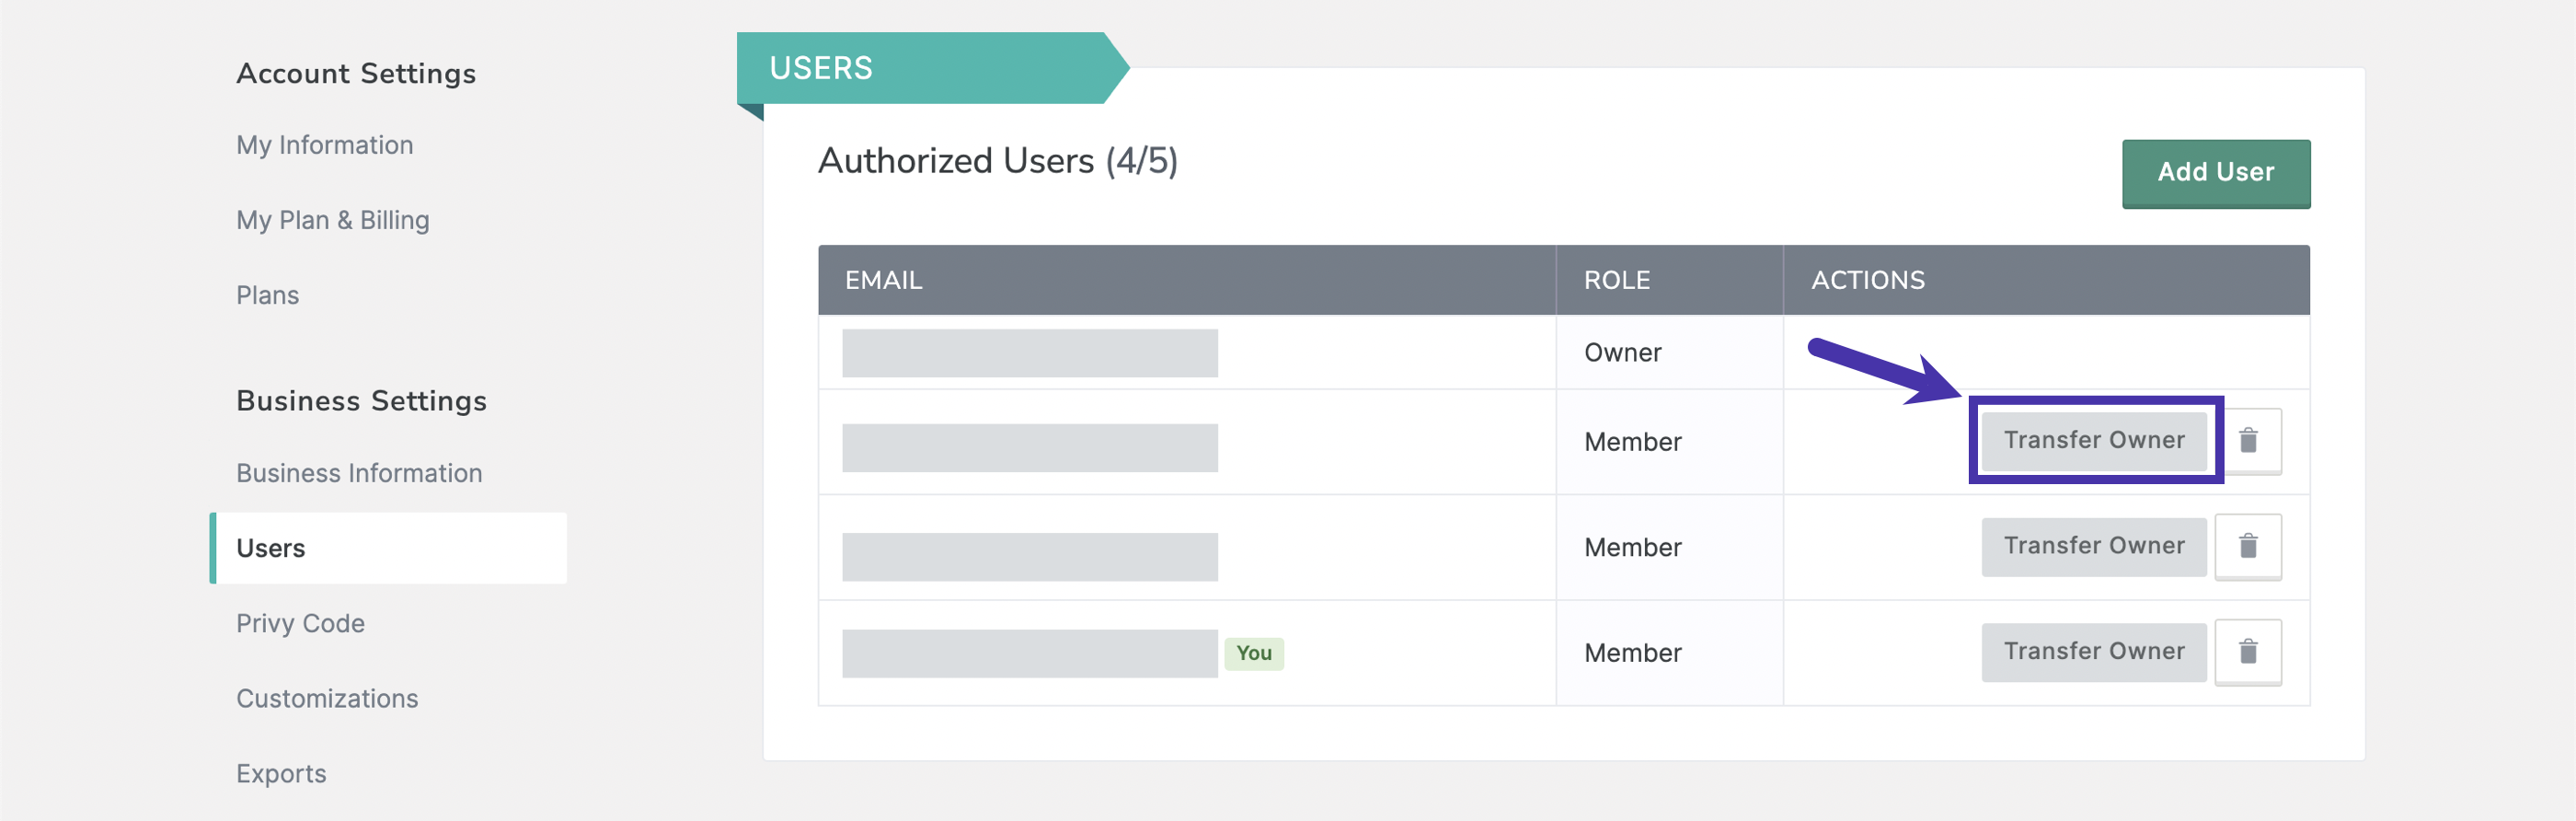
From the left-hand navigation menu, select Users.
Click the Transfer Ownership button next to any authorized user.
The account is now assigned to that user. They will receive any account-specific communications from Privy, and the Privy Support Team will defer to them on account management matters. The ownership of each of your subaccounts is reviewable in My Plans & Billing.
Note: The ownership of subaccounts does not automatically transfer to the owner of the parent account. Each account’s ownership must be updated manually.
Click on your Business Name in the upper right corner of your dashboard and select the Change Business option from the dropdown menu.
Click any business listed in the dropdown menu to be taken to that account’s dashboard. If the desired business is the default option or the switch change doesn’t occur automatically, click the Switch business button to force a refresh.
If you have any issues accessing or managing your accounts, please contact Privy’s Support Team via email or the chat widget at the bottom right of your dashboard.