- Customize email templates with our drag-and-drop editor.
- Send one-time emails to all of your contacts, or a segment of your audience.
- Select the specific date and time you want your message to send.
Create a new campaign
- Navigate to Campaigns.
- Click Send email in the upper right.
- Give your new campaign a name and press Continue.
- Click on a template to get started — you can start from one of our Privy Templates, or choose one of your brand’s Saved Templates.
Customize your template
Once you select your template, you can use our drag-and-drop editor to customize the design. Your changes will save automatically. After you’re happy with your design, click on Subject in the upper right corner to start crafting your Subject Line.Customize your settings
After designing your email, you’ll move through the Subject and Recipients steps to define your subject line, sender details, and recipients.Subject
In your Subject step, you’ll be able to:- Add your Subject Line and (optional) Preview Text.
- Customize your From Business Name, From Email, and Reply To Email, if necessary.
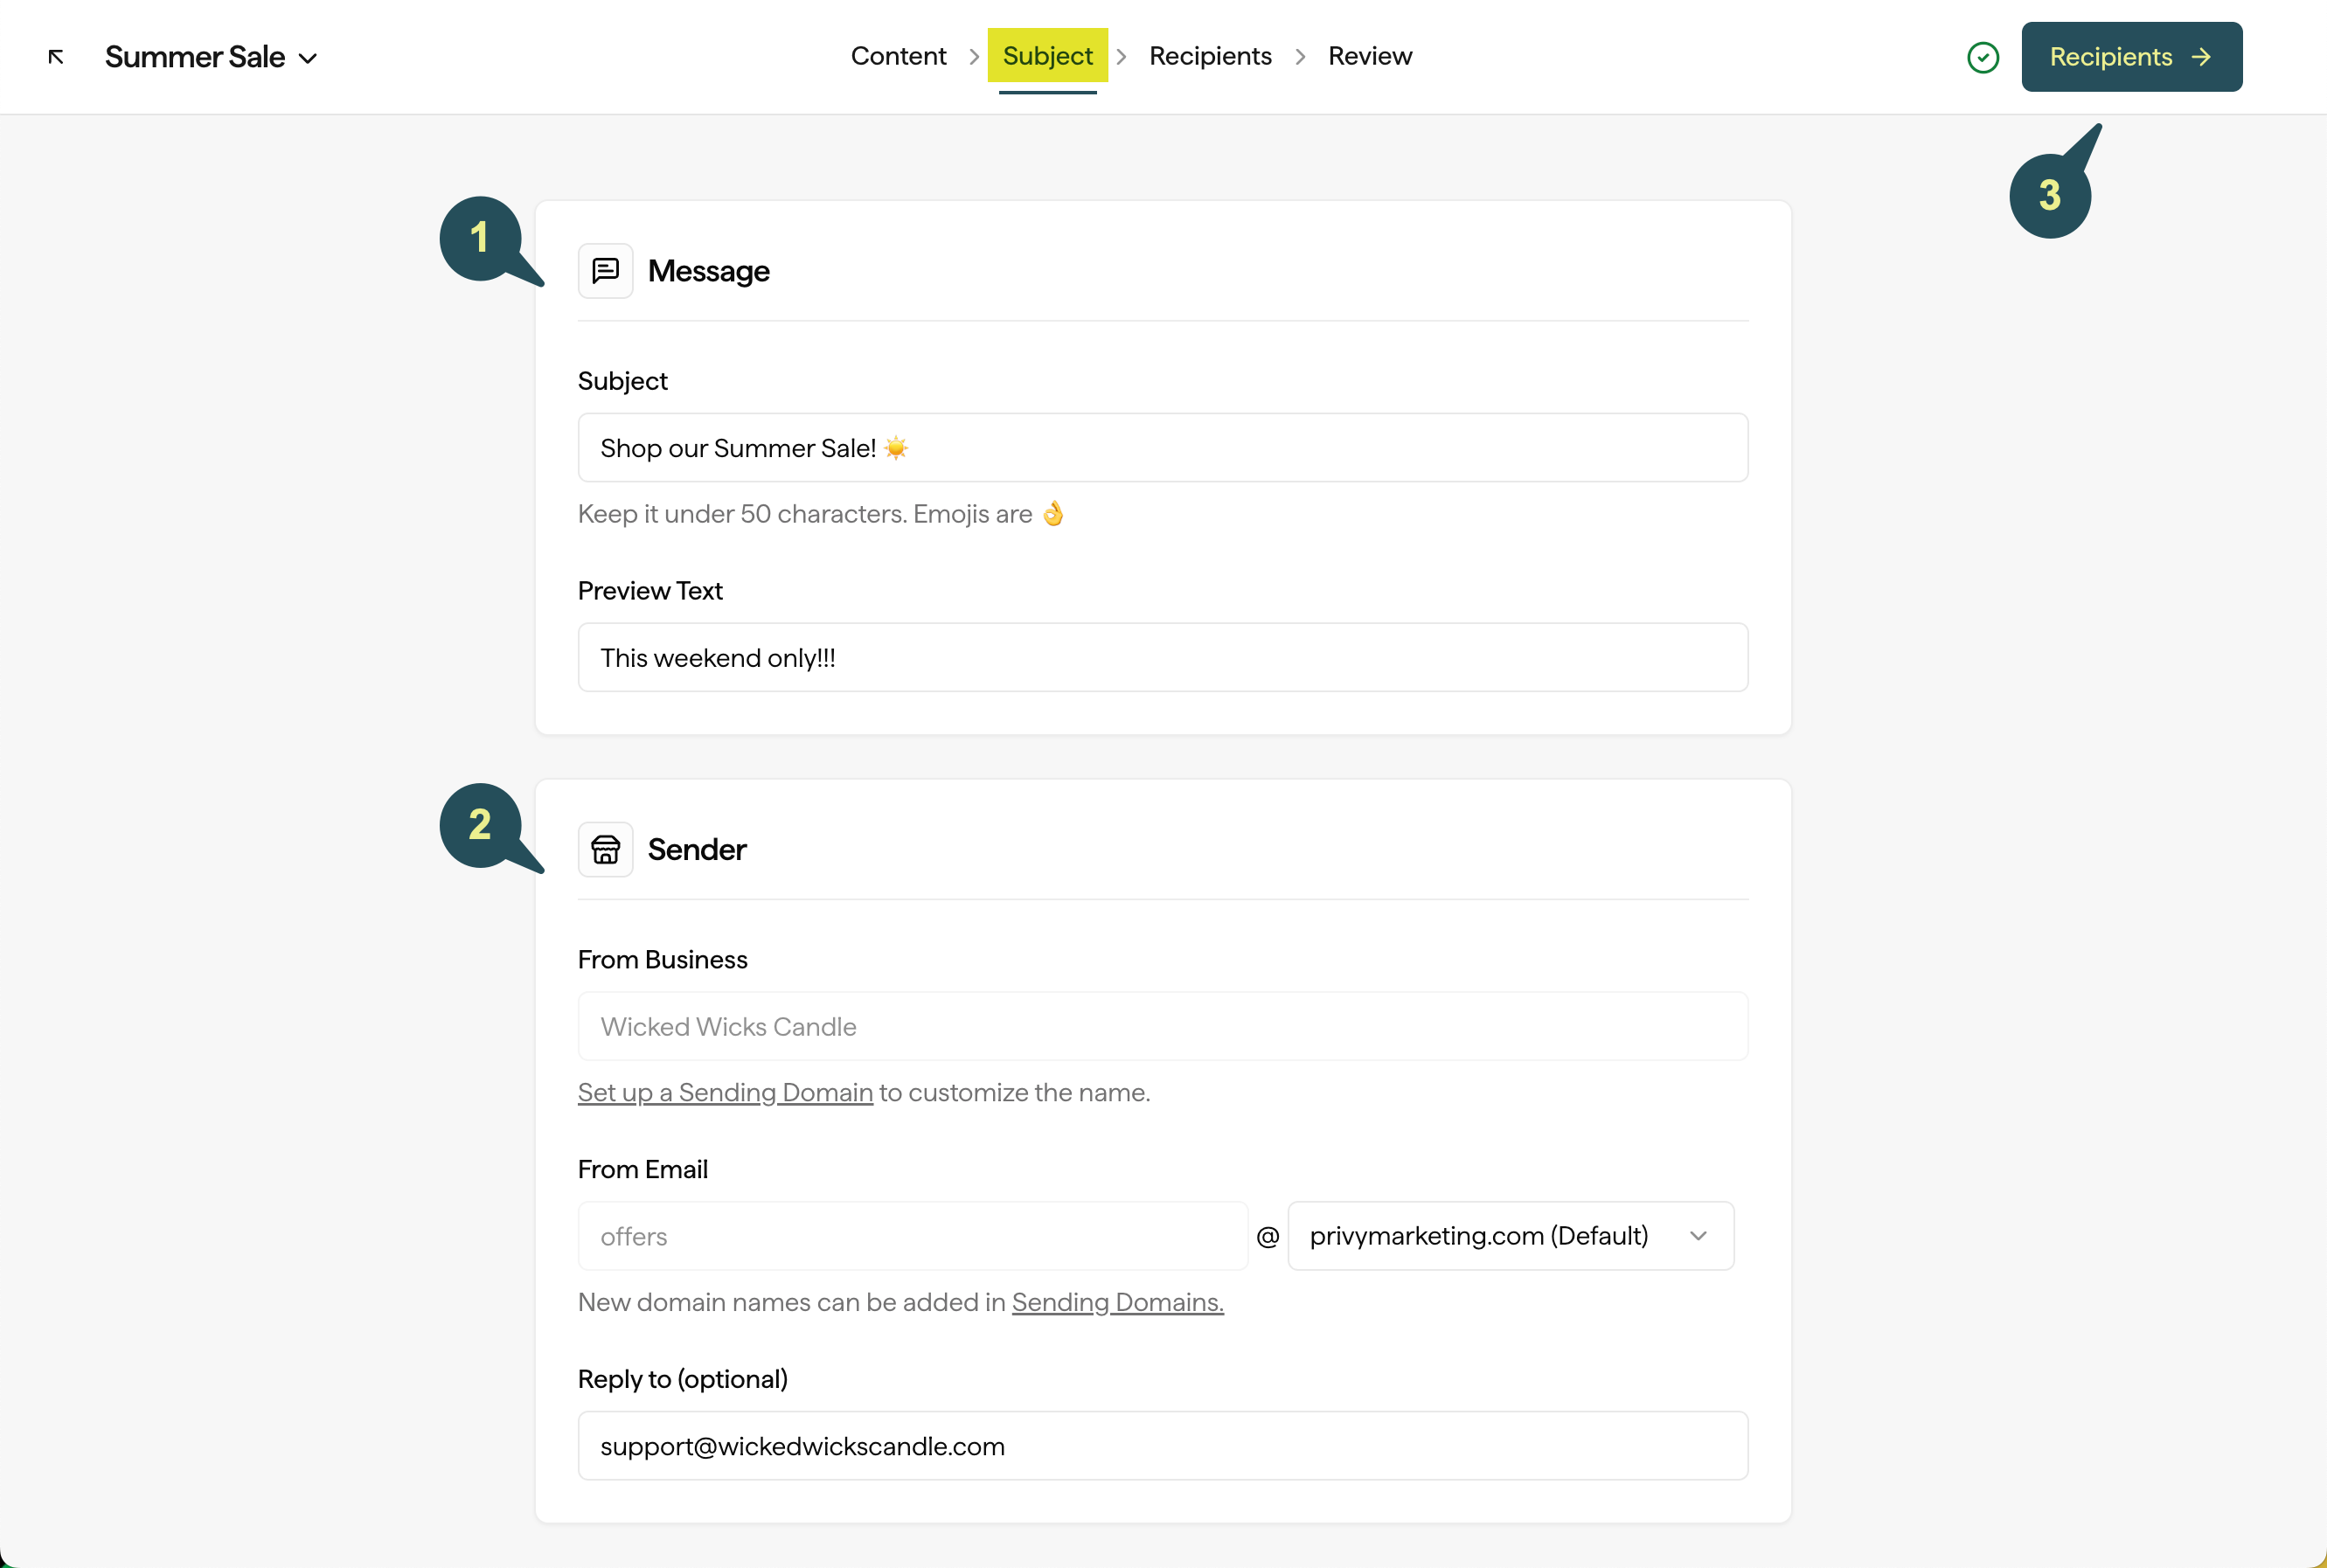
To edit your default Business Name, head to your Business Information settings.To edit your default From Email and Reply To Email, head to your Sender Options settings.To edit your custom sending domain, head to your Sending Domain settings.
Recipients
In your Recipients step, you can select one or more segments to send your email to. You also have the option to exclude a segment, if needed.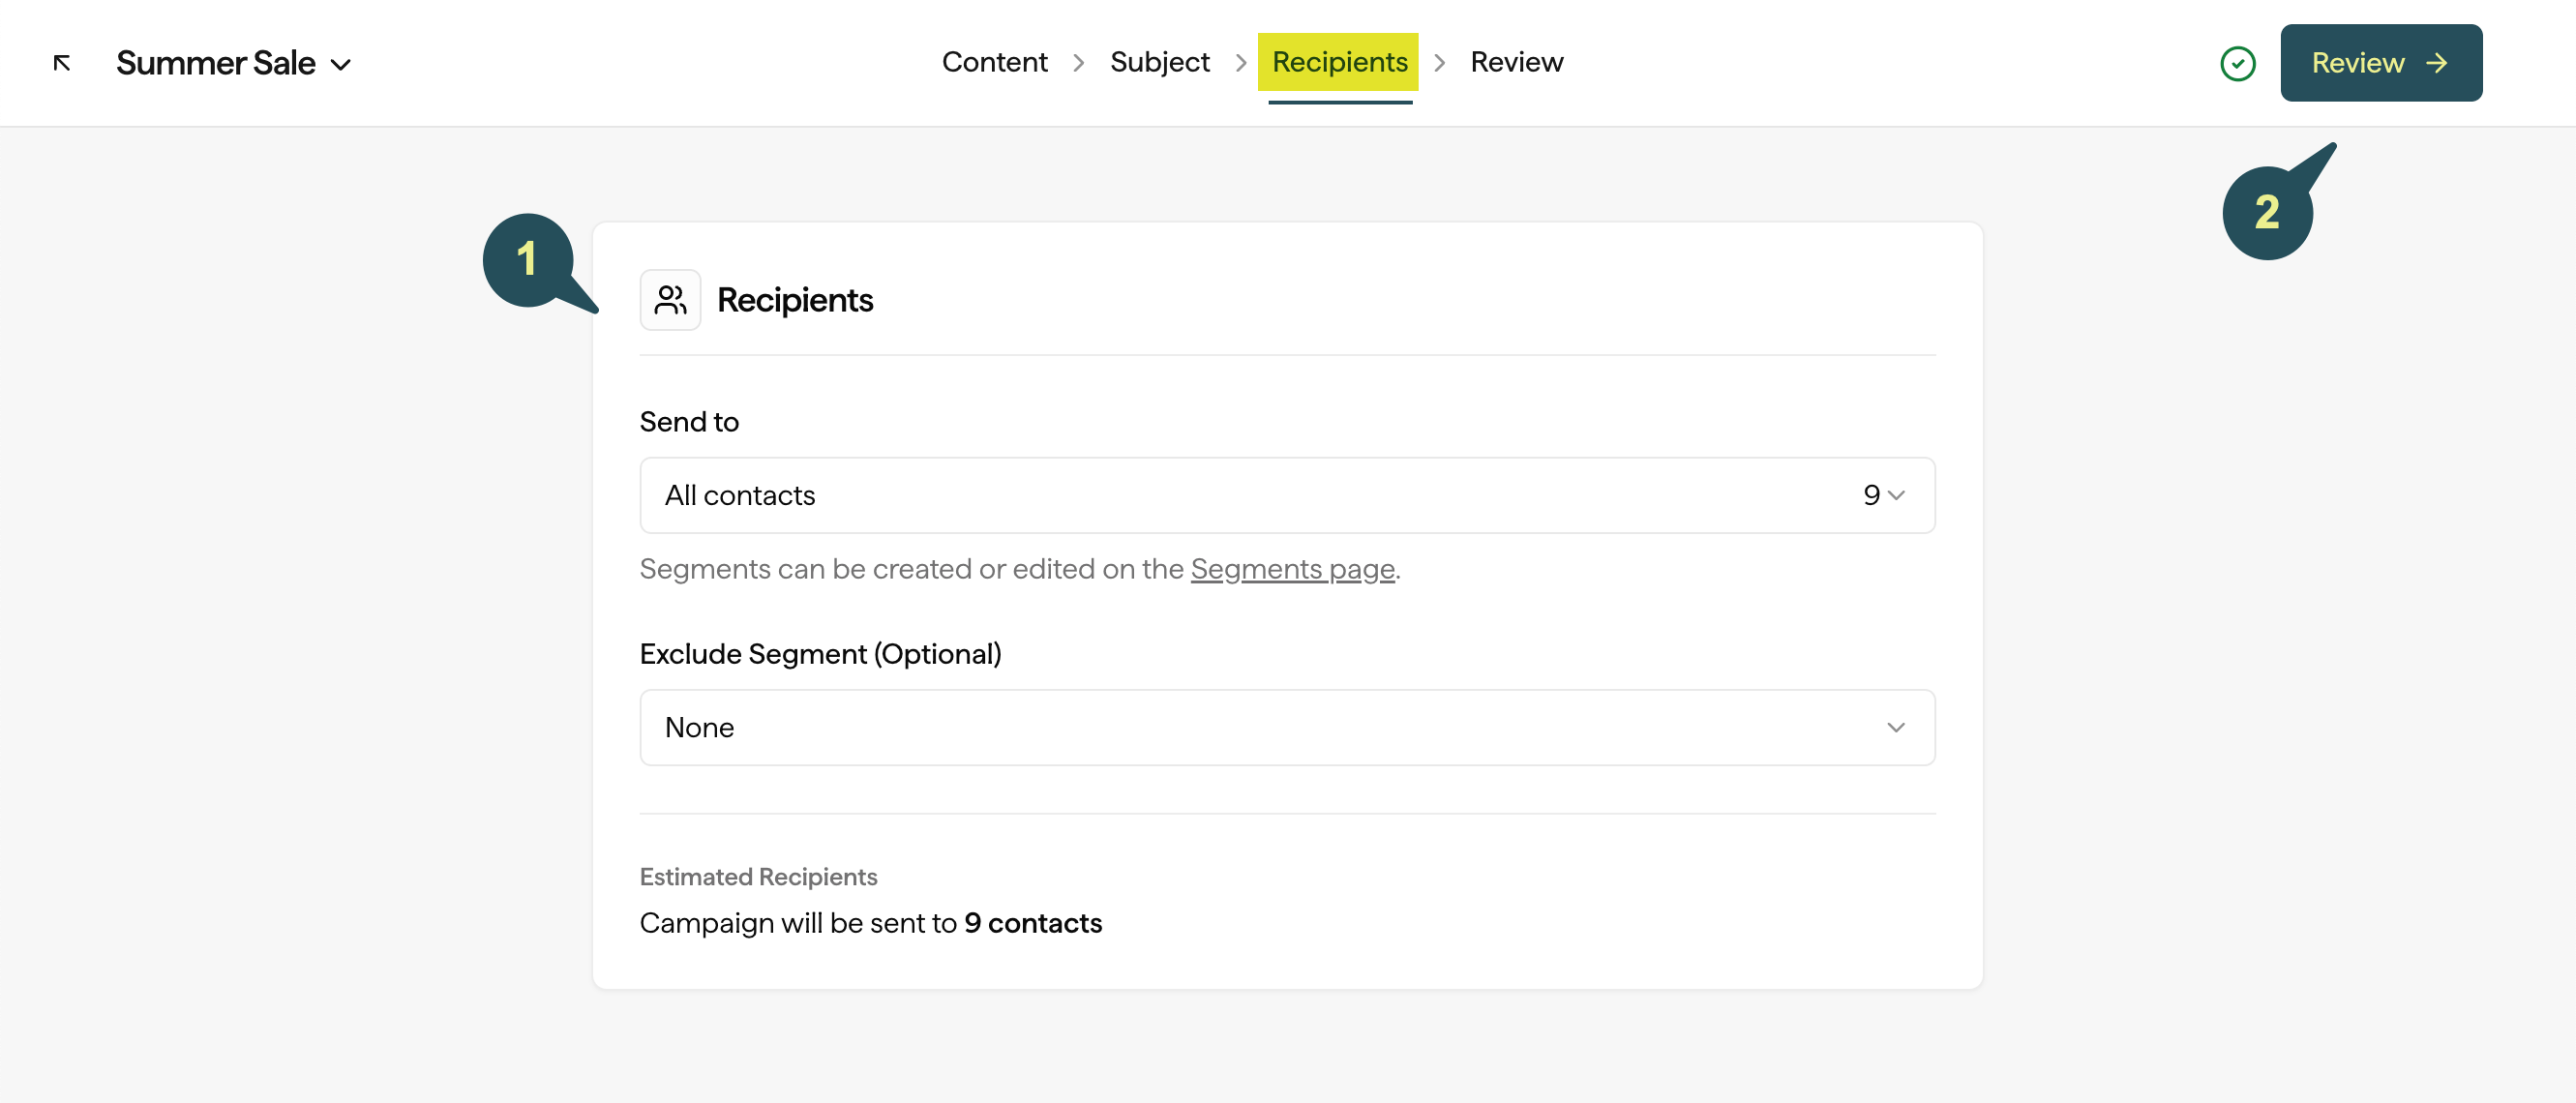
Review your Campaign
In the Review step, you’ll be able to review your email design, subject line, sender details, and total number of recipients, all in one place. You’ll also be able to send or schedule your email as soon as you’re ready.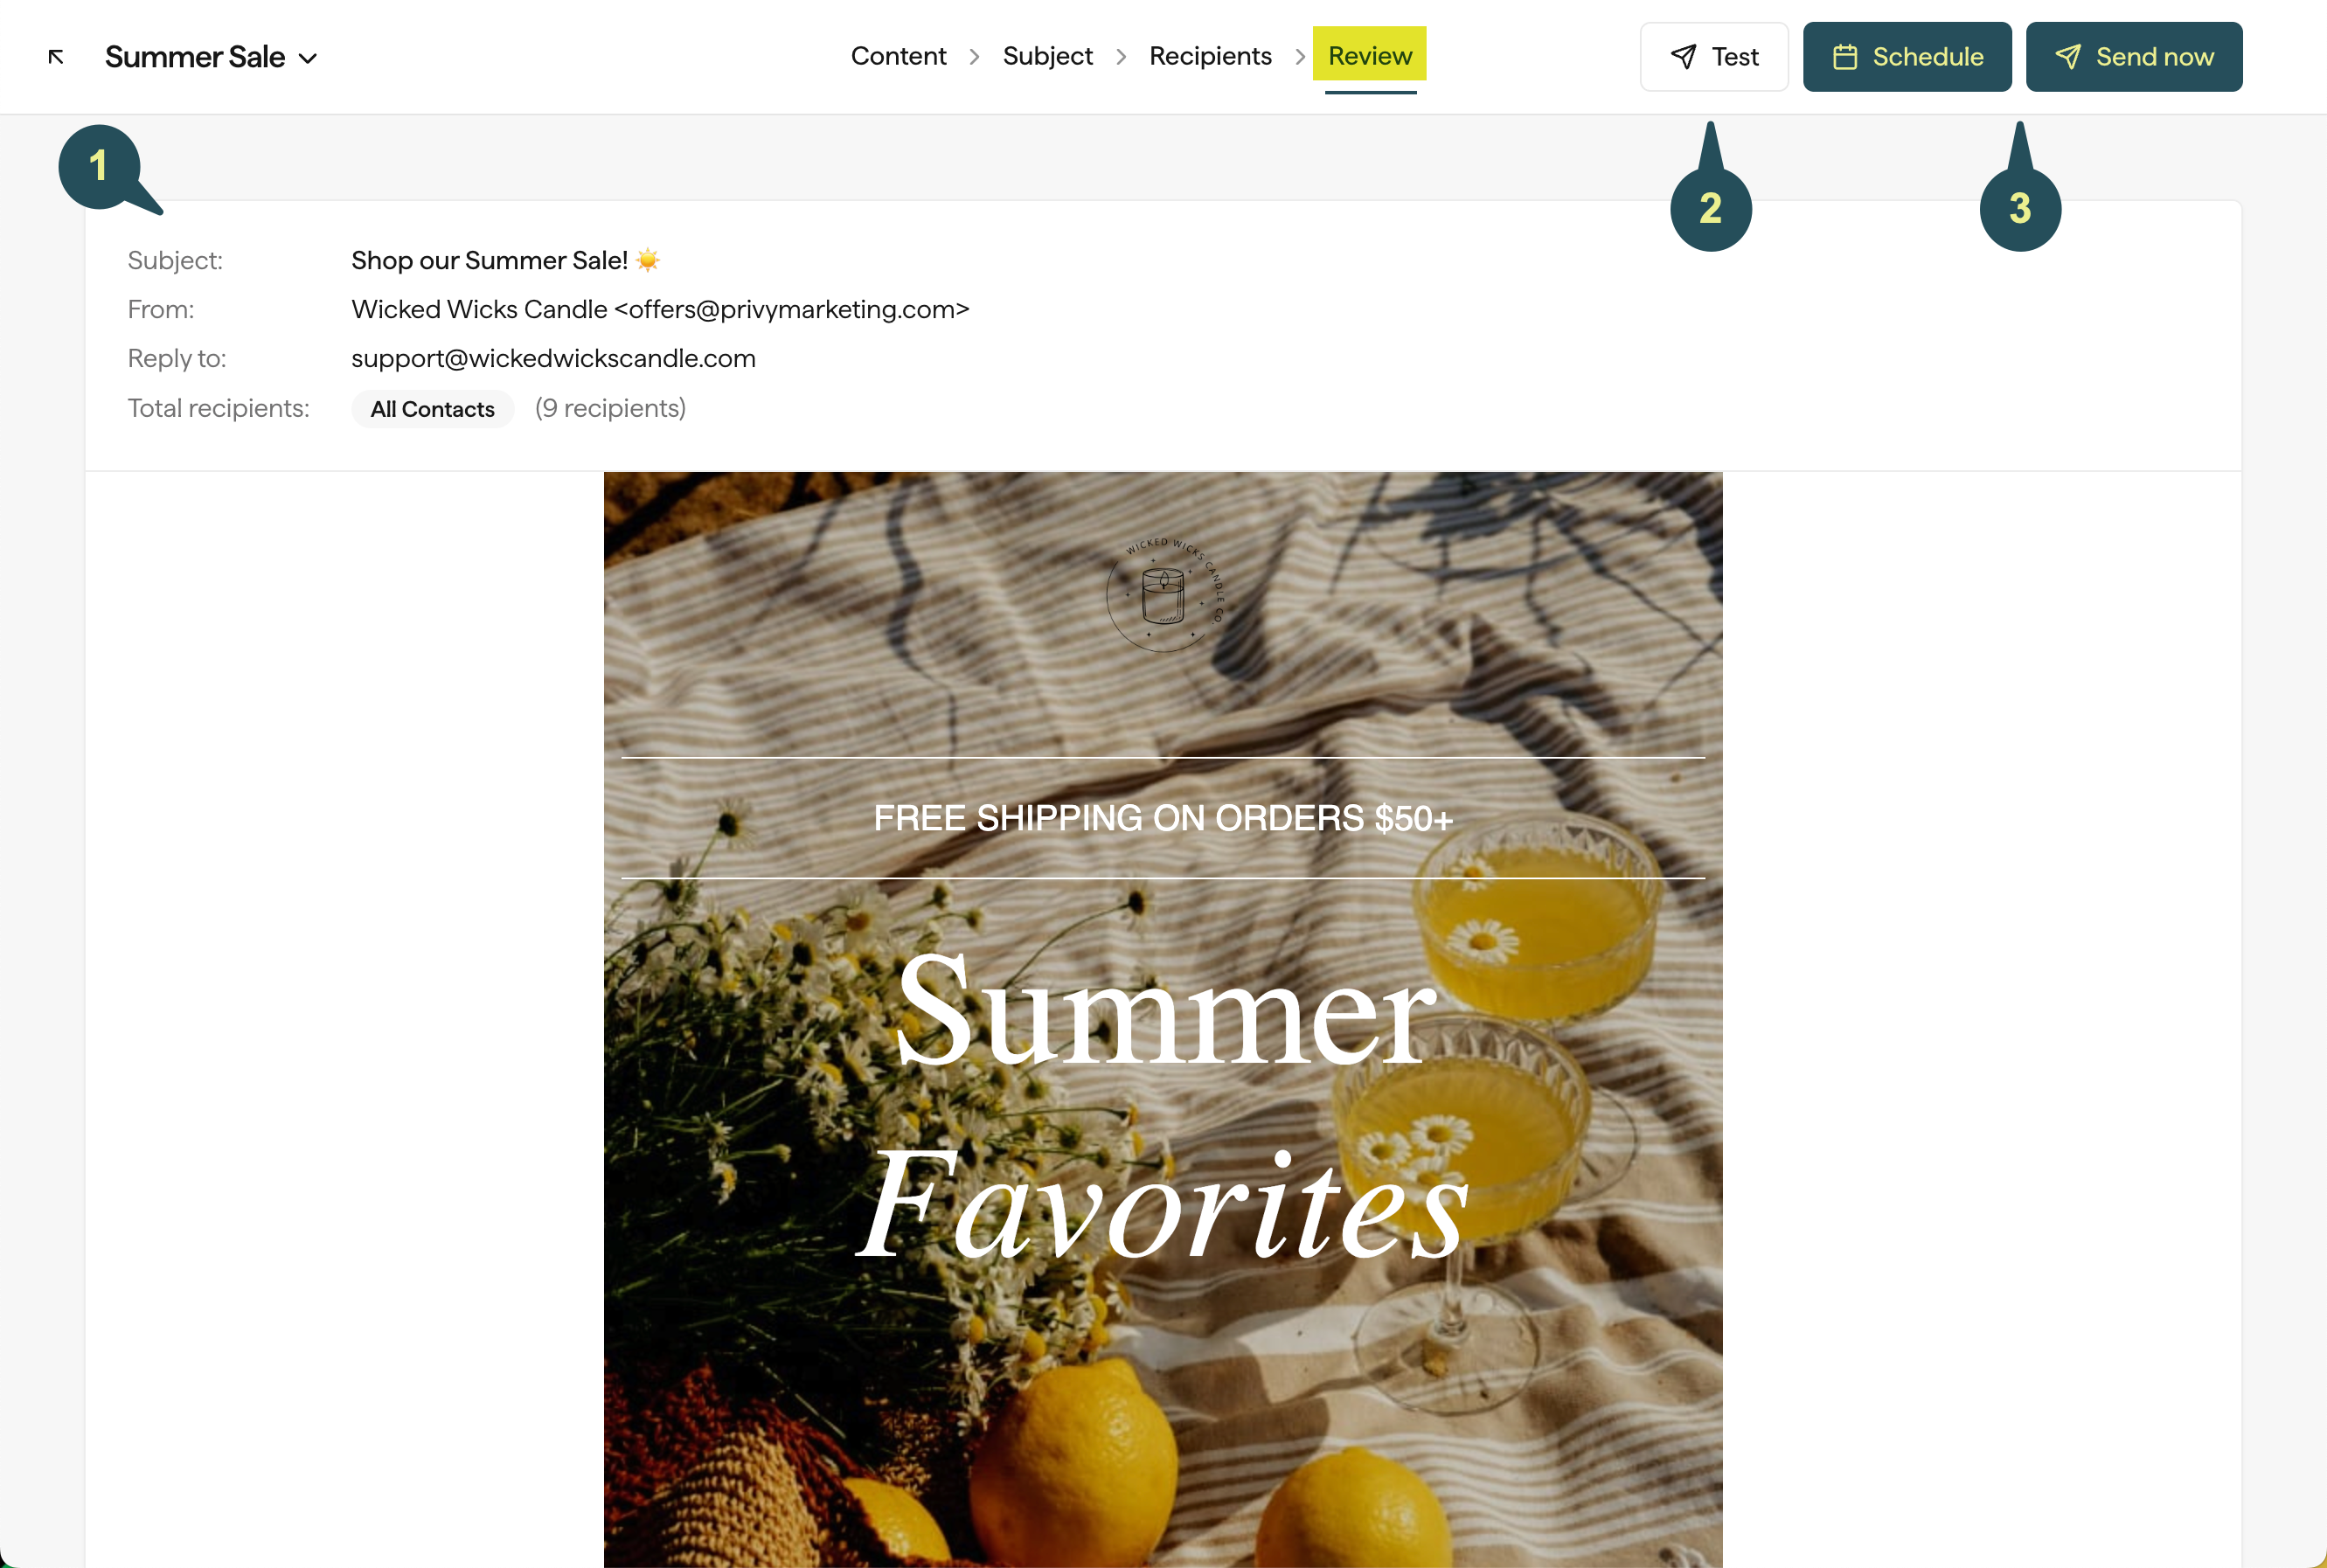
Send a test email
Send a test email by clicking the Test button at the top of the page. You’ll be able to select up to 5 user email addresses to send your test email to.Send or Schedule your campaign
- To send your campaign immediately, press the Send button and Confirm your decision.
- To schedule your campaign, press the Schedule button, specify the day and time you’d like your email to send, and Confirm.
Managing Campaigns
As you create and send campaigns in Privy, you may have drafts that you want to delete, or emails that you want to duplicate.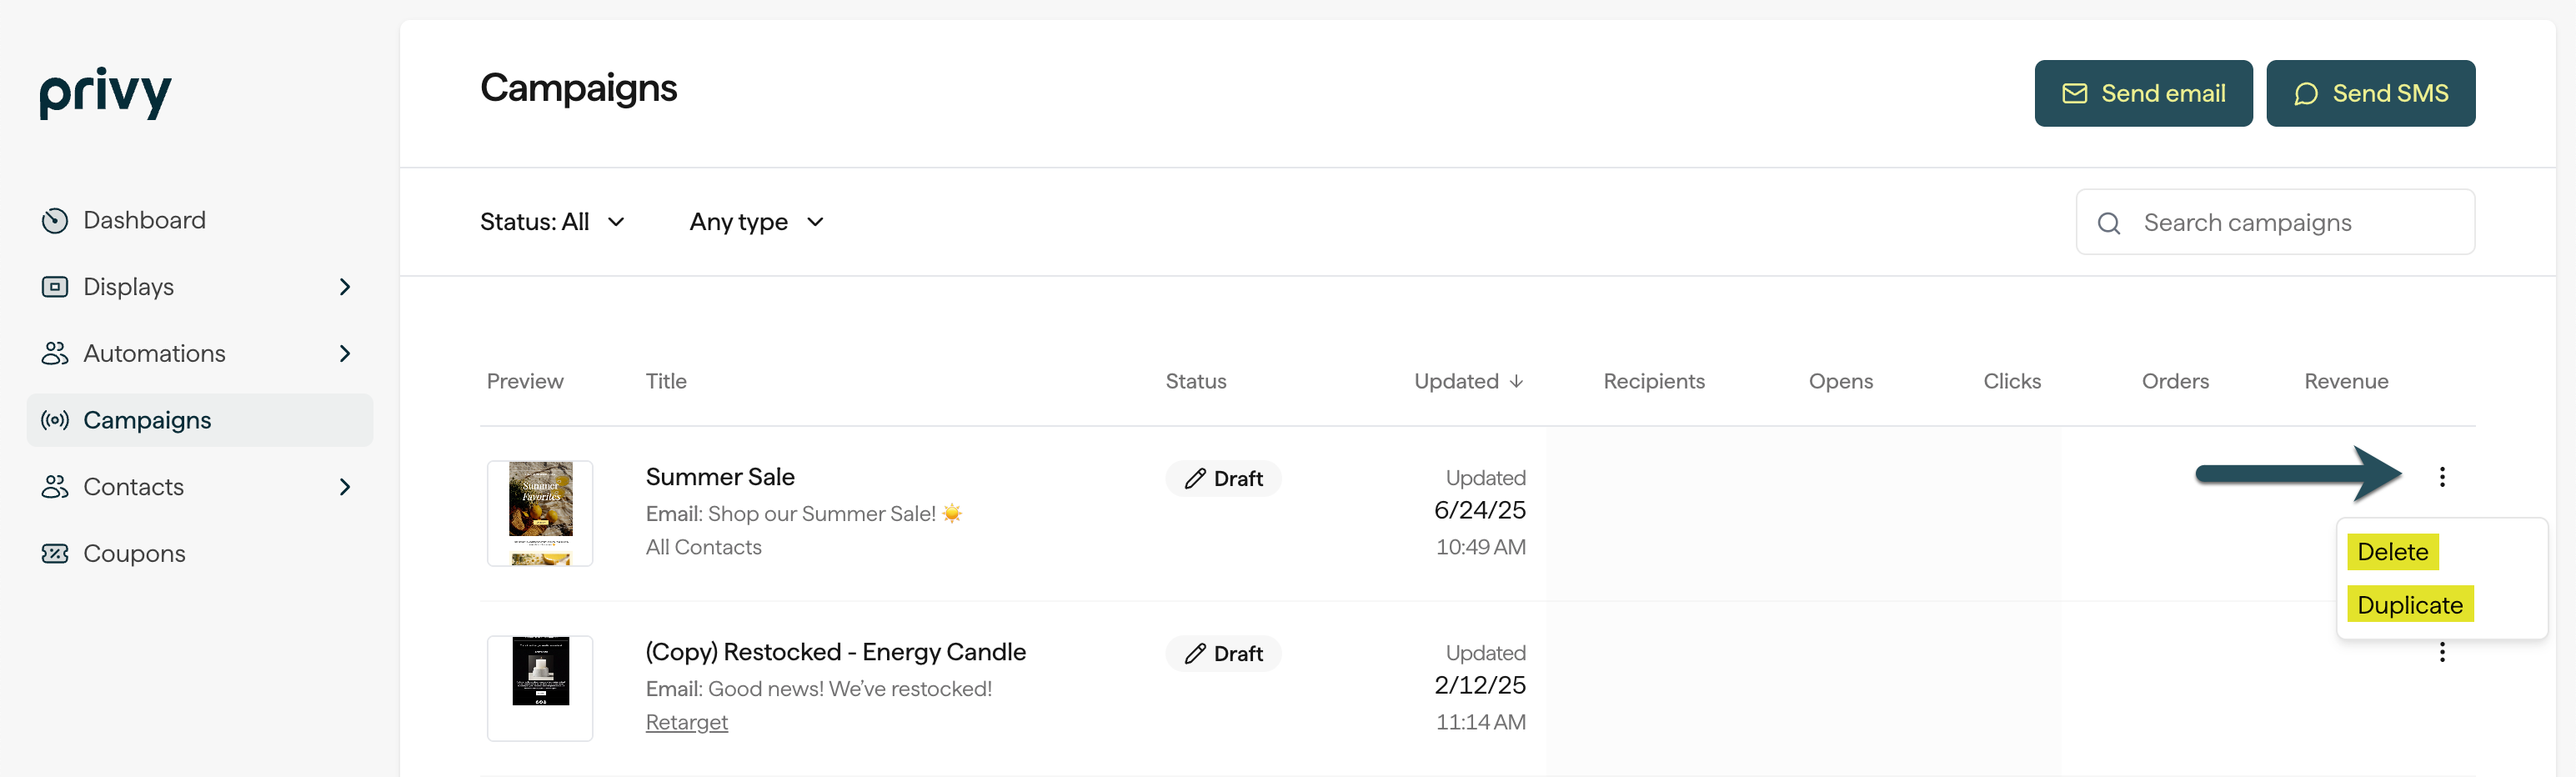
Duplicate a campaign
To duplicate a campaign:- From your Campaigns table, click the dropdown menu to the right of the draft you want to copy. Select the Duplicate option.
Deleting a draft
To delete a draft:- From your Campaigns table, click the dropdown menu to the right of the draft you want to delete. Select the Delete option.
- If you’re on your campaign’s details page, you can also click on the menu beside the Save button. Select the Delete option.