A custom font is one way your brand can express itself and become more recognizable. The font can convey your personality while highlighting how you would like to be perceived by your audience.Documentation Index
Fetch the complete documentation index at: https://help.privy.com/llms.txt
Use this file to discover all available pages before exploring further.
Add a custom font
Fonts that are hosted by online directories and self-hosted are supported. Fonts offered via an online directory like Google Fonts are easier to set up and manage, so they are recommended for most users.Fonts hosted in a directory
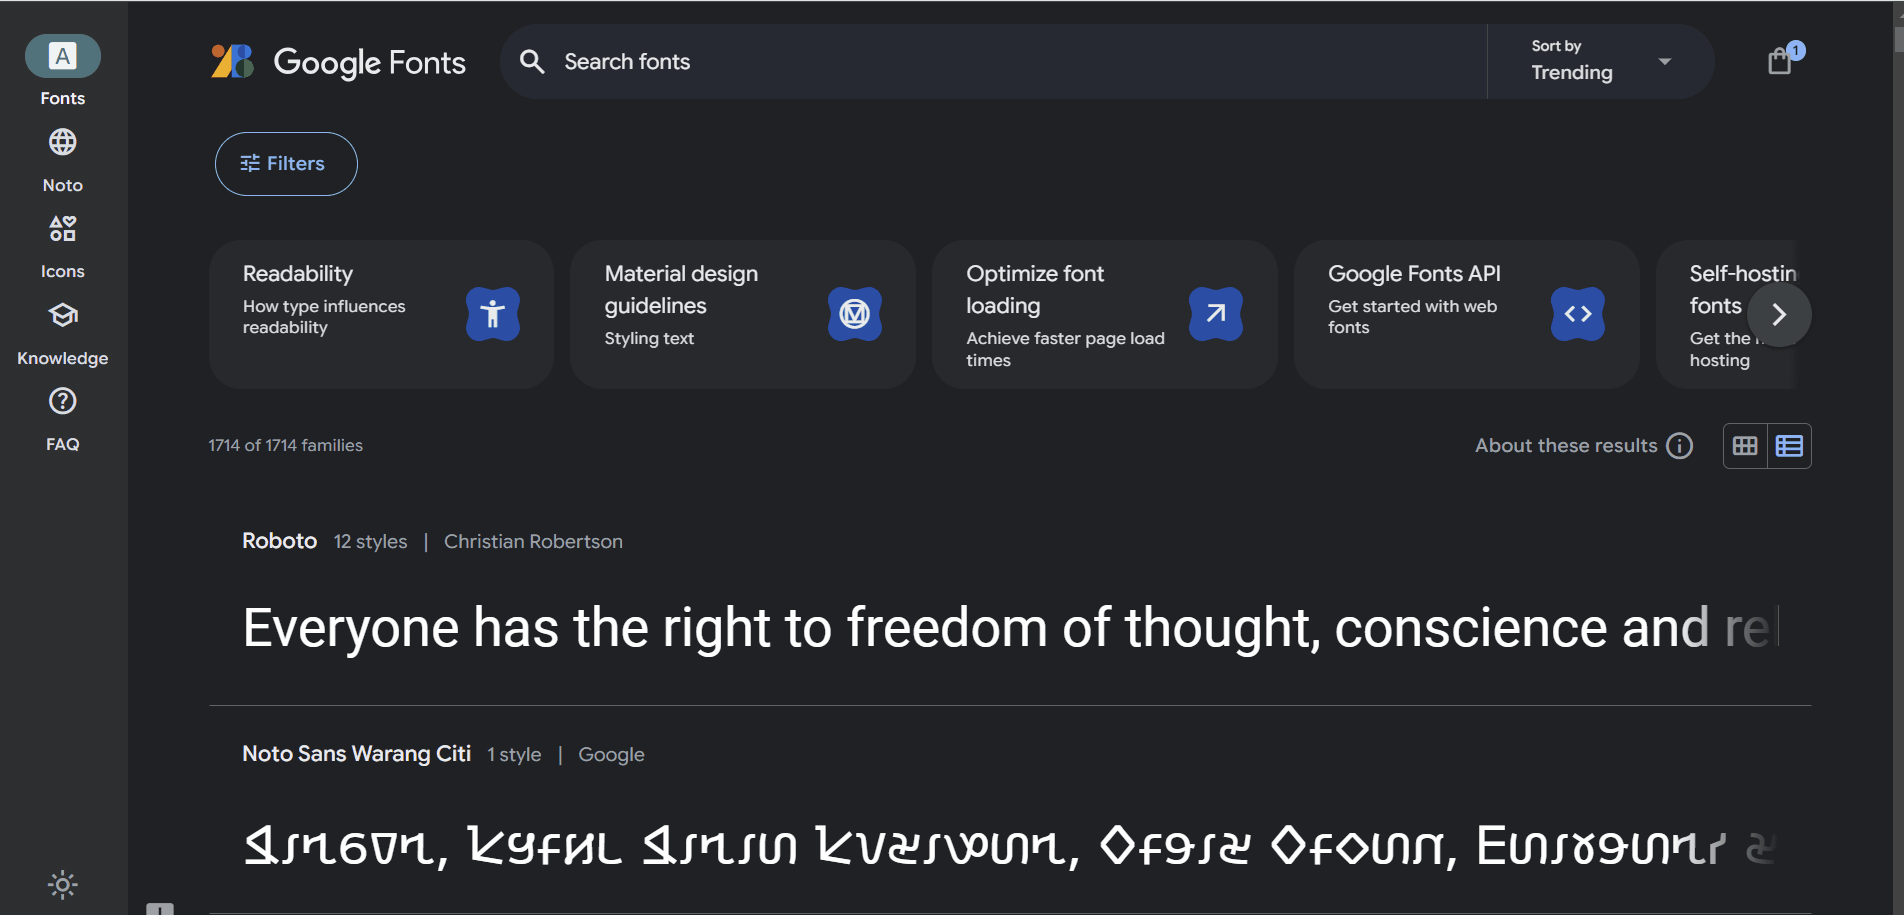
Privy currently recommends Google Fonts, so this example uses its catalog as a reference. That said, the same ideas apply wherever your font is hosted. To add a custom font:- Search for a custom font here.
- Next, click on the font and click the Get Font button on the right side.
- Click the <> Get Embed Code button on the right side
- Then, choose the @import checkbox option
- Here, you’ll see the import code for the font. Copy the URL portion only. In this example, the URL component is https://fonts.googleapis.com/css2?family=Oswald:wght@200&display=swap.
- Once you have the font’s URL, navigate to the Customizations page of your Privy settings.
- Scroll down and click the New Custom Font button.
- Enter a font name. When possible, use the font family from the directory. In this example, the official font family listed in Google Fonts is Lora.
- Next, paste the font URL from earlier in the Font CSS URL field.
- Check the box if you only want this font available on landing pages and embedded forms.
- Click the Save Custom Font button.
Self-hosted fonts
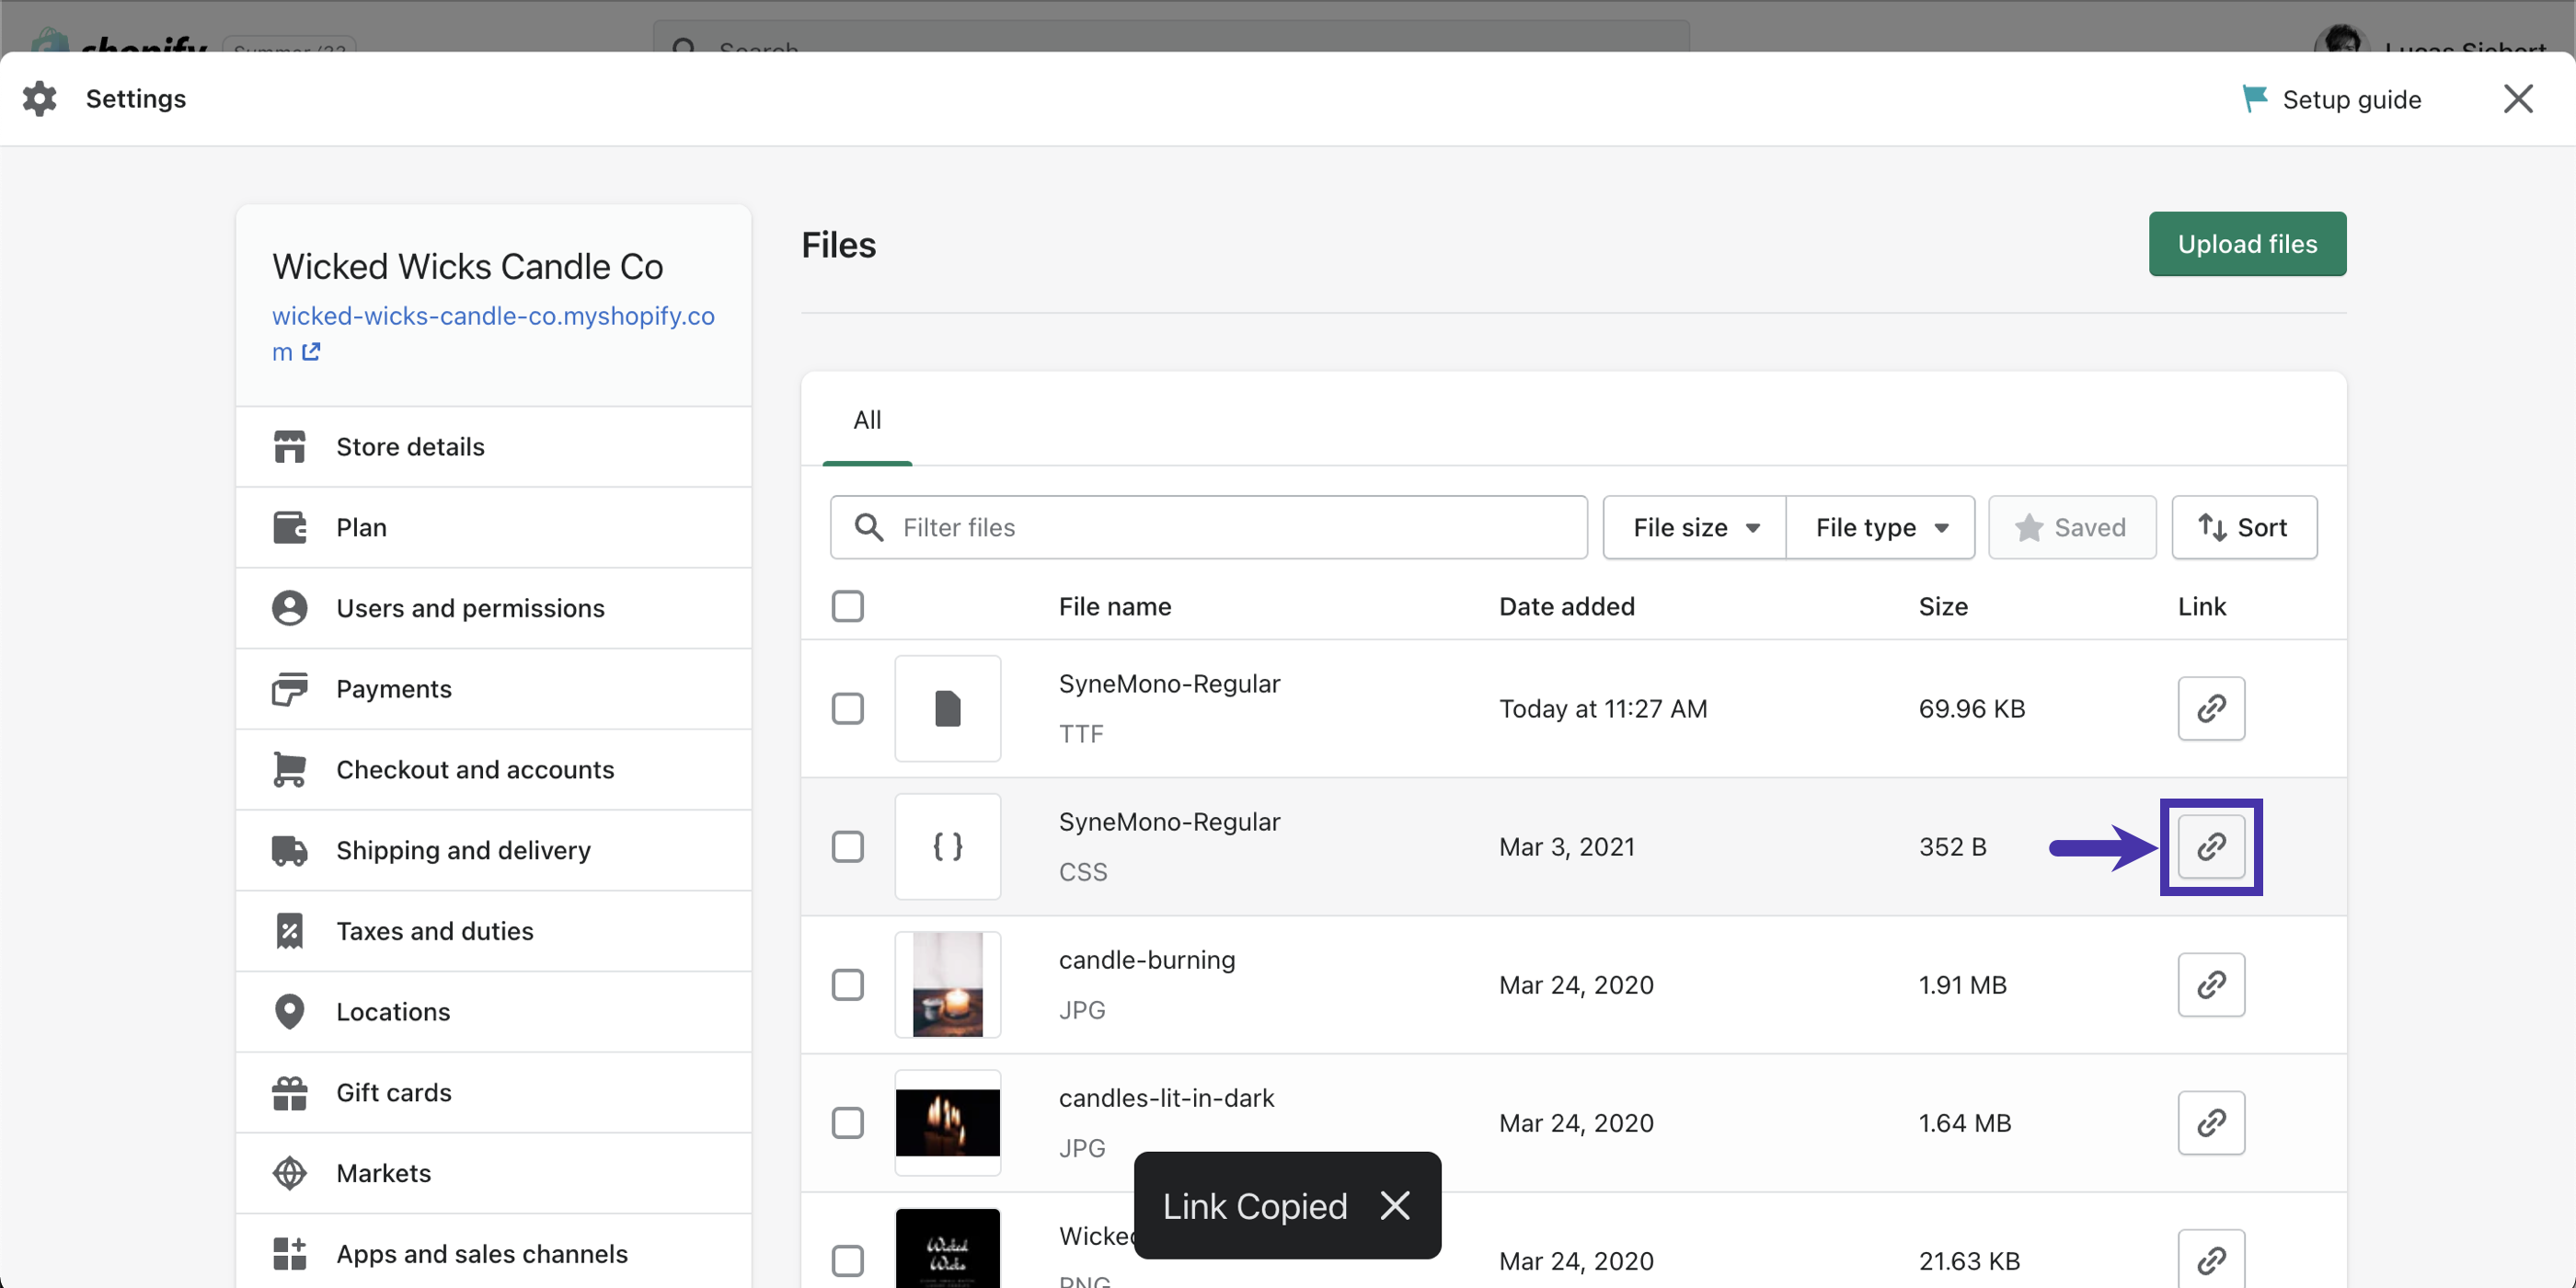
Most Privy merchants decide to self-host store their font files in a storage option provided by their e-commerce provider, so this example uses Shopify as a reference. That said, the same ideas apply wherever your font is self-hosted. To add a custom font:- Ensure the free or purchased font file is downloaded to your computer. In this case, the selected custom font is called “SyneMono-Regular” and was available in the “TTF” format.
- Upload the font to your hosting provider. To do this in Shopify, navigate to Homepage > Content > Files and select the Upload files option at the top-right. The file will upload and be assigned a URL.
- Open a text editor, like Brackets or Sublime Text, to create a font-face file. If you were provided a font-face file, please skip ahead to upload the font-face file.
- In the text editor, paste in the information listed below to create a font-face file. Please make sure to replace the generic information with your font’s information.
- Add your font source URL to the font-face file, and match the format to your file extension. In this case, the URL is listed next to the uploaded font file in Shopify and uses the TTF extension.

- Save your customized font-face file as a CSS file (e.g., SyneMono-Regular.css).
- Upload the CSS font-face file to Shopify and copy the assigned URL.
- Once you have the font’s URL, navigate to the Customizations page of your Privy settings.
- Scroll down and click the New Custom Font button.
- Enter a font name. Use the font family from the directory when possible. In this example, the official font family is SyneMono-Regular.
- Next, paste the font URL from earlier in the Font CSS URL field.
- Check the box if you only want this font available on landing pages and embedded forms.
- Click the Save Custom Font button.
Use a custom font
To use your custom font:- Select an element that contains text in an onsite display.
- In the sidebar, locate the Text section.
- Select the custom font from the dropdown menu.
- Customize the remainder of the display and Save.
Remove a custom font
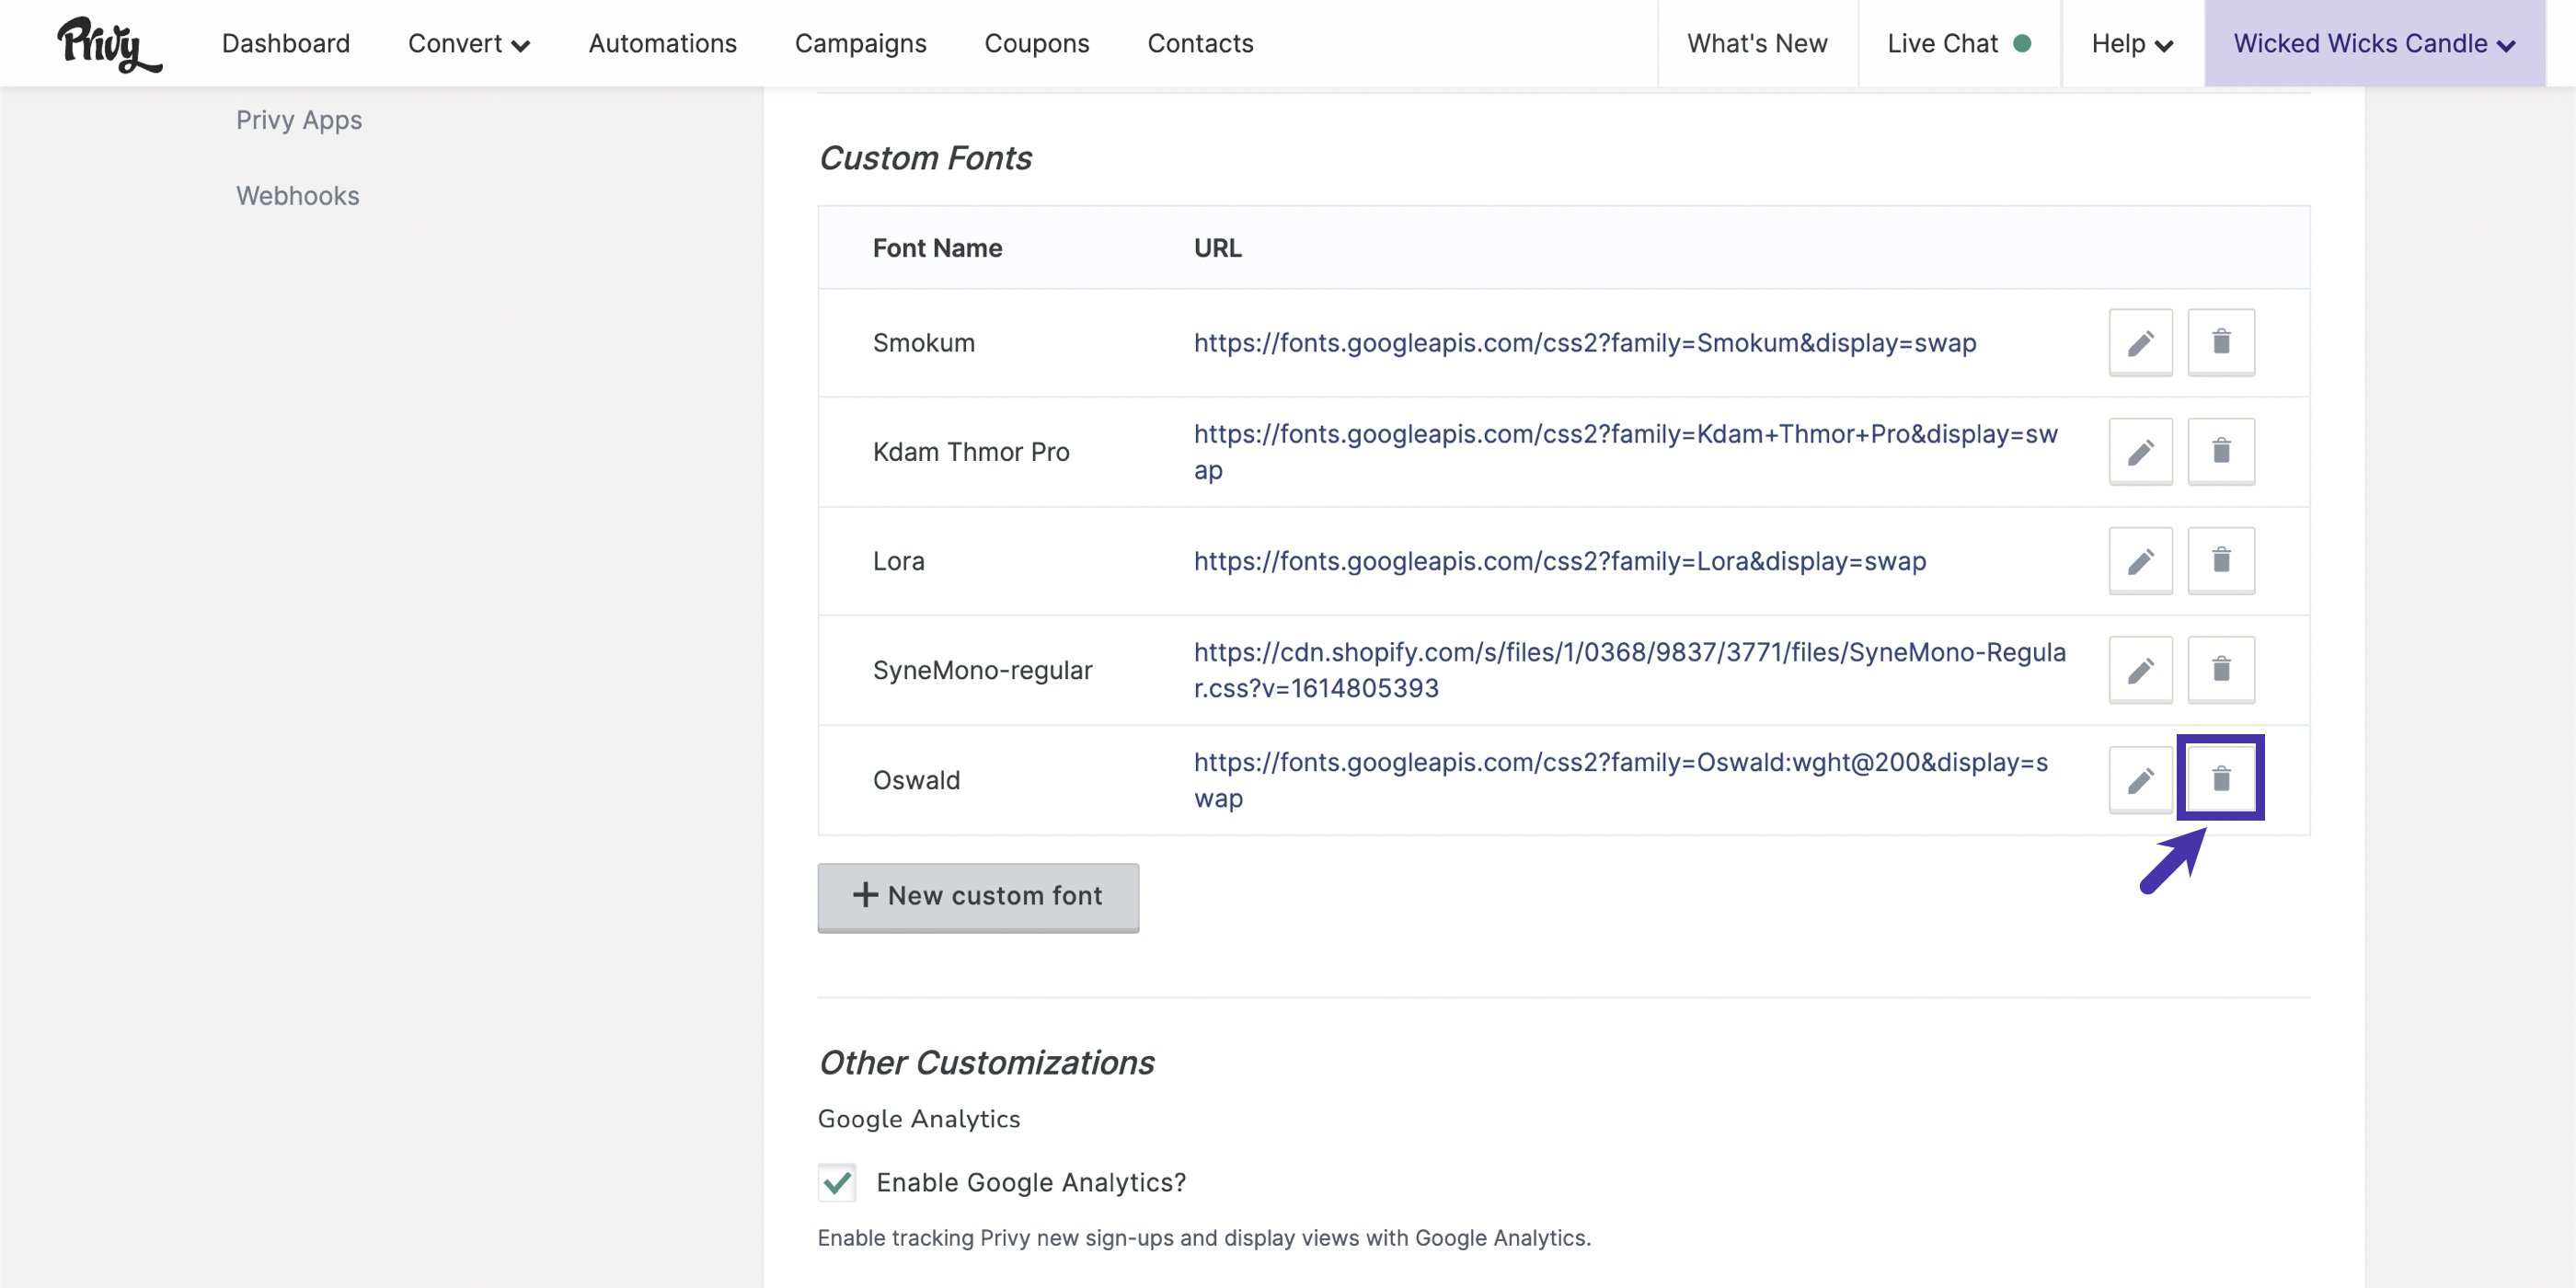
To remove a custom font:- Navigate to the Customizations page of your Privy settings.
- Scroll down and click the Delete icon next to the font you’d like to remove.
Troubleshooting
If your custom font isn’t working as expected, check out these common problems and solutions:The font’s URL is not valid
The most common issue with custom fonts is that the provided URL is formatted incorrectly. To check and correct this possible error:- Check the URL added to Privy, making sure it starts with HTTPS:// and does not end with a font file extension (e.g., .woff2).
- Try opening the URL by either clicking on it or copying and pasting it into a new tab. It should open a plain text CSS file containing the font information. If this action triggers a download of the font file, it is not the correct URL.
The font name and font family don’t match
For Privy to reference the correct custom font, the font name in Privy needs to match the font family listed in the font file. To confirm that the two values match, open/visit the font URL and check the font-family line.
