Create a new Cross Sell display
To create a Cross Sell display:- Navigate to Convert > All Displays and click the Create New Display button.
- Select the Increase Order Value filter on the left side menu of the Templates dashboard.
- Select one of Privy’s “Cross Sell” templates and click Get started.
Customize your Cross Sell
Now that you’ve selected your template, it’s time to select which product you want to promote, and customize the display’s appearance.- Edit your display’s background color, sizing, and display type on the right side of the editor.
- To add new elements, hover over your display’s content and click the blue ‘plus’ sign, then select the desired element from the menu and customize.
Choose your product
By default, your template will have a Product block included. To select your product, hover over the elements and click. On the right side, you’ll be able to search and select which Shopify product you want to promote. Once you select your product, Privy will automatically pull in its title, description, and price information. It will also auto-fill the button’s URL to add this product to cart on-click. You can customize how much of this information you want visible by checking and unchecking the boxes on the right. To edit a specific component of your product block (i.e., the text or the image), click directly on the element you want to change and customize its settings on the right. Don’t forget to Save your changes!Edit your settings
When you’re happy with your display’s design, you’ll want to head over to Settings to set up your targeting so that your Cross Sell shows at the right time to the right audience.Triggers and visibility
For a Cross Sell, we want to set the “Time on page” trigger setting to Immediately. All other settings can remain the same!Audience Targeting
There’s a few different approaches you can take to Audience Targeting for your Cross Sell. Select which goal you have in mind for this display to reveal which targeting you should set up:I want to suggest a product that pairs nicely with what the customer added to cart.
I want to suggest a product that pairs nicely with what the customer added to cart.
Add a new targeting condition for 
Cart Product IDs + contains any of and then select which product(s) you want to include.My shopper is close to free shipping, so I want to get them over that threshold.
My shopper is close to free shipping, so I want to get them over that threshold.
Add a new targeting condition for 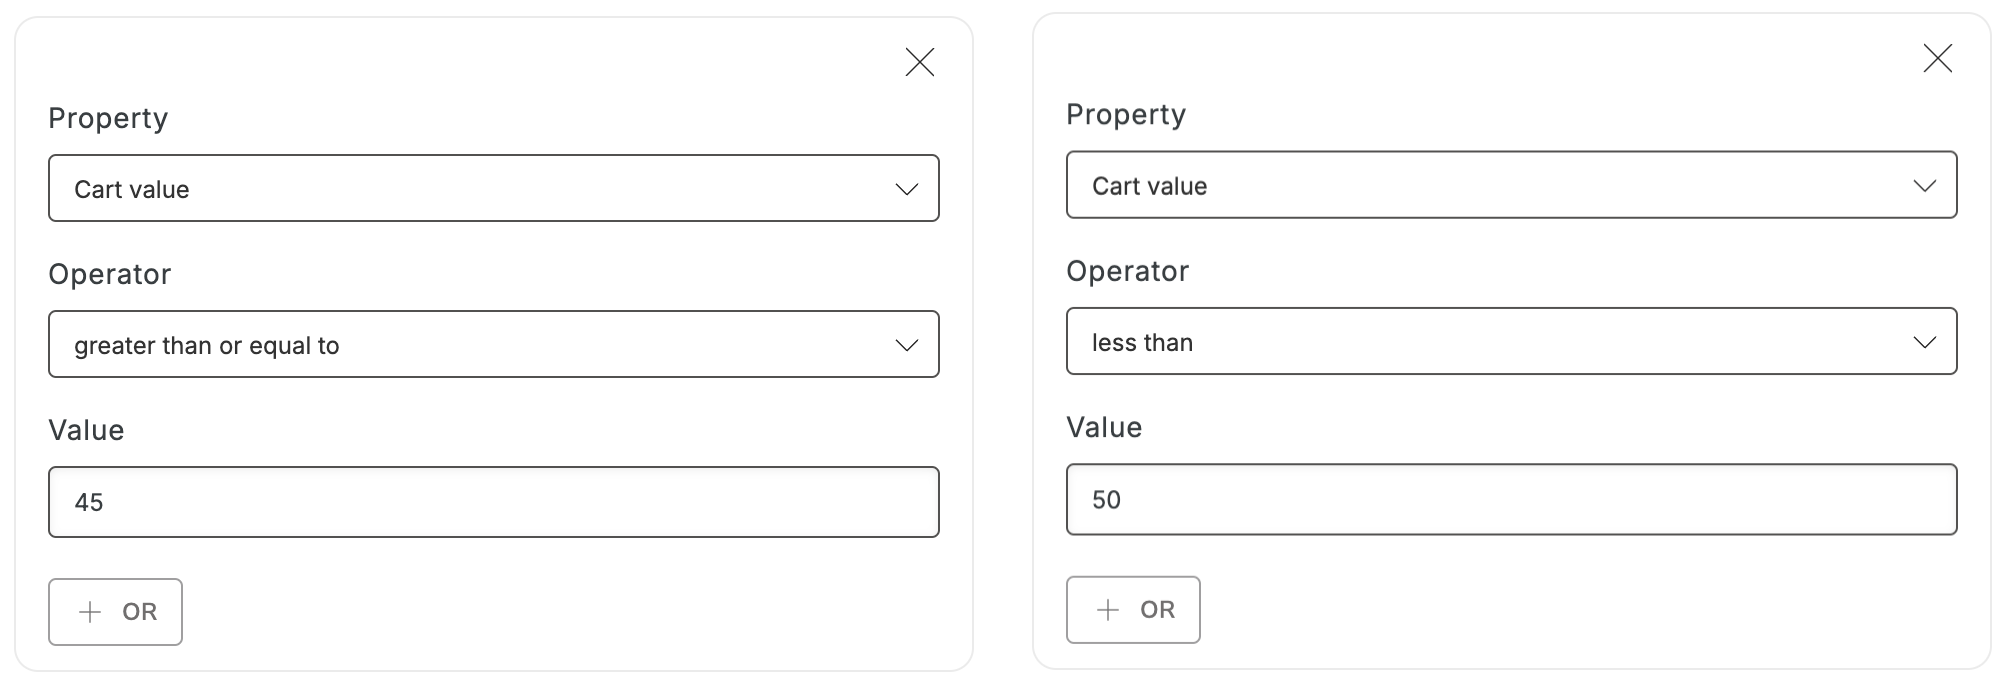
Cart Value + is greater than or equal to and then enter a value.
Add a second targeting condition for Cart Value + is less than and then enter your free shipping threshold.I want to promote a bundle that contains an item that my shopper added to cart.
I want to promote a bundle that contains an item that my shopper added to cart.
Add a new targeting condition for
Cart Product IDs + contains any of and then select which product(s) you want to include.