Create a new Flow
To create a new Flow:- Navigate to Flows and click Create Flow.
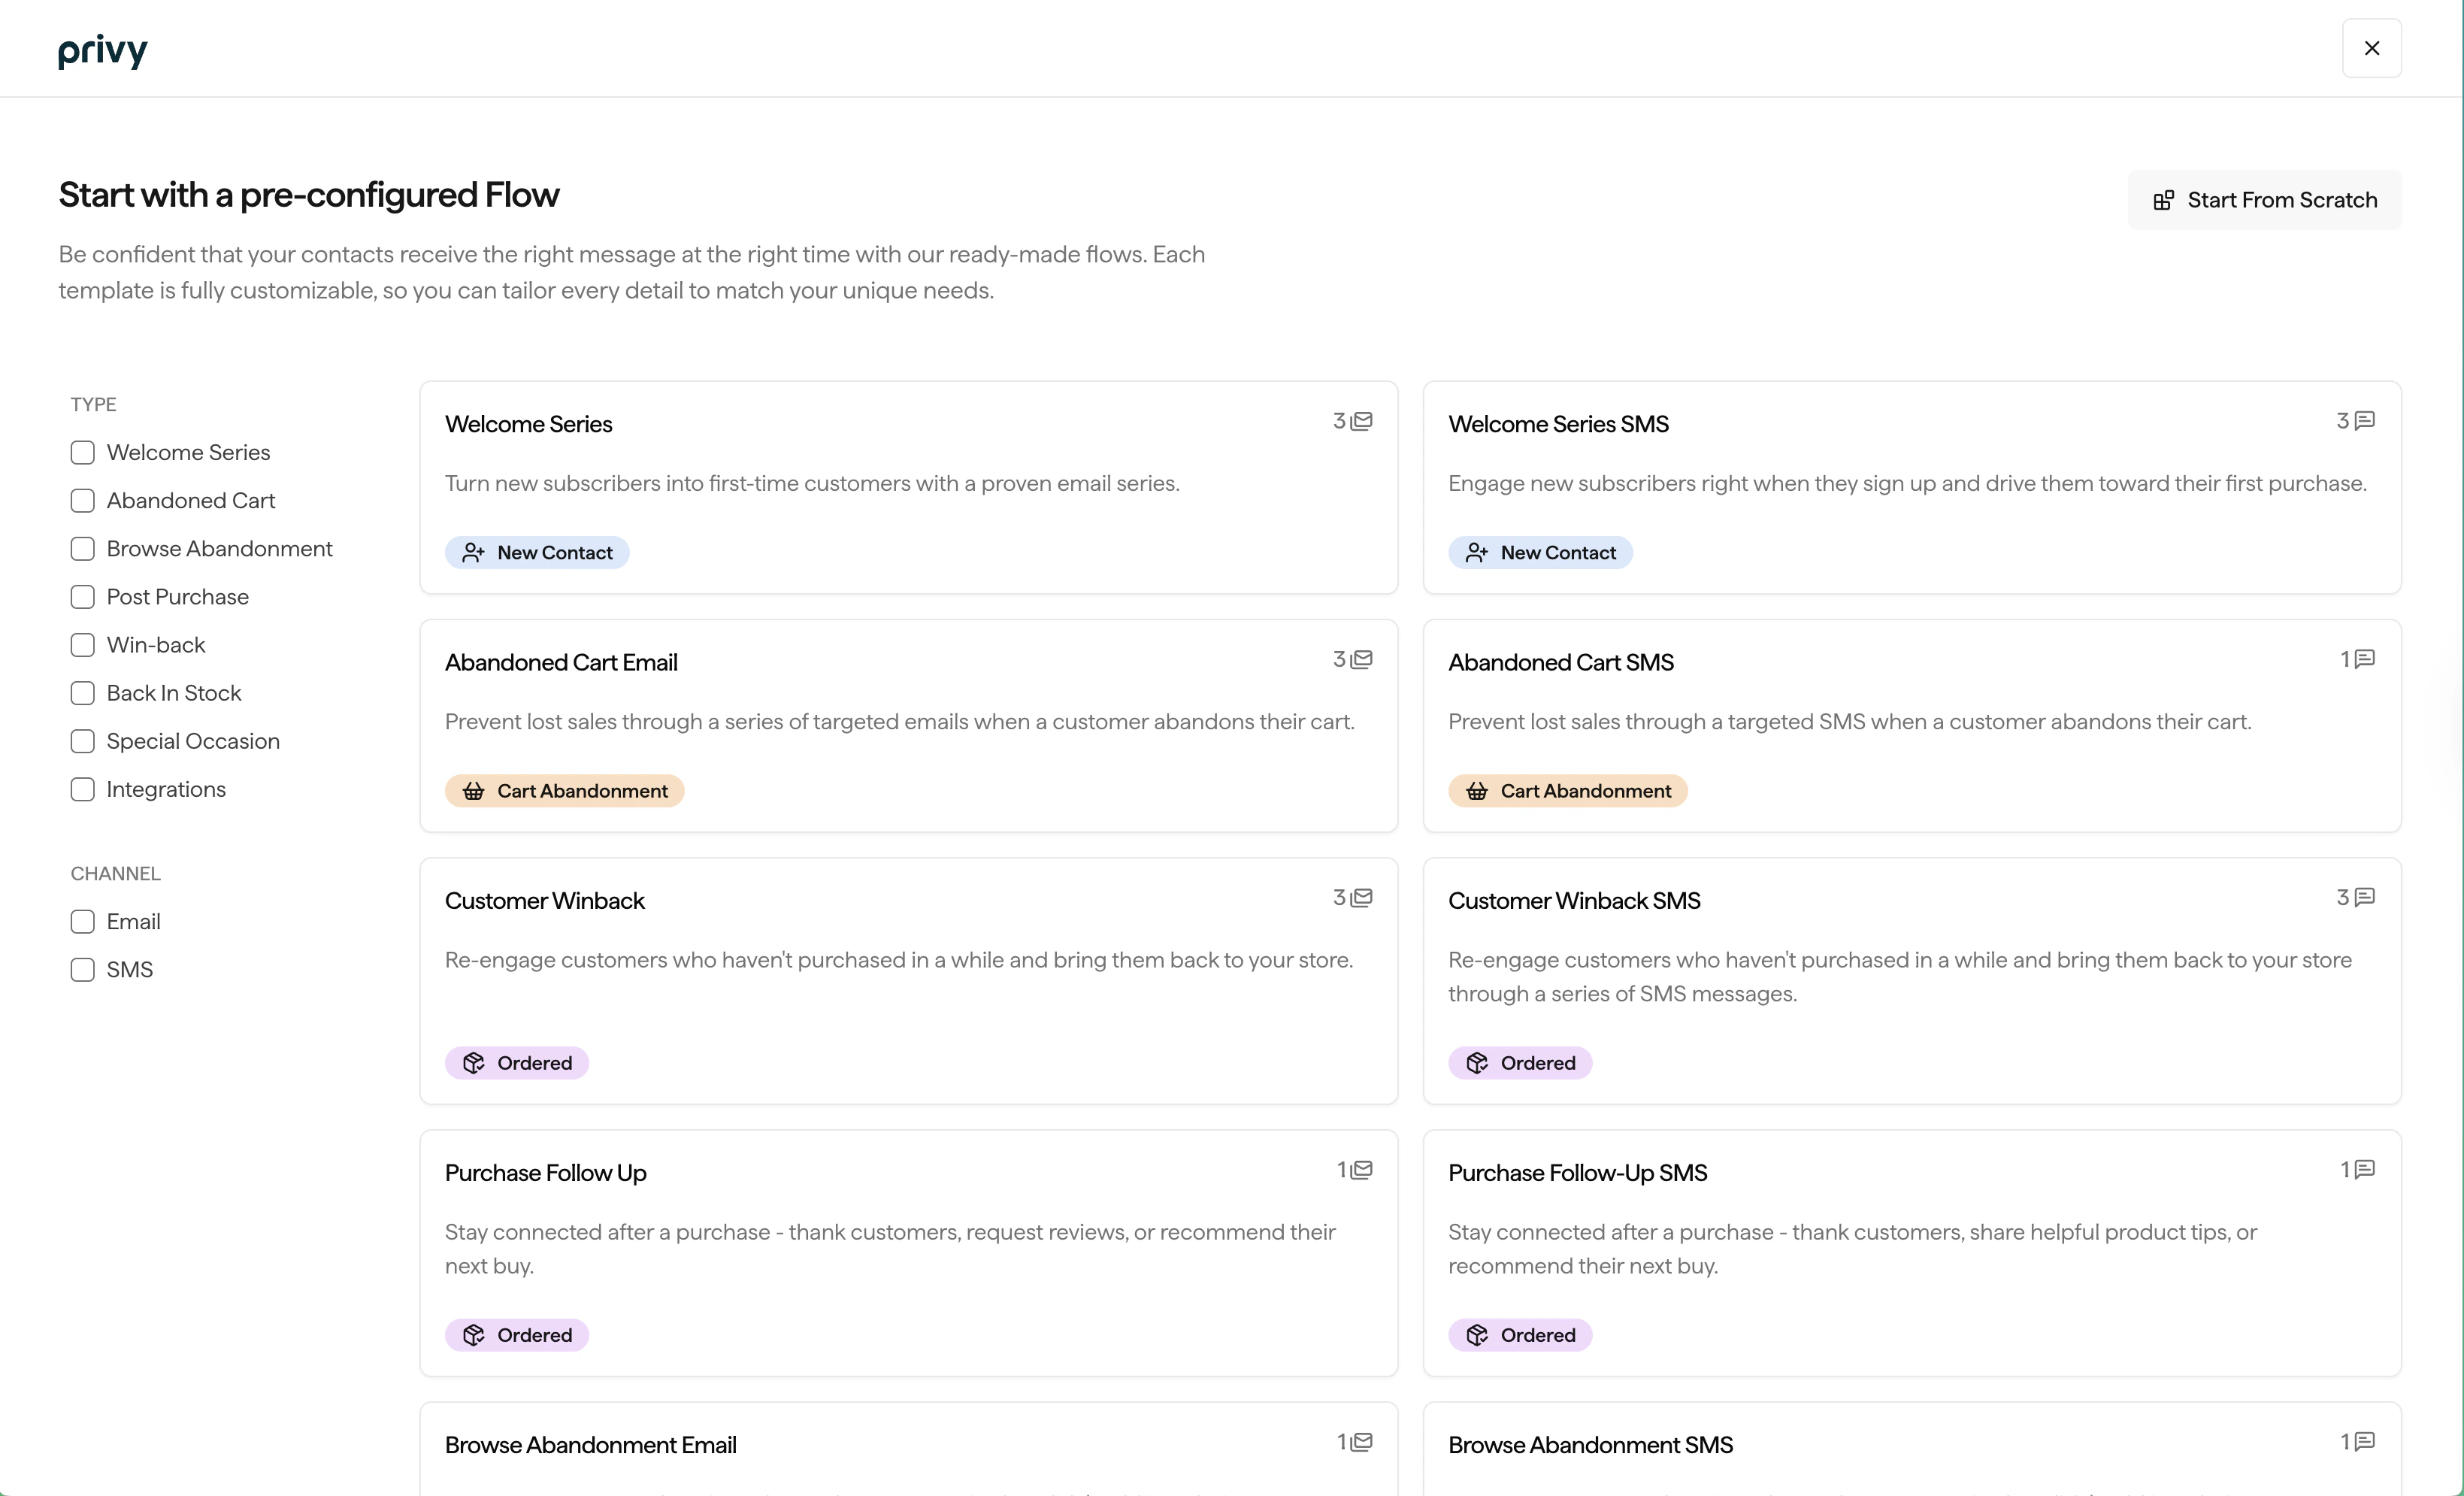
- Select which type of Flow you’d like to build. Available templates include:
- Welcome Email and Welcome SMS — greet new subscribers
- Subscriber Conversion Series — convert email subscribers into SMS subscribers
- Abandoned Cart and Abandoned Cart SMS — recover lost sales
- Browse Abandonment — re-engage visitors who viewed products but didn’t add to cart
- Purchase Follow Up and Post-Purchase SMS — nurture customers after a purchase
- Customer Winback and Winback SMS — re-engage lapsed customers
- Back in Stock — notify contacts when out-of-stock items return
- Integration Event — trigger flows from third-party events (e.g., Rivo, Yotpo)
- Special Occasion — automate around important dates for your contacts (for example birthdays or anniversaries)
- Start From Scratch — choose a custom trigger, including when a contact is tagged or untagged
Naming your Flow
To customize your new Flow’s name:- Click on the title in the upper left corner.
- Select “Edit Name” from the dropdown menu.
- Update the name and Save.
Using the Flow builder
The following instructions will help guide you on how to edit your settings, add new elements, and publish your new Flow. After you configure the trigger, you build the journey by inserting steps from the plus menu between blocks. Available step types are Add email, Add SMS, Add Delay, Split Flow, Tag Contact, and Update Contact; the sections below walk through each one.Customize your Trigger Settings
When you first land in the Flow builder, you’ll notice the Trigger block is selected. On the right side, you’ll find the following settings: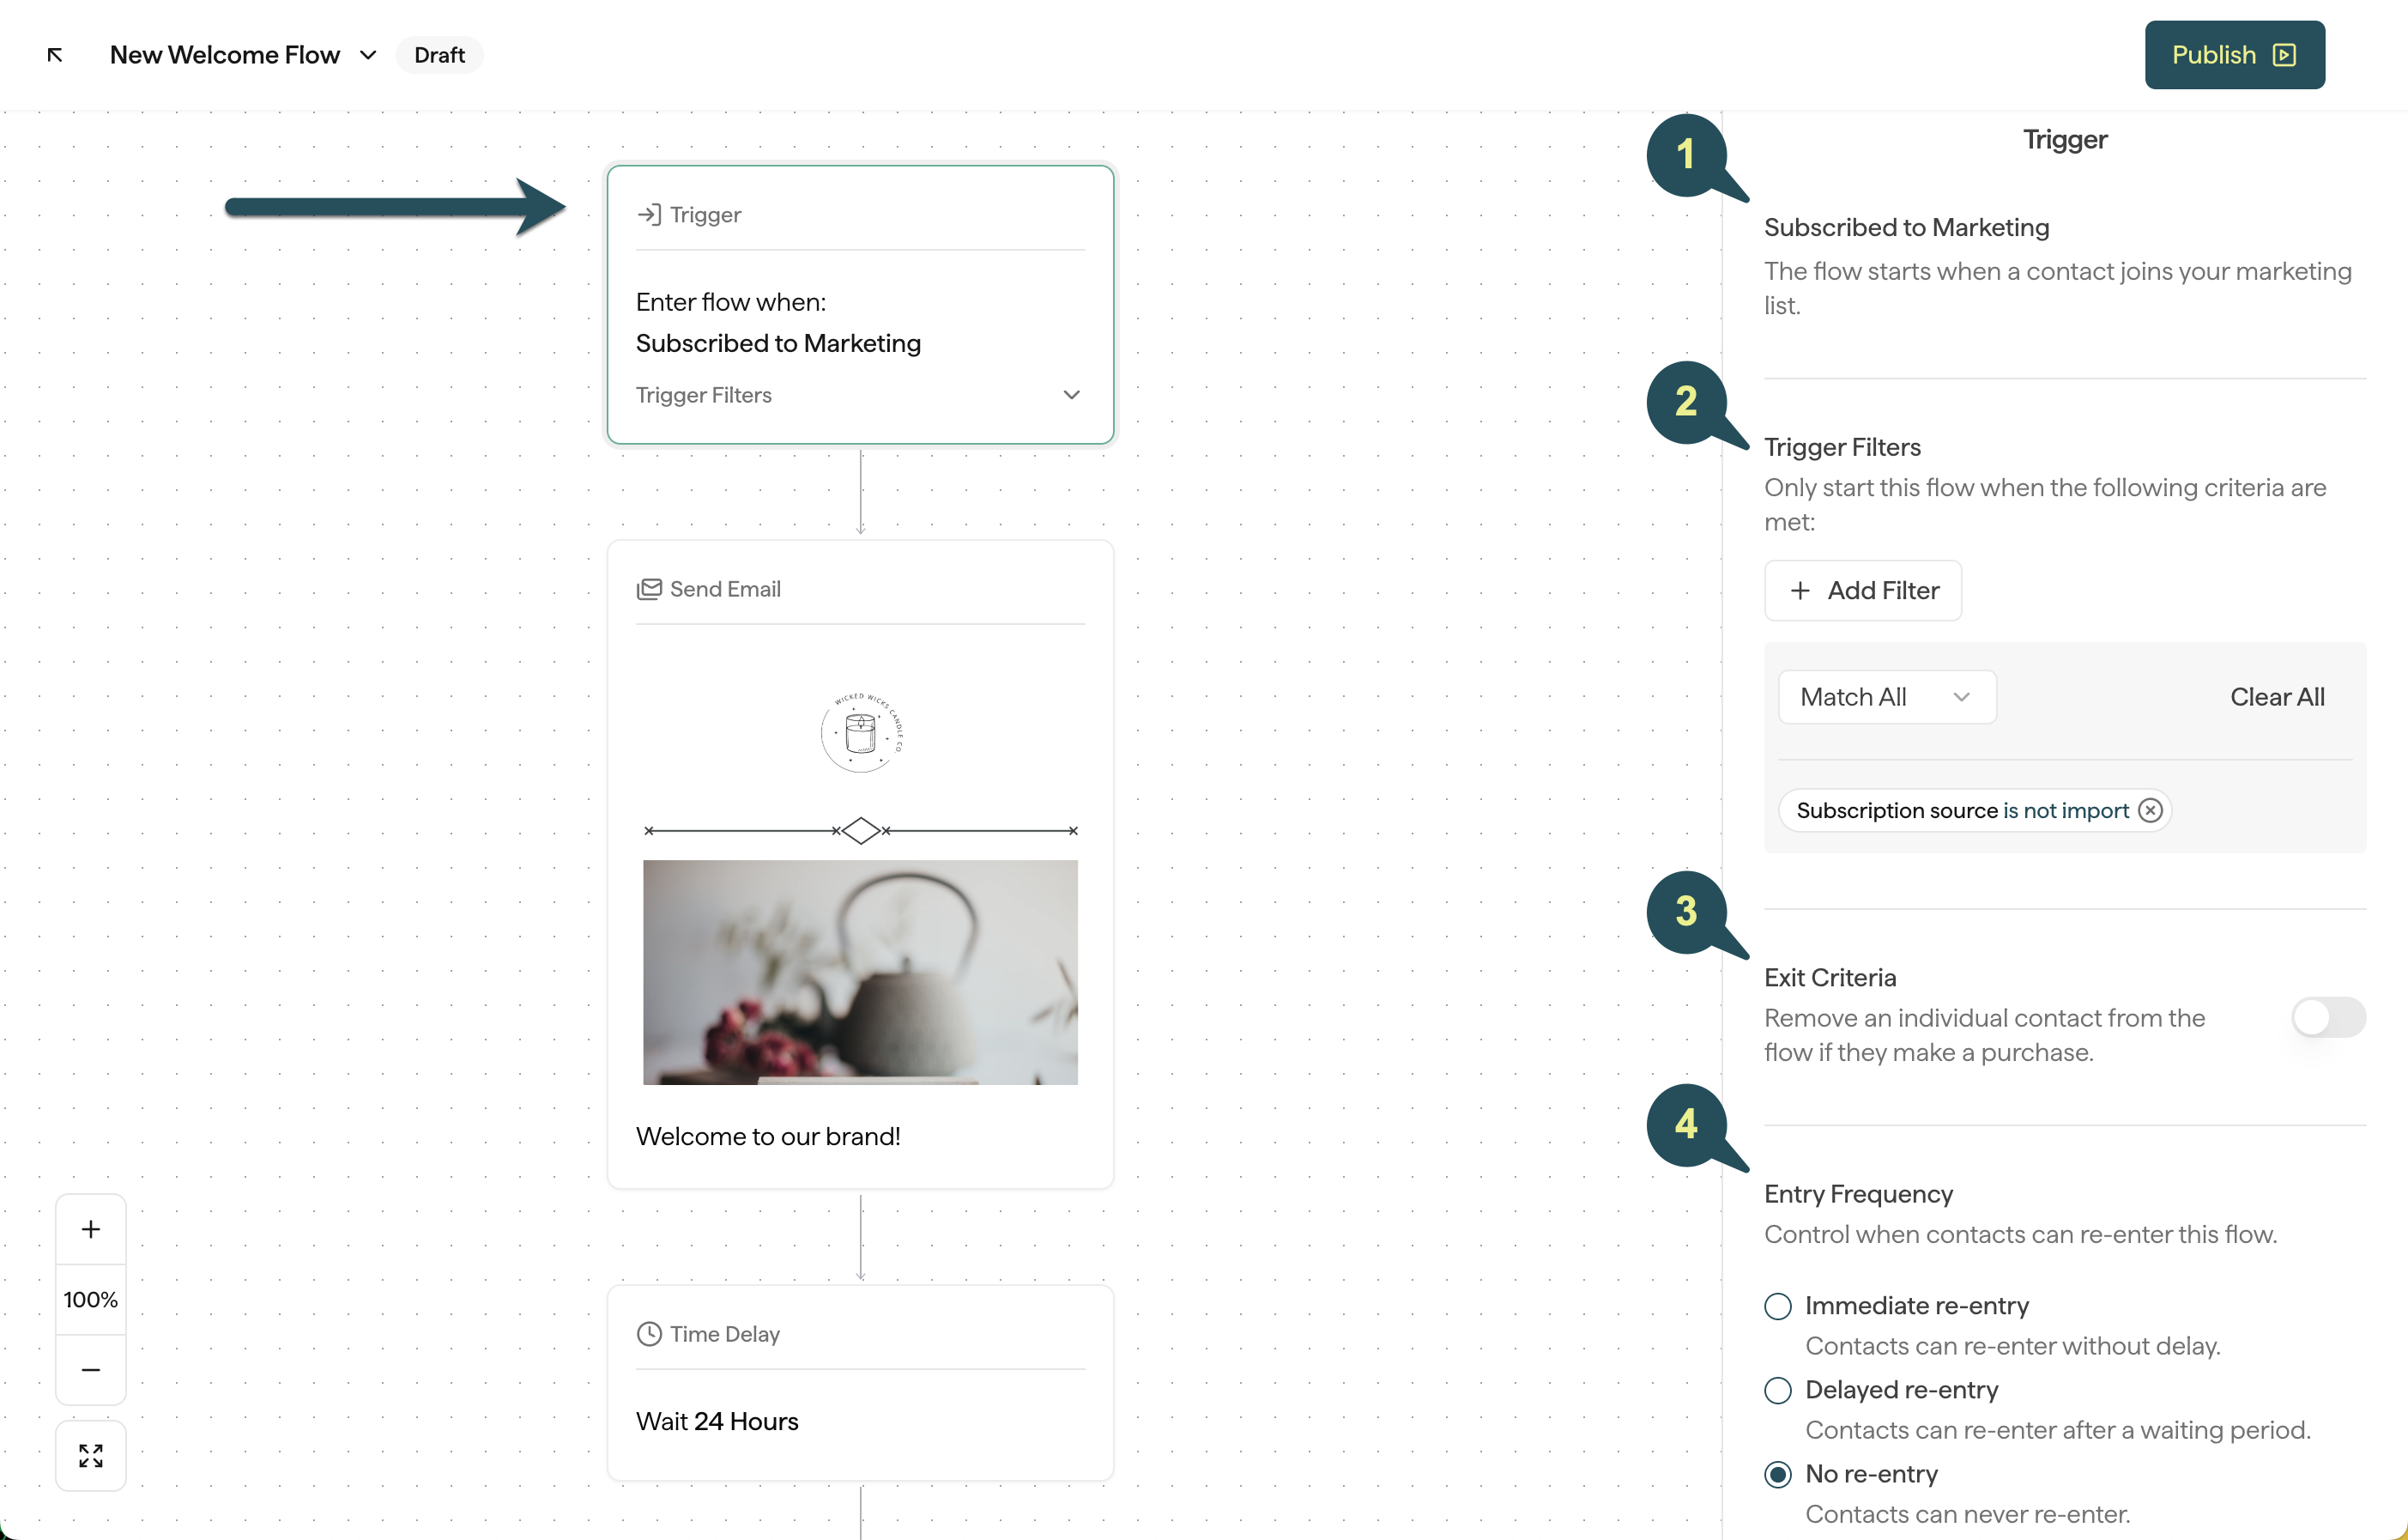
Trigger
Trigger
This shows you which action will initiate this flow.
Flow Filters
Flow Filters
Add audience filters to customize which contacts will be allowed to enter this flow. For tag-based triggers, use filters like Privy Tag Added, Privy Tag Removed, Shopify Tag Added, or Shopify Tag Removed to control which tag changes start the Flow.
Exit Criteria
Exit Criteria
Select whether or not you want contacts to be automatically removed from this flow as soon as they make a purchase.
Entry Frequency
Entry Frequency
Control how often contacts are allowed to re-enter this flow after they’ve already received it:
- Immediate re-entry: Contacts can re-enter this Flow without a delay.
- Delayed re-entry: Contacts can re-enter this Flow as long as a certain period of time has passed since they last received it.
- No re-entry: Contacts will only be allowed to enter this specific Flow once.
Add new emails
To add a new email to your Flow:- Click on the plus sign where you’d like to add your new email.
- Select Add email from the menu.
Add new SMS
To add an SMS message to your Flow:- Click on the plus sign where you’d like to add your new SMS message.
- Select Add SMS from the menu.
Add time delays
It’s important to add time delays between the actions in your Flow. To add them into your Flow:- Click on the plus sign where you’d like to add your Time Delay.
- Select Add Delay from the menu.
- Customize the timing on the right side.
Add a Split Flow
Splits can be added at any point in your Flow. They allow you to divide your audience based on their attributes, and customize which messages are sent to each audience.- Click on the plus sign where you’d like to add your Split.
- Select Split Flow from the menu.
- Choose whether or not you want the remaining messages and/or delays in your Flow to fall under the “YES” or “NO” path.
- Select your condition(s) on the right.
- Customize each path of your split.
Add a Tag Contact action
Use a Tag Contact action to apply one or more Privy Tags to a contact automatically when they reach that step in your Flow. This helps you record lifecycle stage, campaign source, or other labels for filtering and segmentation without updating profiles by hand. To add a Tag Contact action:- Click the plus sign where you want the tag to be applied in your Flow.
- Select Tag Contact from the menu.
- In the settings on the right, choose the tag(s) to apply. You can select existing tags or create new ones inline, as needed.
Add an Update Contact action
Use an Update Contact action to change a contact’s state automatically as they move through the Flow:- Suppress Contact — marks the contact as merchant-suppressed so they stop receiving Flows, Campaigns, and Displays from your account.
- Unsuppress Contact — clears merchant suppression so the contact can resume receiving messages.
- Click the plus sign where you want the action to run in your Flow.
- Select Update Contact from the menu.
- In the settings on the right, choose Suppress Contact or Unsuppress Contact.
Removing and duplicating blocks
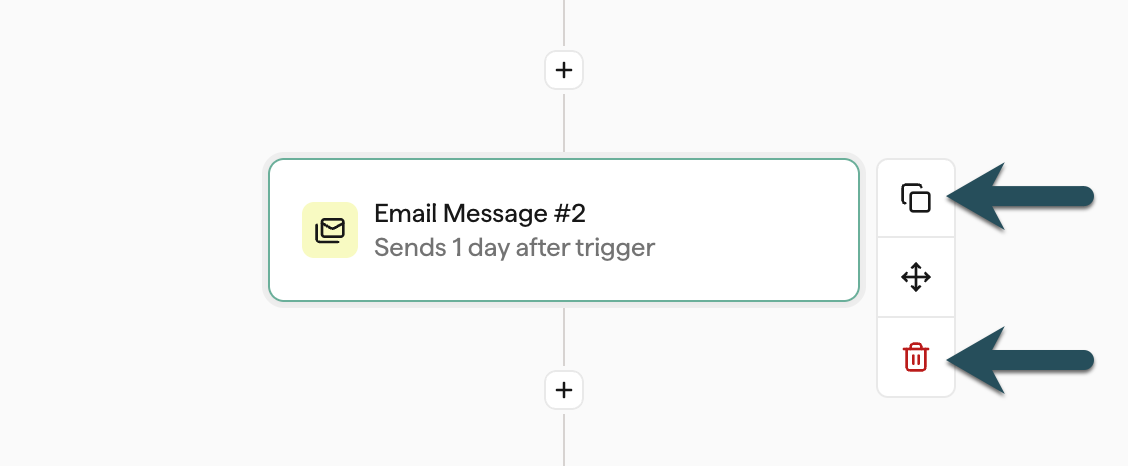
If you need to remove a message, time delay, split, Tag Contact, or Update Contact action from your Flow:- Select the block you’d like to delete.
- Click on the “delete” icon to the right of the block and confirm.
- Select the block you’d like to duplicate.
- Click on the “duplicate” icon on the right of the block.
Drag and drop blocks
If you need to move an existing email or SMS block to a different part of your flow:- Select the block you’d like to move.
- Click and hold the icon.
- Drag the block, and drop in its new location.
Note: Email and SMS blocks can only be dragged and dropped when your Flow is in a Draft state. Once you publish your Flow, you will no longer be able to drag and drop blocks.
Editing your emails
To edit the appearance and content of the emails in your Flow:- Select the block you’d like to edit.
- If you’re creating a brand new email in your Flow, choose Select Template on the right.
- If you’re editing an existing email template, choose Edit Design on the right.
Send test emails
You can send yourself (or up to 5 teammates) a test of any Flow email from two places:- From the Flow canvas: select the email block, then click the paper airplane icon above the preview on the right.
- From inside the email editor: click Test in the editor header. This sends the email you’re currently designing, including any unsaved edits to the body.