Setting up the integration
To link your Privy account with your Mailchimp account:- Navigate to your Settings from the bottom left corner of your dashboard.
- Head to your Linked Accounts page from the left side menu.
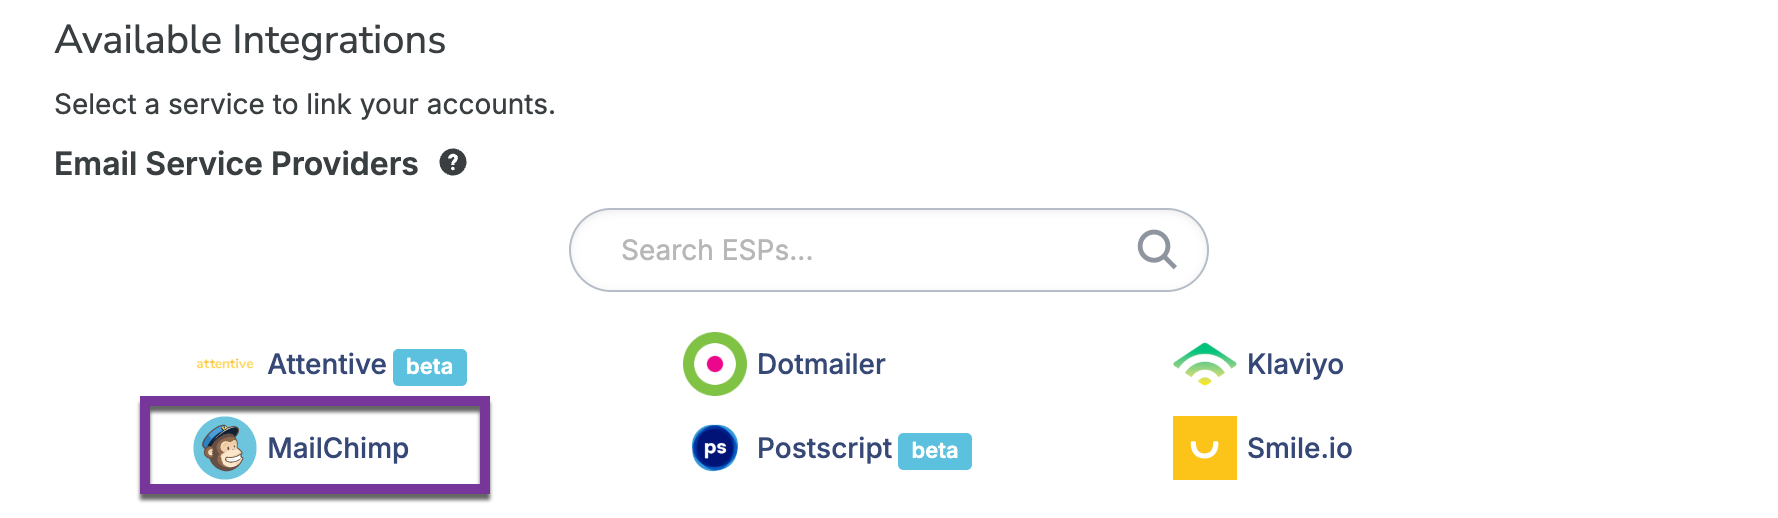
- Select Mailchimp from the Available Integrations.
- Enter your credentials in the prompt, and select Login.
- Follow the prompts to allow the proper permissions and select your account.
Add a sync rule to your display
To add a sync rule to a display so that the collected contacts sync to Mailchimp:- Navigate to your Displays from your dashboard.
- Select the display you’d like to sync and navigate to your Settings in the display builder.
- Click to expand the Advanced Settings in the bottom left of your screen. Click on the Sync Integrations card.
- Click “Add Integration” and select Mailchimp from the dropdown menu. Configure the presented options, and Save.
Troubleshooting
If you run into any of the following issues with your Mailchimp integration, here are some solutions:Expired or Disconnected error
The integration’s connection may expire or disconnect for a wide range of reasons. To ensure that Privy and the external service are still properly integrated:- Navigate to your Settings from the bottom left corner of your dashboard.
- Head to your Linked Accounts page from the left side menu.
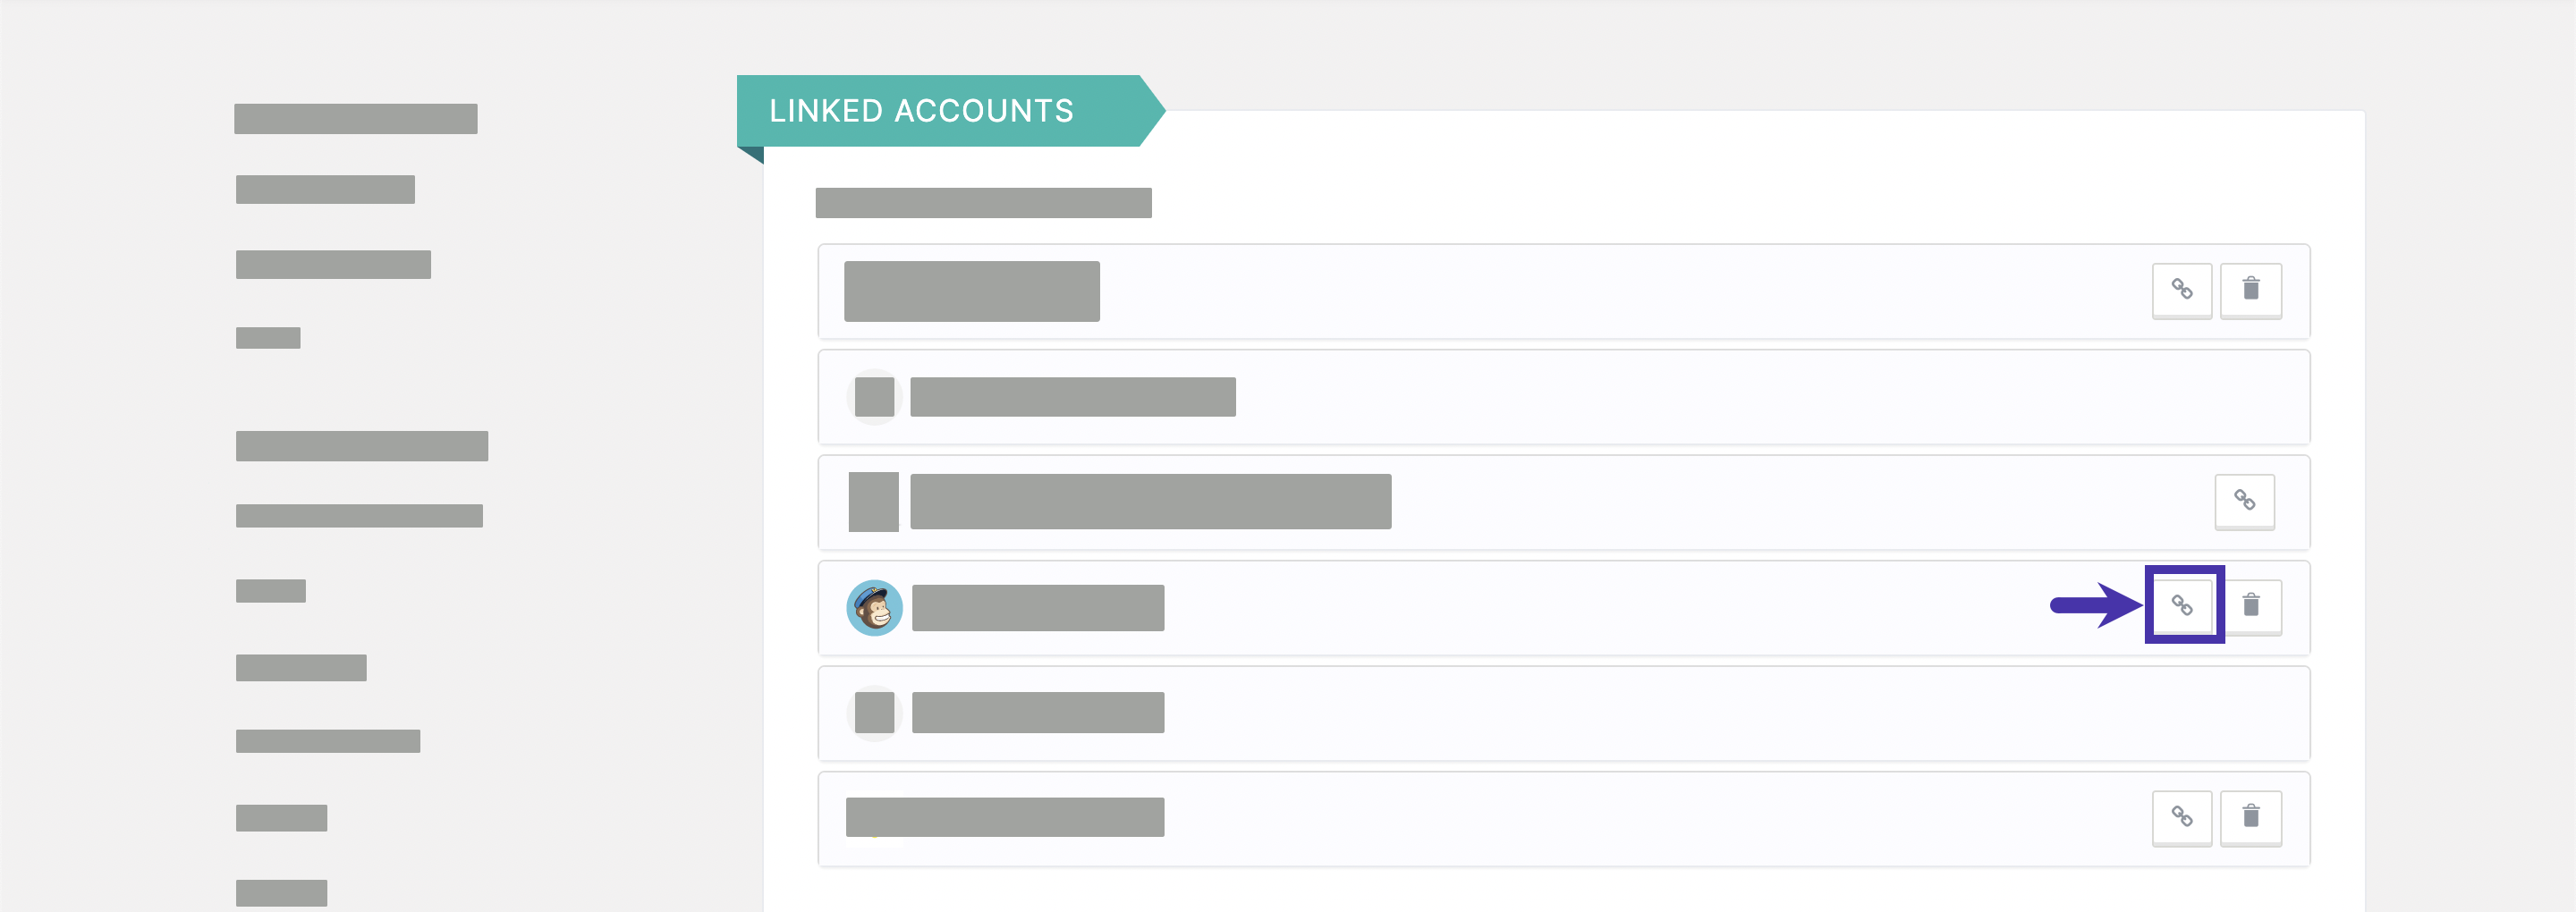
- Locate your Mailchimp integration under the Authorized Integrations section and select the Test Account icon.
Permissions error
You can only connect a Mailchimp account to Privy if you are the account’s Owner or Admin. To review these requirements and make any necessary changes, please review this resource from Mailchimp. Once an Owner or Admin is available, they can attempt to link the accounts again.Sync errors
If you see an error when exporting or syncing to an audience (list) in Mailchimp like:- FNAME must be provided – Please enter a value
- MMERGE10 must be provided – Please enter a value
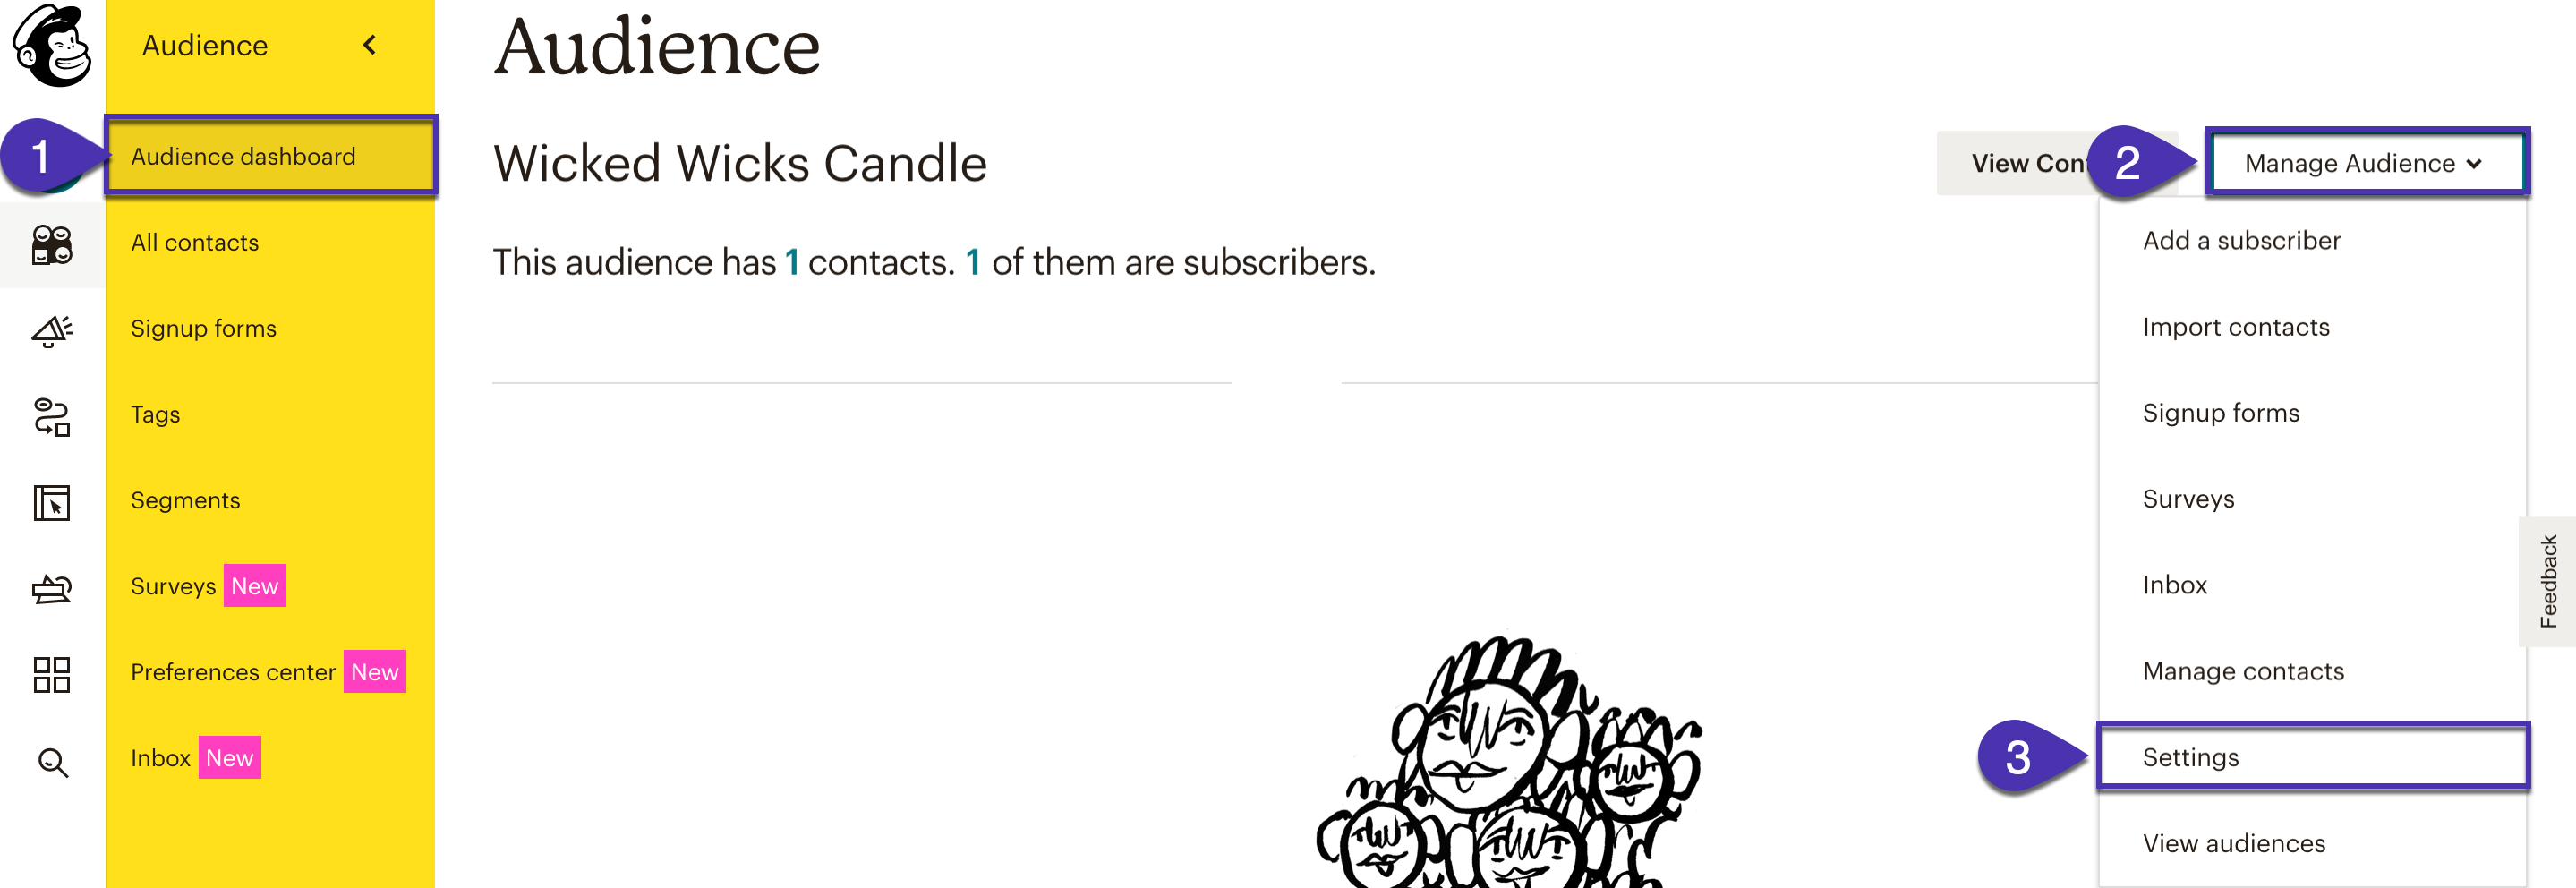
- Navigate to your Audience dashboard in Mailchimp.
- Select the audience (list) you have chosen to export or sync to in Privy.
- Click the Manage Audience dropdown menu and then click Settings.
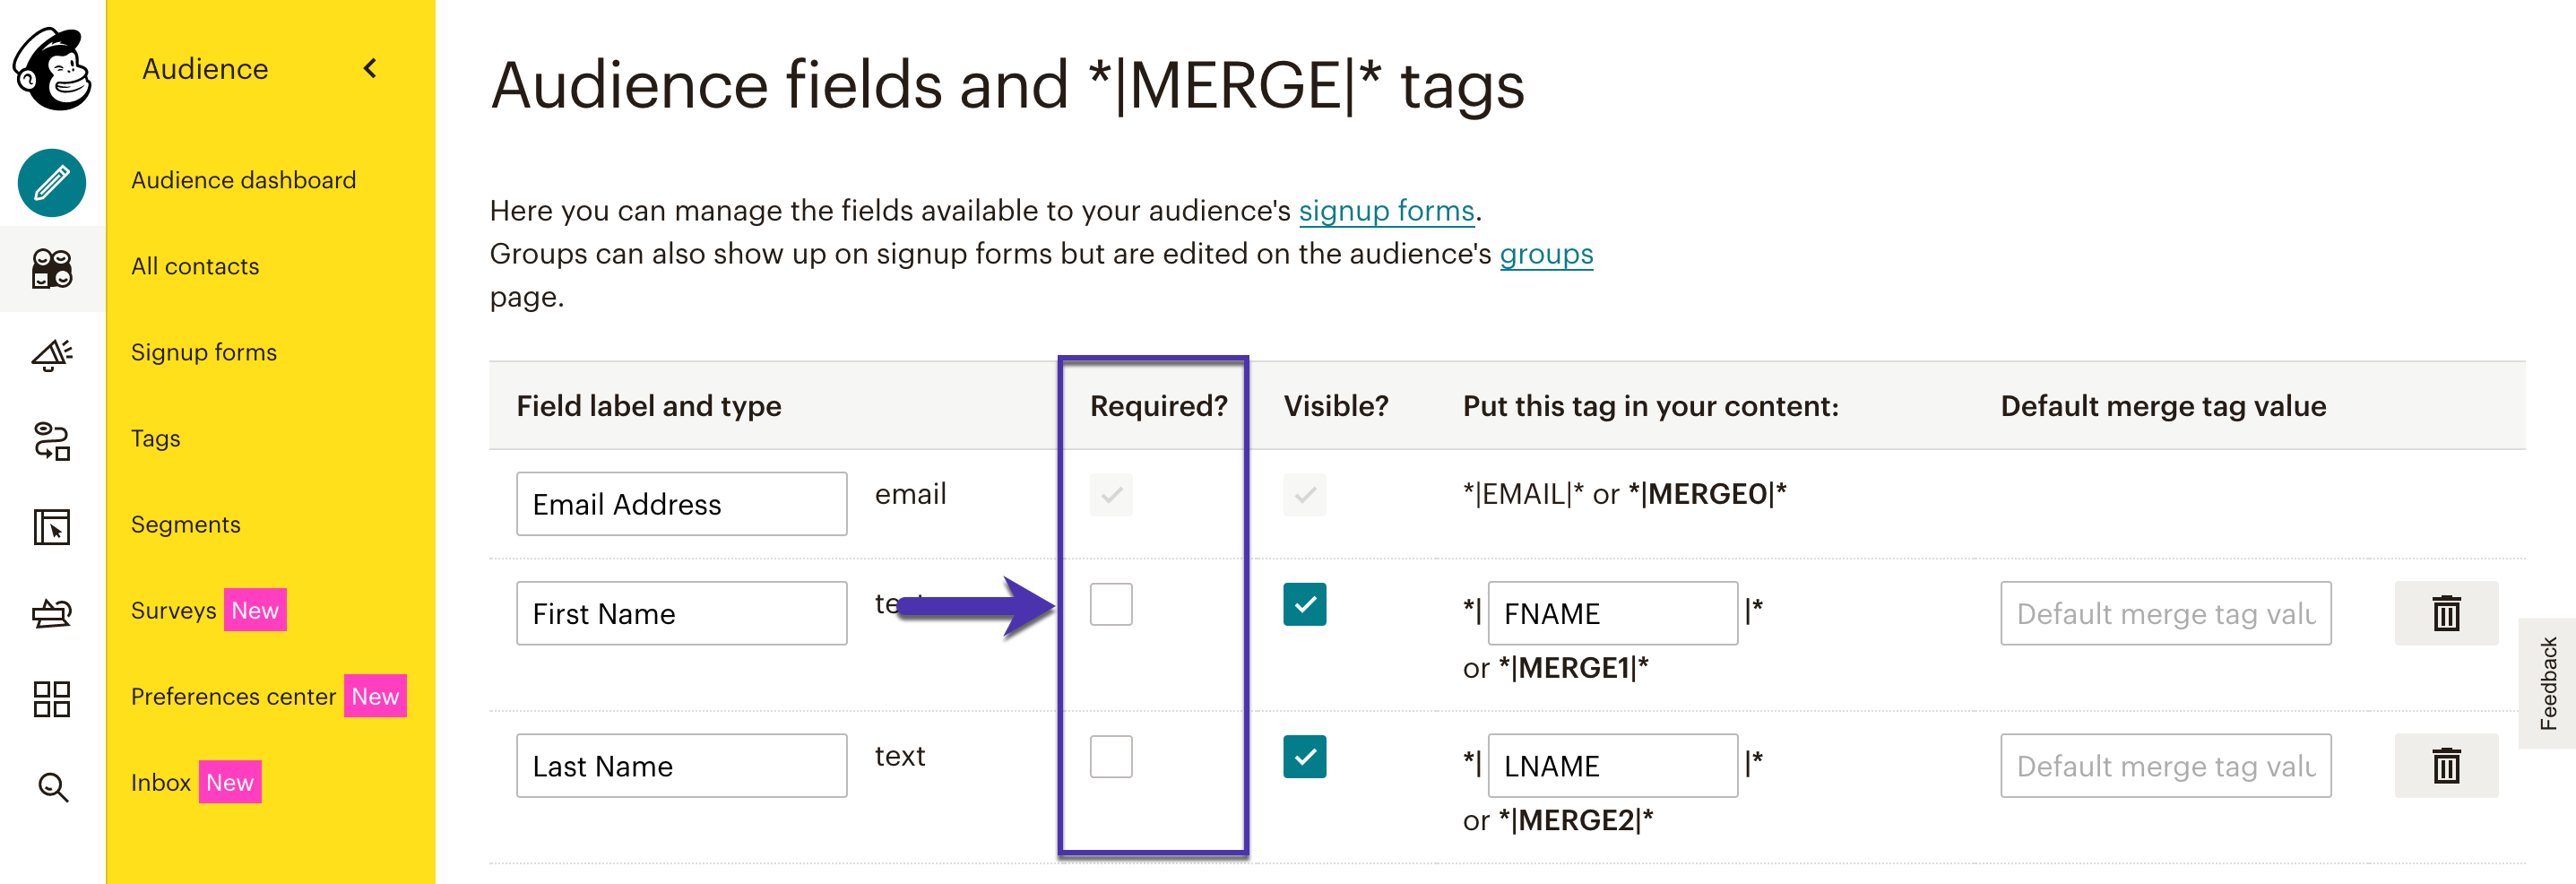
- Locate and select the Audience fields and *|MERGE|* tags option.
- On the next page, you’ll see the fields associated with this audience (list), as well as a checkbox next to any field that is REQUIRED. Uncheck all required fields except the email field.
Removing the integration
If you need to disconnect your Privy and Mailchimp accounts, follow these steps:- Navigate to your Settings from the bottom left corner of your dashboard.
- Head to your Linked Accounts page from the left side menu.
- Locate your Mailchimp integration under the Authorized Integrations section and select the Delete icon.