To send Purchase Follow-Up Emails, you need to be integrated with BigCommerce, Shopify, Shopify Plus, or Wix so that your customers’ order activity is available to Privy.
Create a new Purchase Follow-Up email
- Navigate to Automations (Legacy) and click the New Automation button.
- Select the Purchase Follow-Up option. This action opens Privy’s series editor.
Name your series
- At the top of your series editor, you’ll be able to edit and update the name of your series — this is internal only and for you to keep yourself organized.
Add/Remove emails
- To add more emails to your series, click on any of the ‘plus’ signs between the emails.
- To remove an email from your series, click on the trash icon at the bottom of the email you’d like to delete.
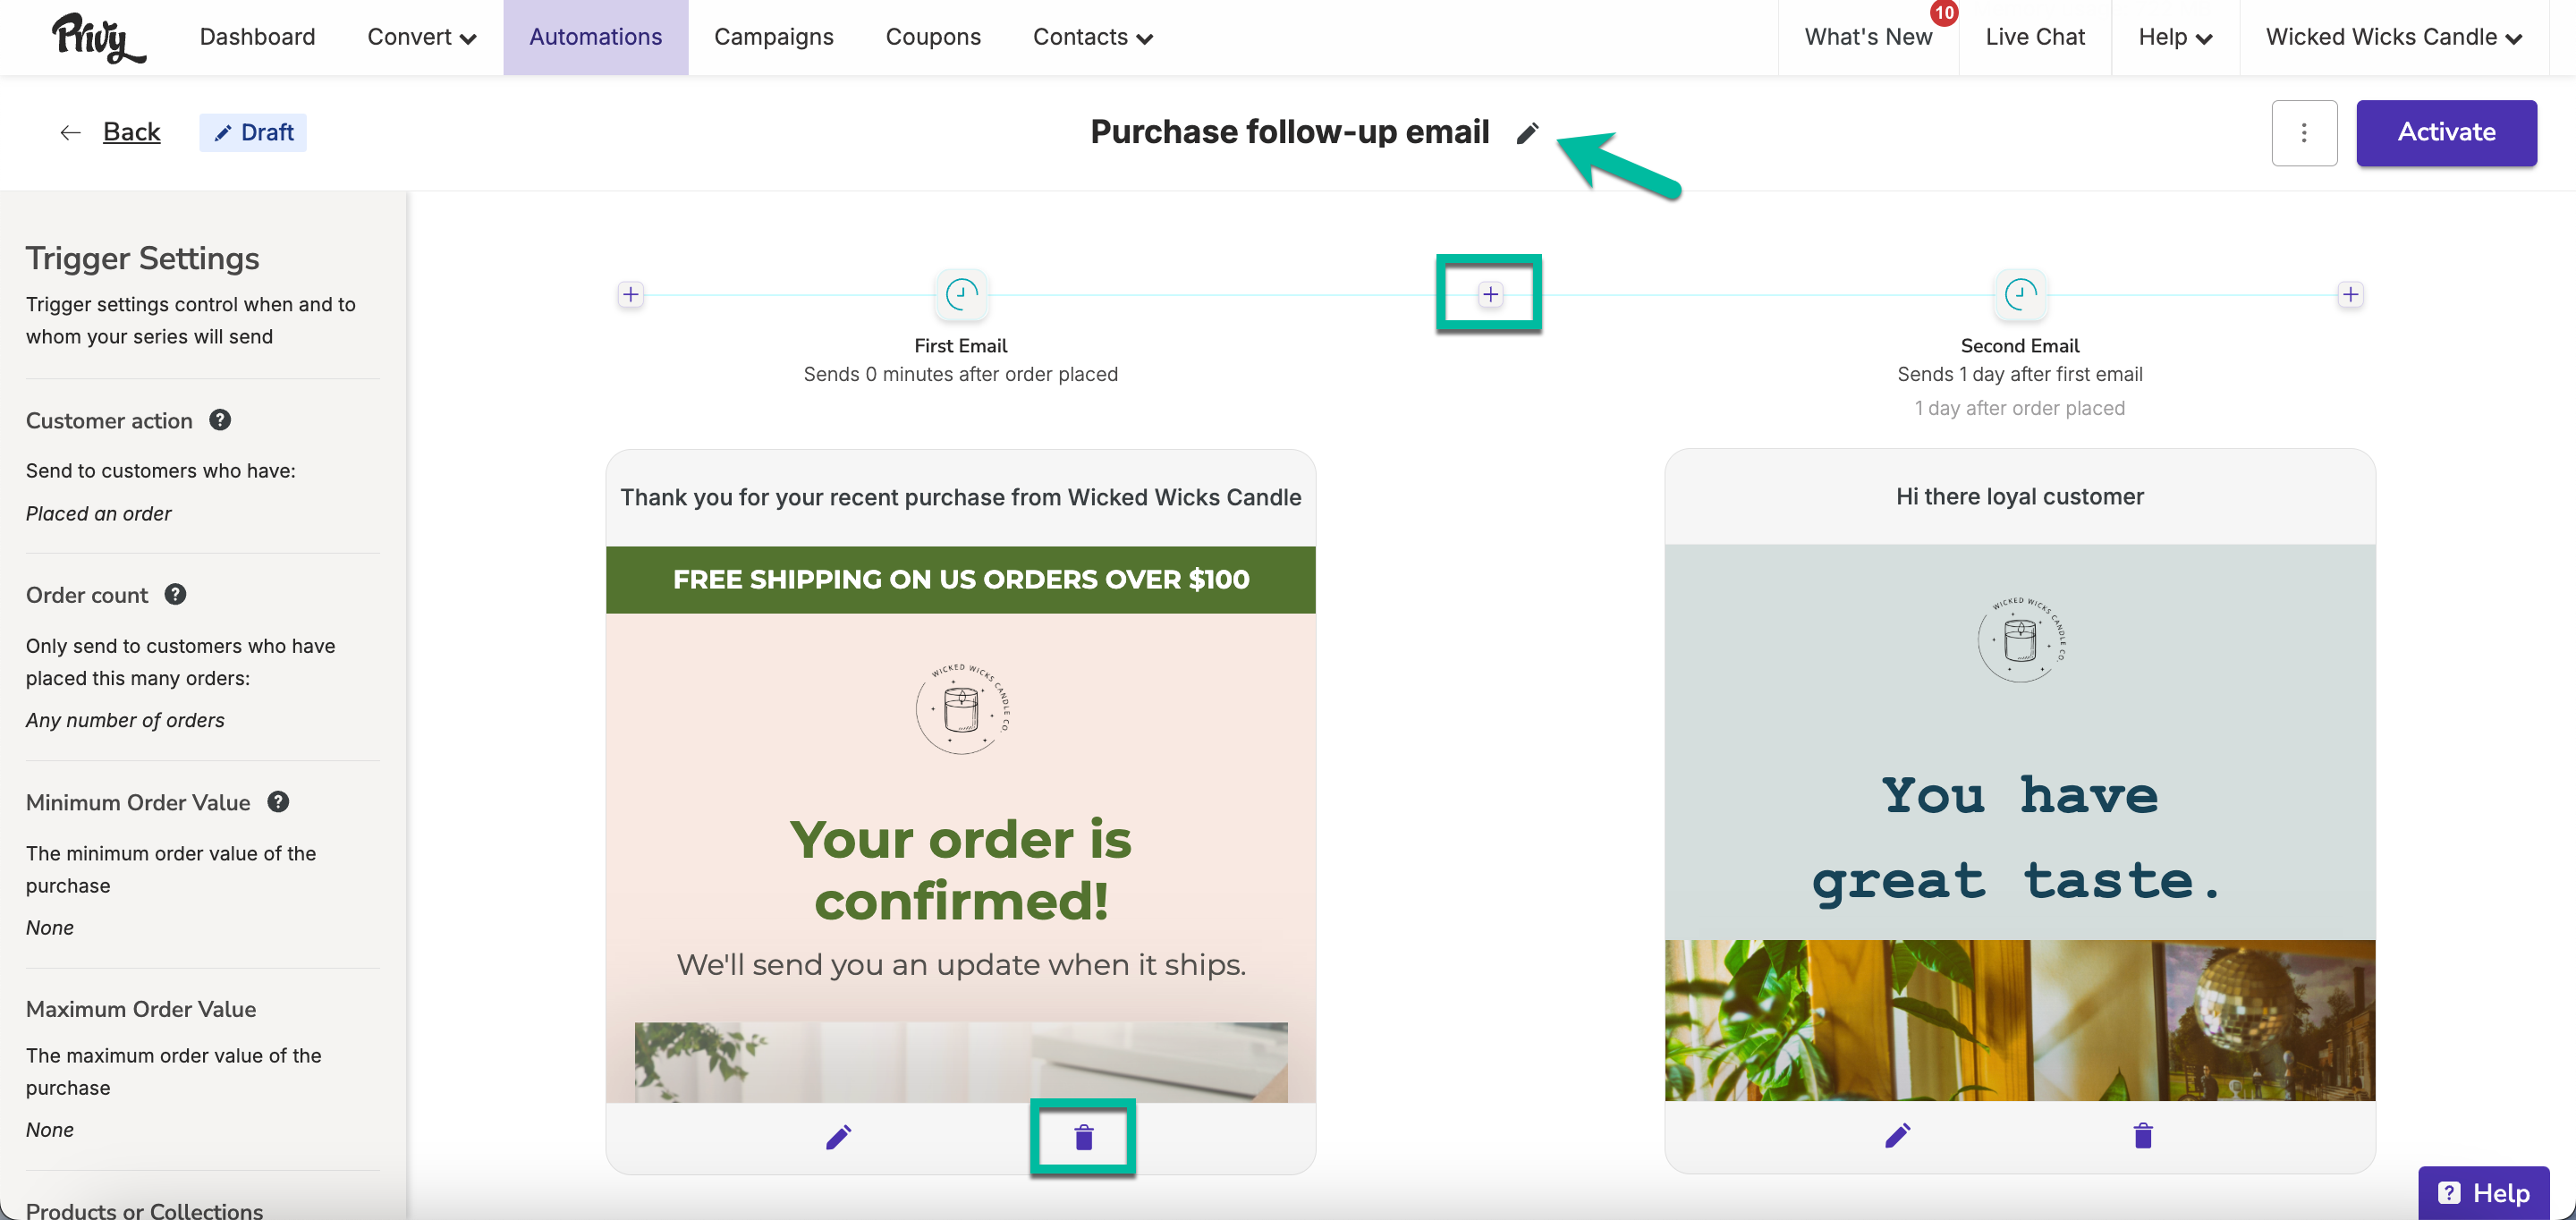
The minimum amount of emails needed is 1. The maximum amount of emails allowed in a series is 10.
Edit your settings
When creating your Purchase Follow-Up series, you have a number of settings that you can configure, including your time delay, customer action, order count, minimum/maximum order value, products/collections, and coupon. To edit your settings, click the Edit settings button on the left side bar.Time delay
Configure your time delay to determine how long your first email triggers since the customer’s order was placed or delivered, and how much of a delay there is between each subsequent email triggers. You can customize each email’s time delay by number of minutes, hours, or days.Customer Action
Choose between Placed an order or Received the order (Shopify Only - A default shipping carrier with tracking information is required).Order Count
Choose between Any number of orders, someone’s First order, or More than one order (repeat customers).Minimum/Maximum Order Value
This setting is optional. It allows you to restrict this series from triggering unless the customers’ order meets a certain minimum or maximum subtotal in their cart. By default, these settings are disabled, which means that an order will trigger this series regardless of their value.Products/Collections
This setting is optional. It allows you to restrict this series from triggering unless the customers’ order contains your selected products or collections. By default, this setting is disabled, which means that an order will trigger this series regardless of which products are in the order.Coupon
Attach a coupon code to your series. By default, none of the emails in the default series templates include a coupon code. However, if you want to attach a coupon code, you can follow these instructions to insert a code into your templates as you customize them!Customize your templates
To edit the appearance of each of your emails, click the Edit icon to access the email editor: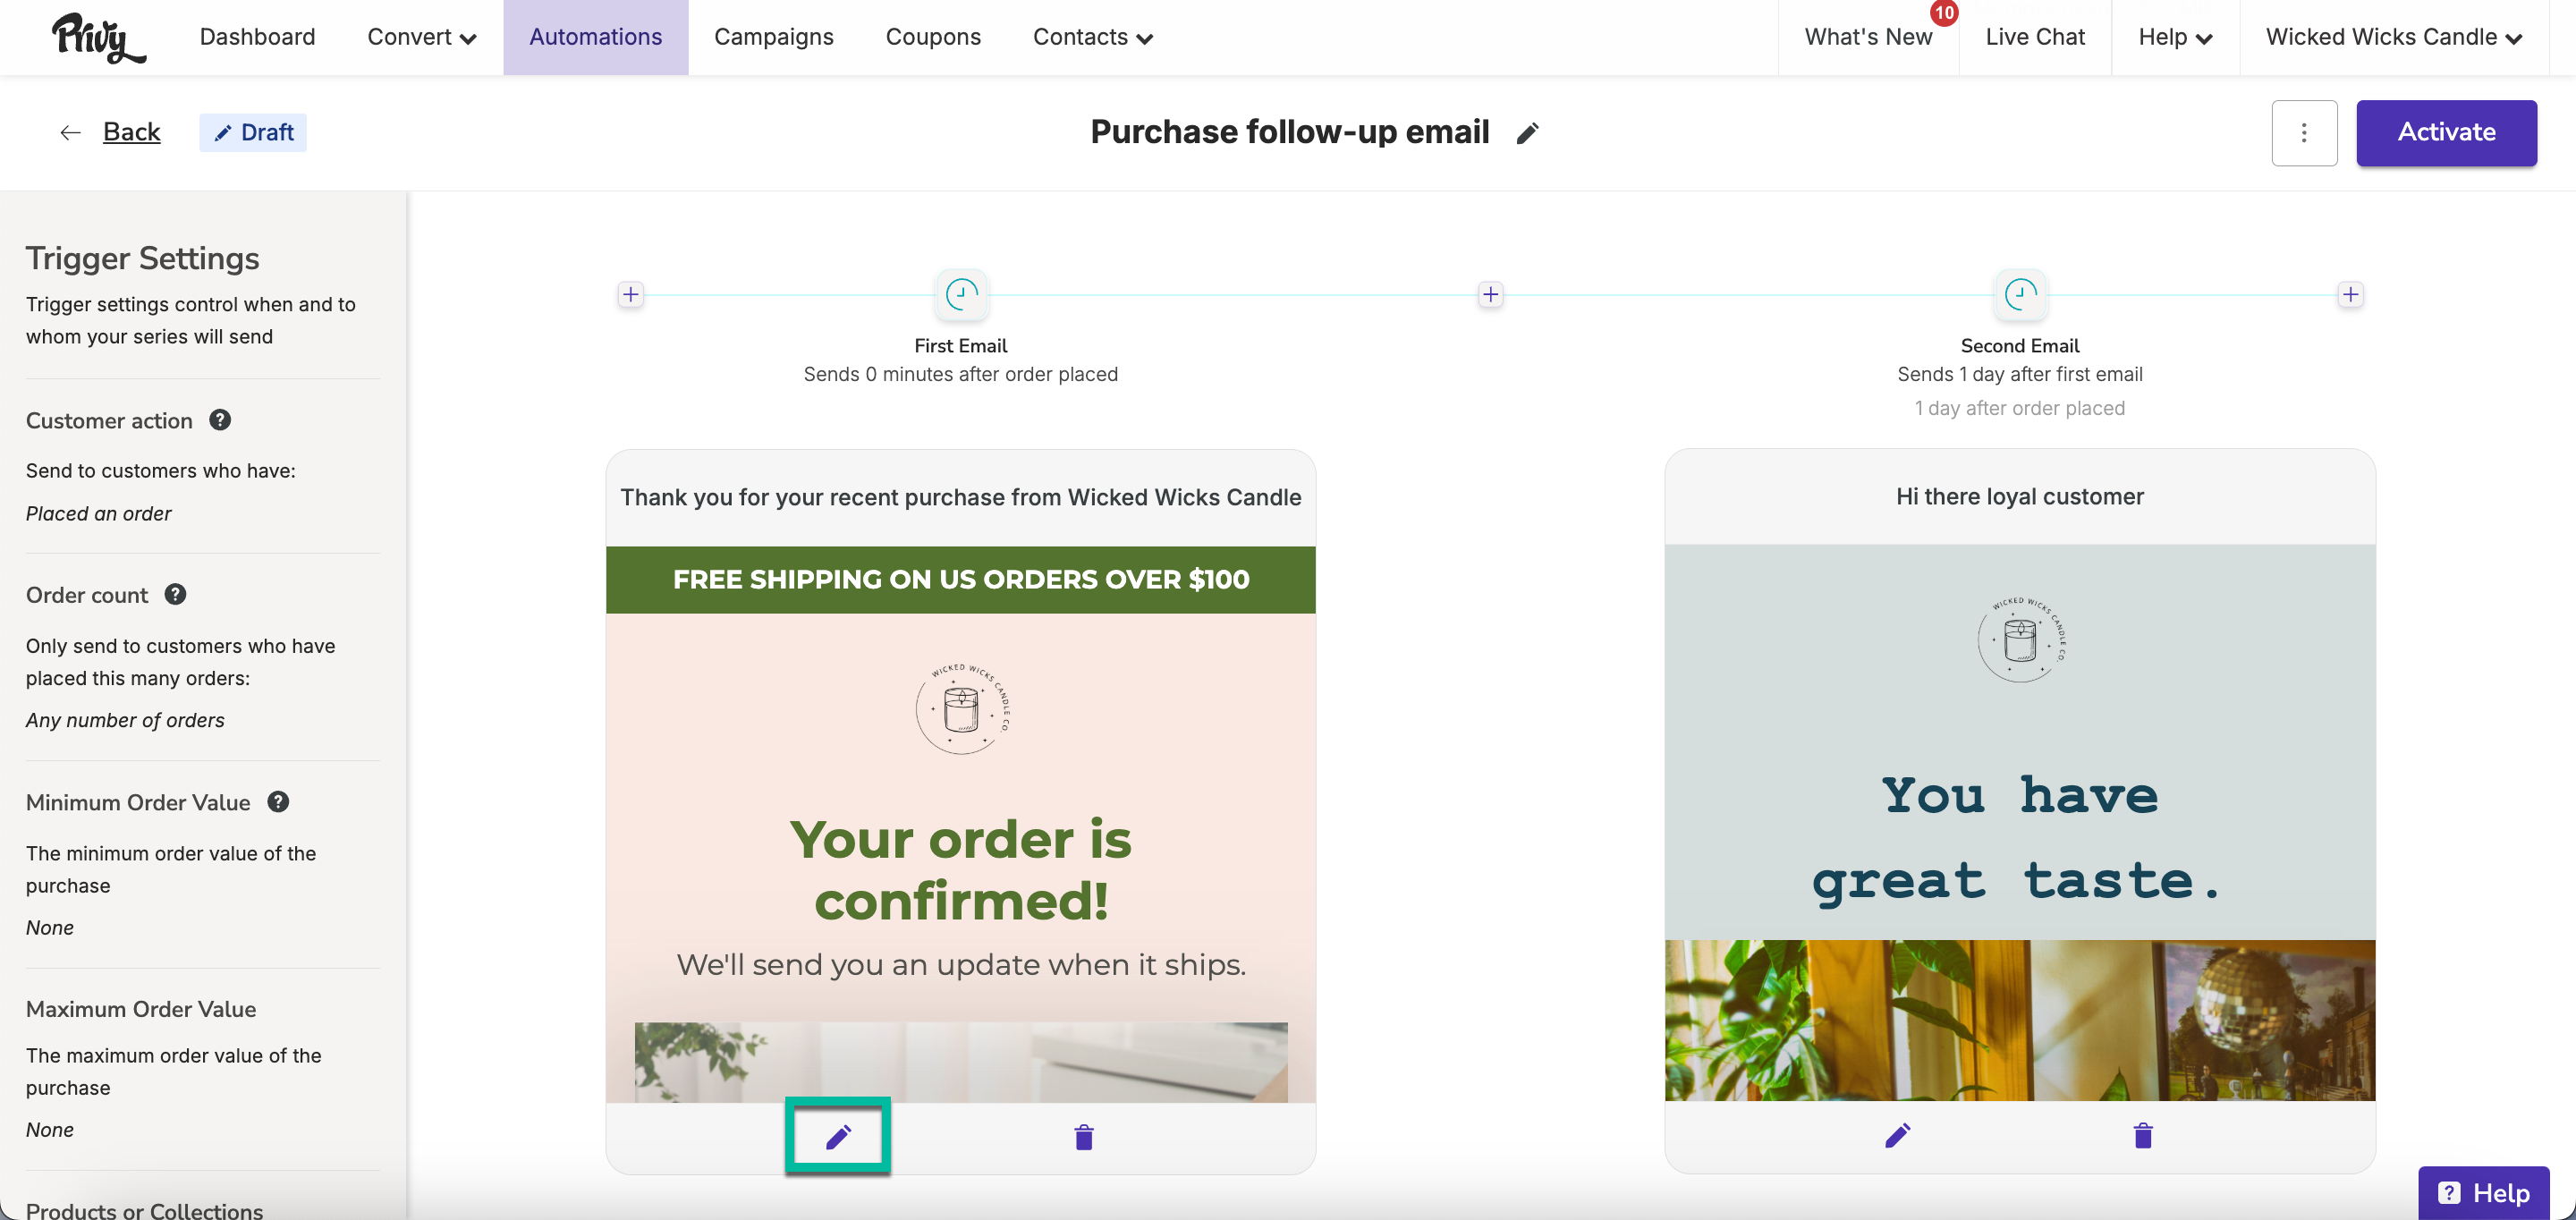
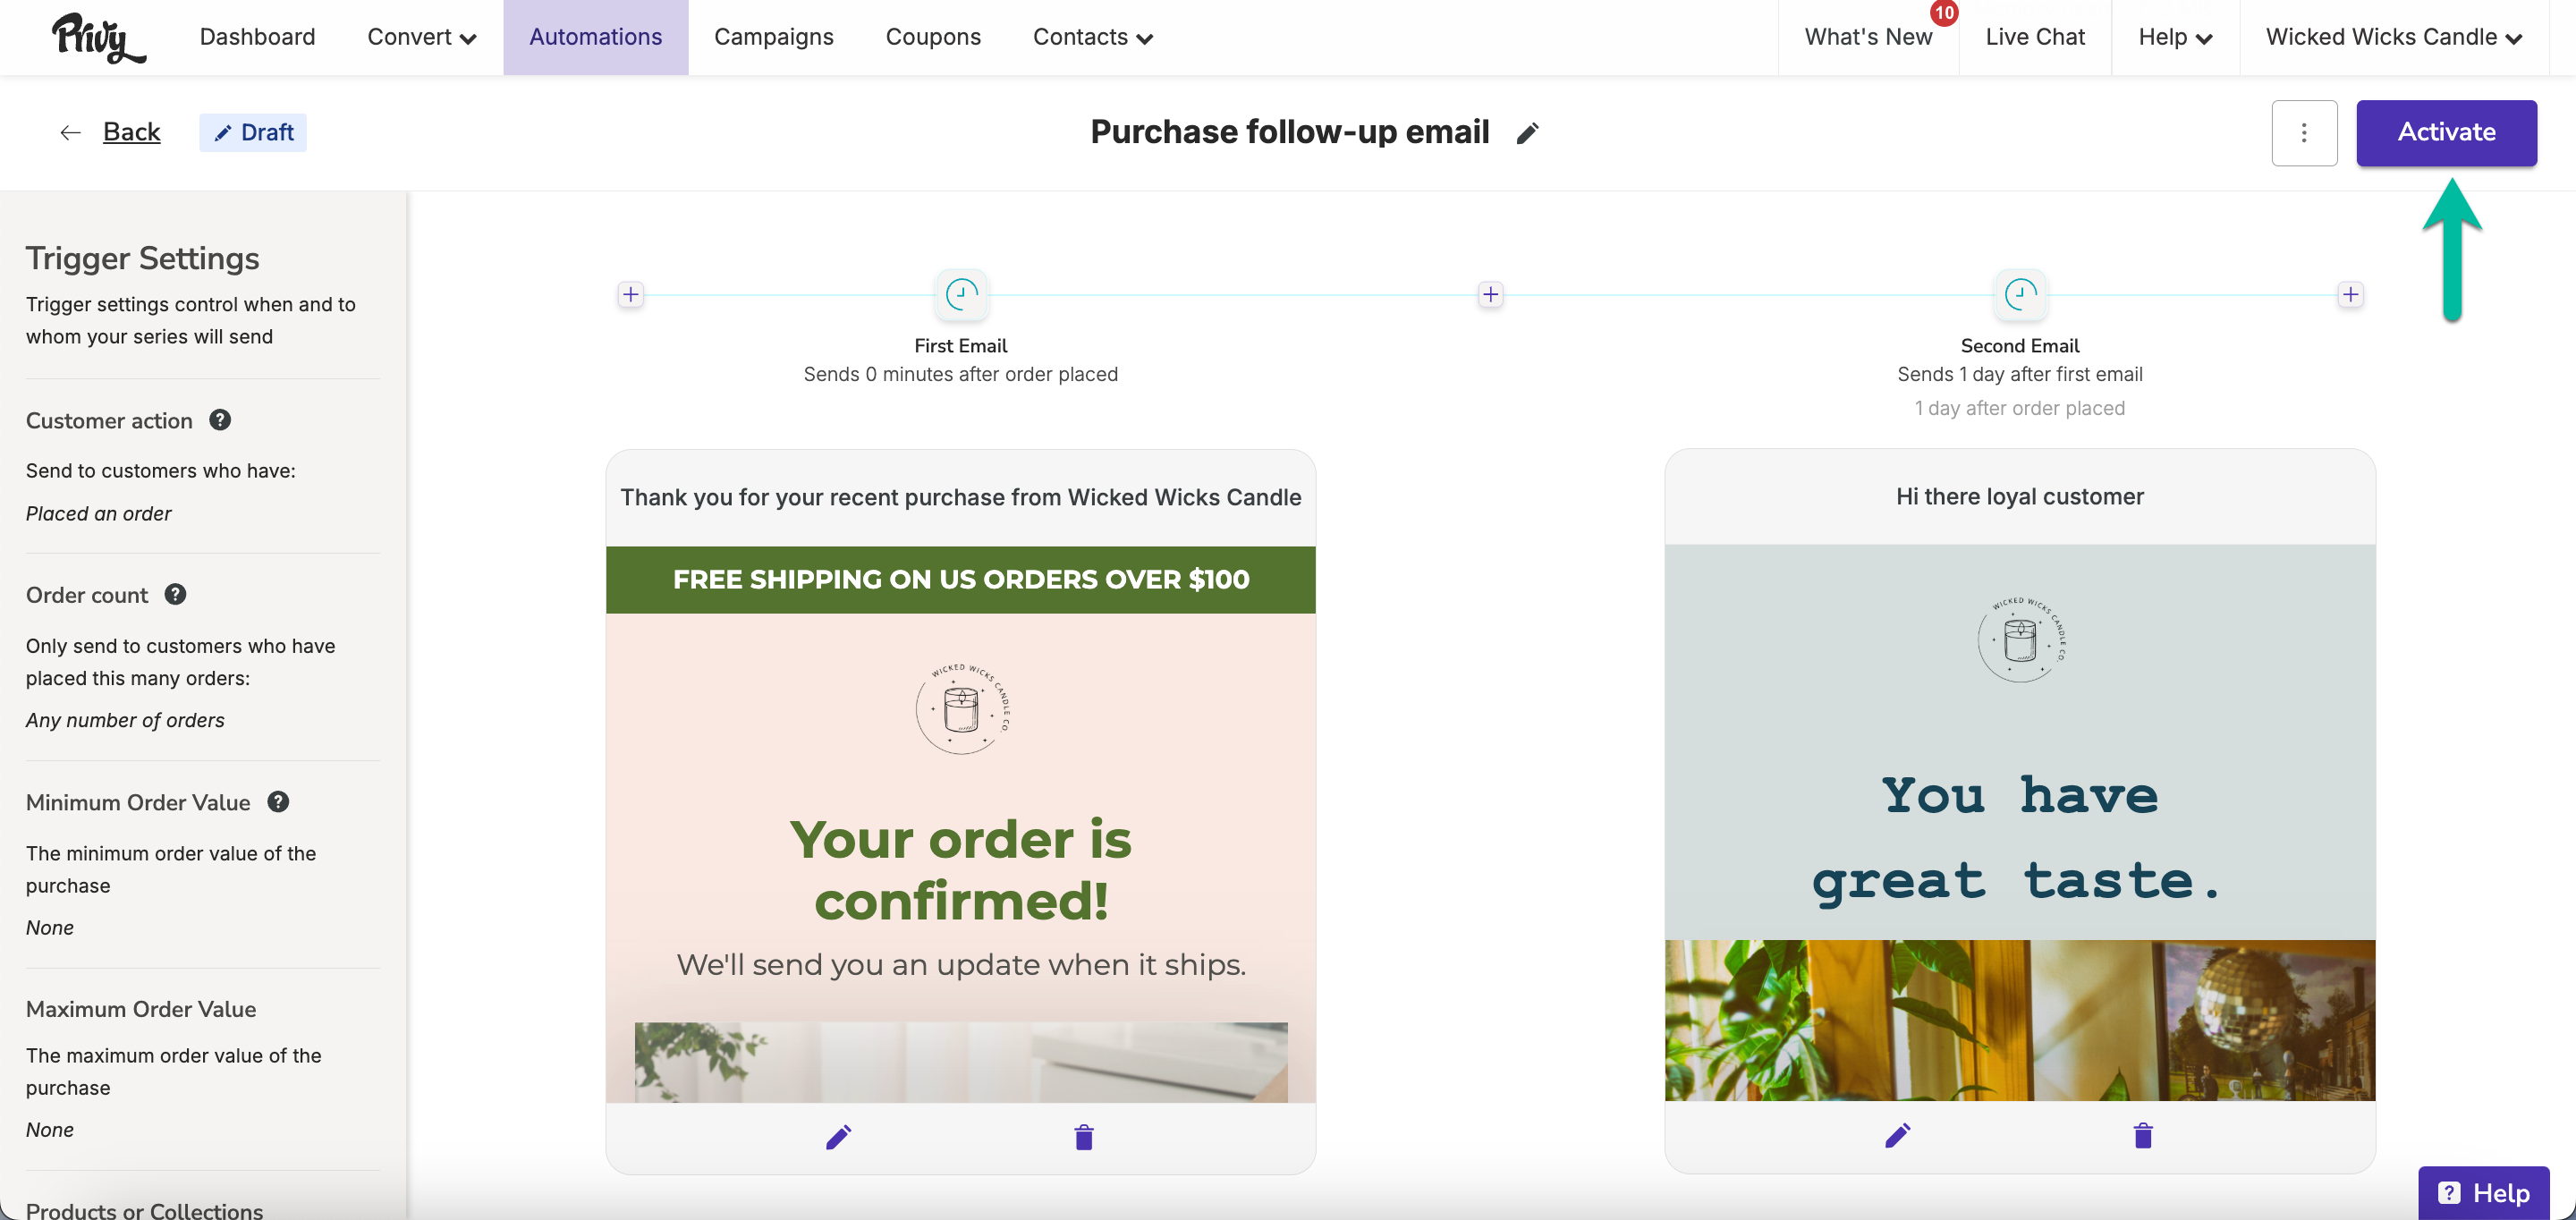
Activate your series
Once you’ve customized your templates and edited your settings, you’re ready to launch your Purchase Follow-Up Series! Click the Activate button in the upper right corner of your series.