Create a new Welcome Flow
To get started:- Navigate to Flows and click New Flow in the upper right corner.
- Select Welcome Email or Welcome SMS from the menu, depending on which type of welcome series you want to build.
Name your Flow
To name your new Flow:- Click on the title in the upper left corner.
- Select “Edit Name” from the dropdown menu.
- Update the name and Save.
Build your Flow
Our Flow builder allows you to fully customize the recipients’ journey. You can add and remove emails, customize the timing of each message, and even apply audience filters to target a specific group of contacts. To add a new emails, time delays, or audience filters to your Flow:- Hover between the blocks in your Flow until you see a blue plus sign appear.
- Click the blue plus sign.
- Select the desired action from the following menu.
Customize your settings
To customize who enters and exits your flows, select the Trigger block at the top of your Flow. Your Flows’ settings will appear on the right side of the builder: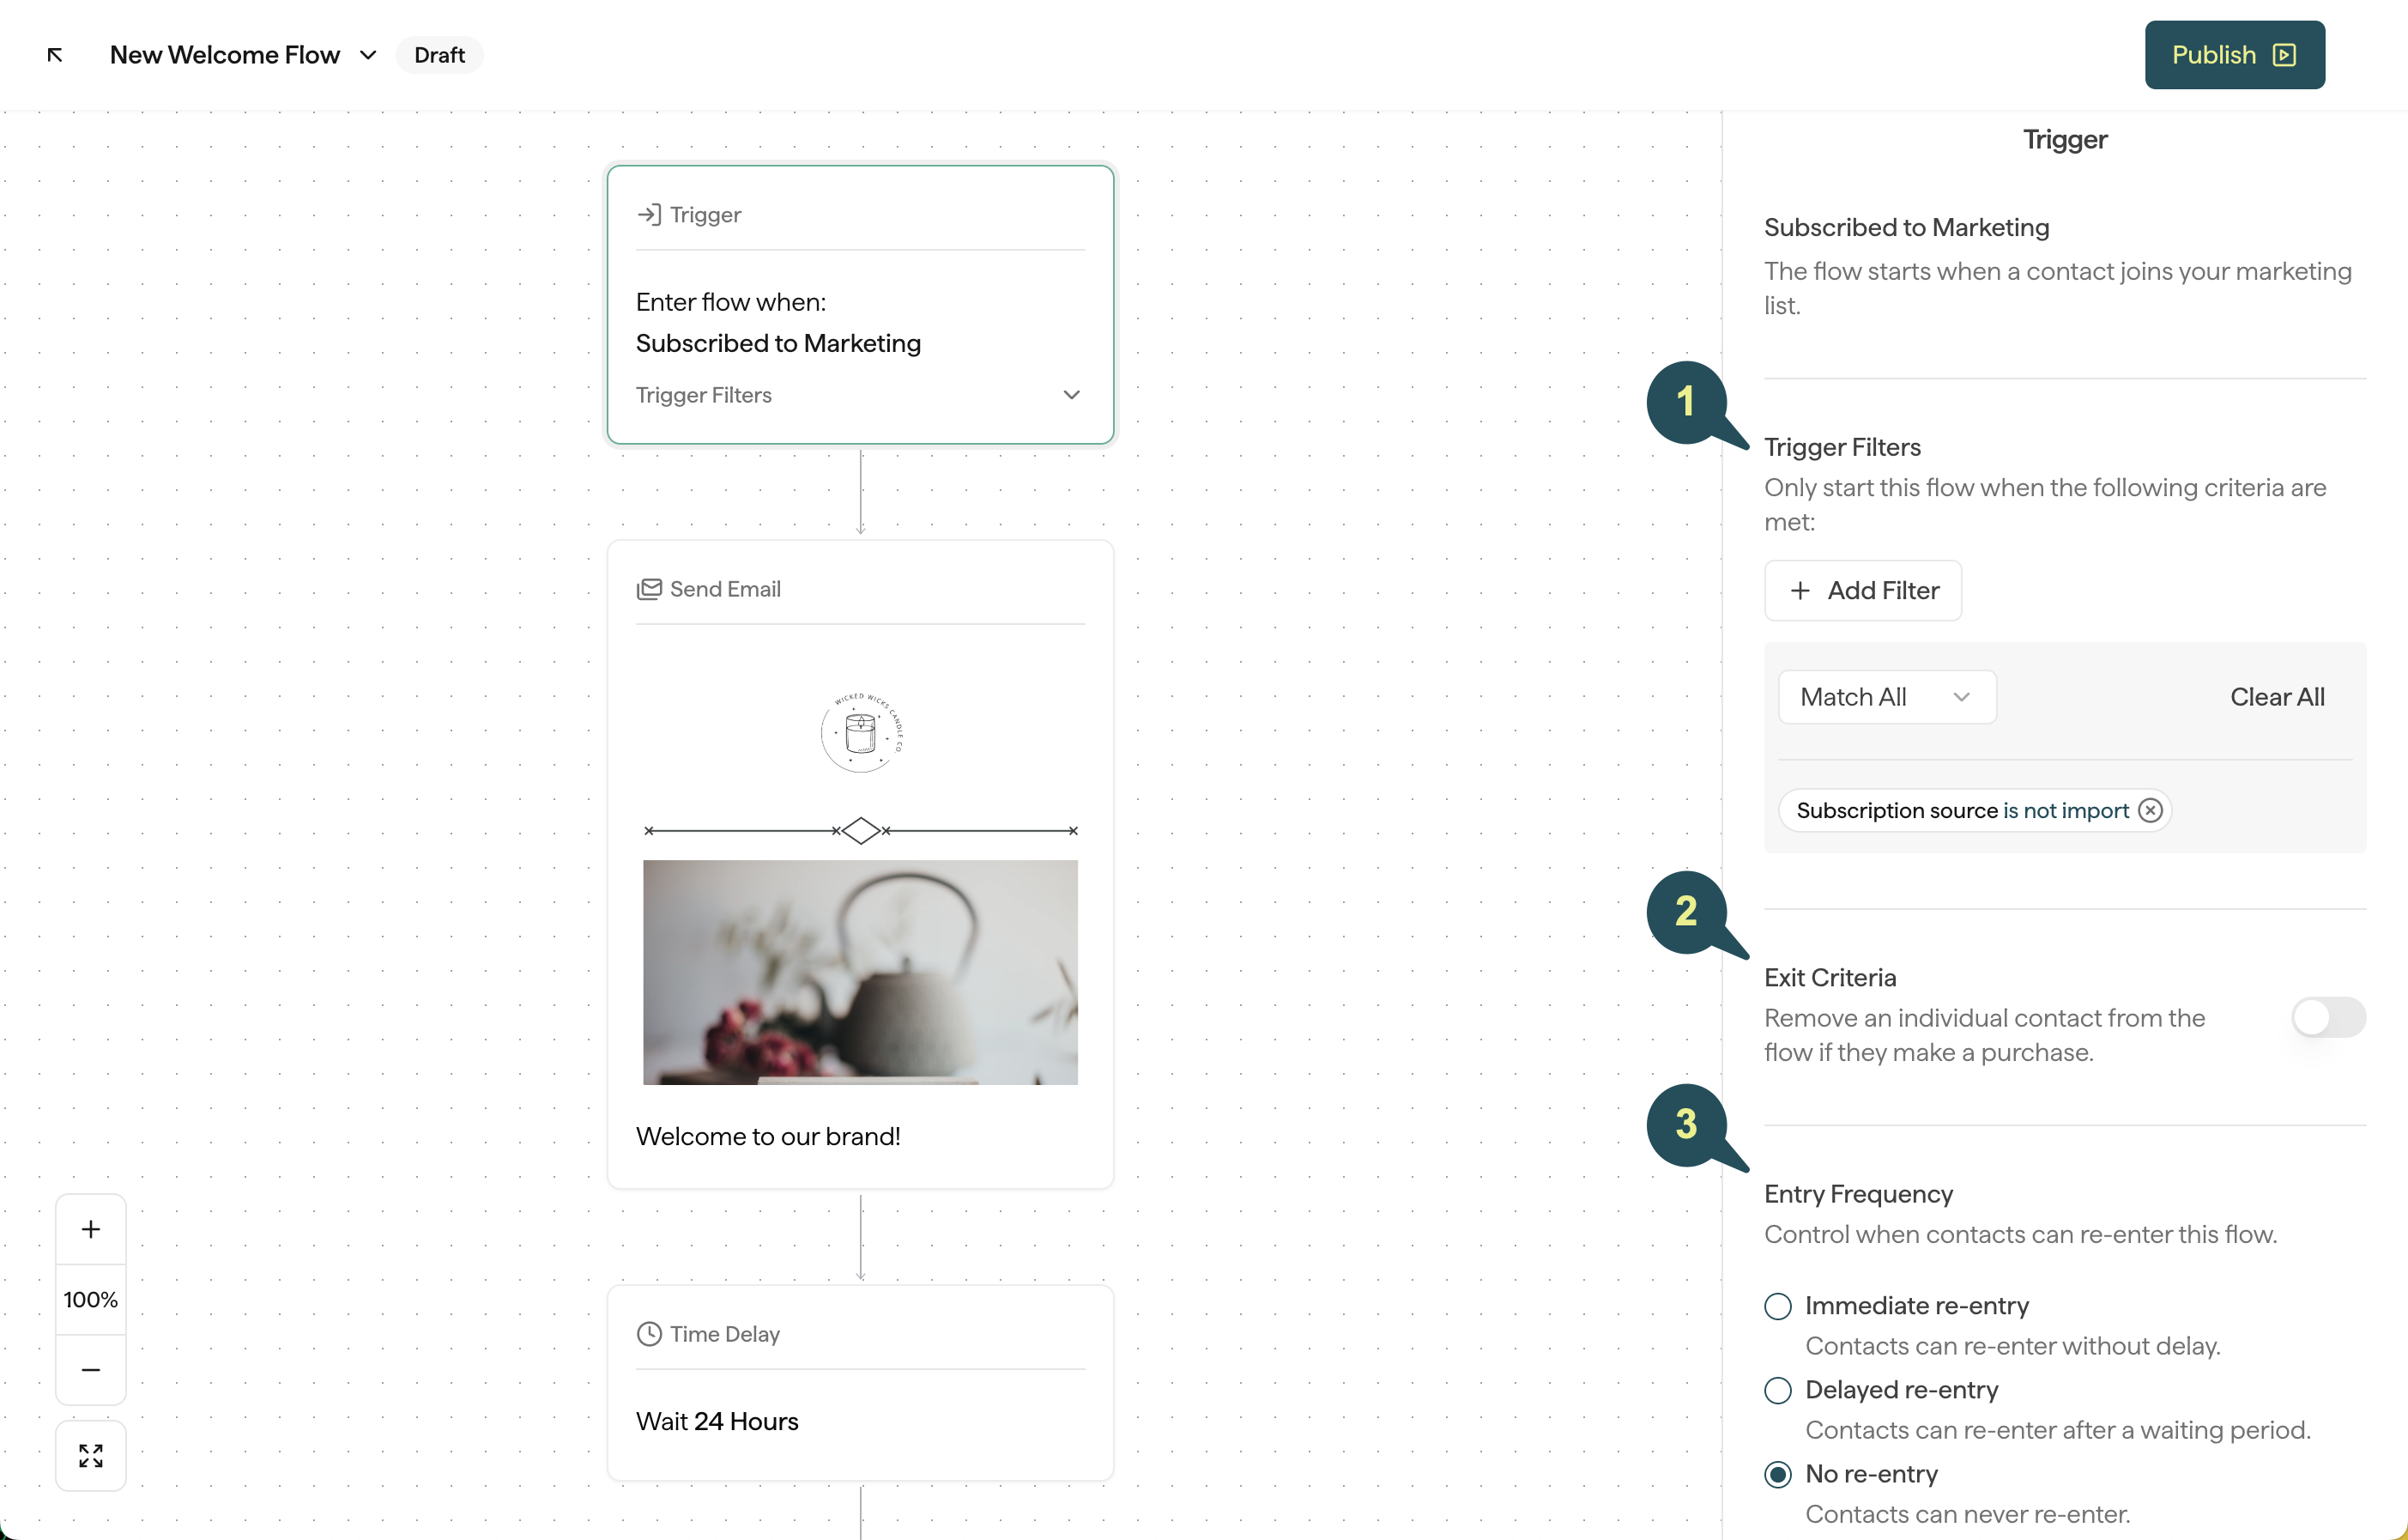
1. Flow Filters
You can add the following filters to customize which contacts are allowed to enter this Flow:- Subscription Channel: Target contacts based on the channel they used to subscribe — Email or SMS. Use this to ensure contacts enter the right welcome flow (e.g., only SMS subscribers enter your Welcome SMS flow).
- Subscription Source: Target or exclude contacts based on how they subscribed: display signups, Shopify, contact import, or manually added.
- Subscription History: Target contacts based on whether they are first time signups or return subscribers.
Once a Welcome Flow is launched, it will trigger in real time based on the filter(s) you choose above. Welcome Flows are not retroactive.
2. Exit Criteria
Enabling this feature allows you to automatically remove any contacts who place an order while in the Flow.3. Entry Frequency
Control how often contacts are allowed to re-enter this flow after they’ve already received it:- Immediate re-entry: Contacts can re-enter this Flow without a delay.
- Delayed re-entry: Contacts can re-enter this Flow as long as a certain period of time has passed since they last received it.
- No re-entry: Contacts will only be allowed to enter this specific Flow once.