Connect Privy with Rivo to automate and personalize your loyalty and referral program strategy.
The Privy integration with Rivo allows you to engage and reward your loyalty program members in various ways, including: Segment contacts by Rivo properties, such as Loyalty Status or Points Balance. Personalize emails and SMS with Rivo properties, such as Points Balance or Loyalty Status. Trigger Flows based on Rivo events, such as Points Earned or VIP Tier Upgraded.
Navigate to your Settings in the lower left corner of your dashboard.
Head to your Integrations page, which can be found near the bottom of the left side menu.
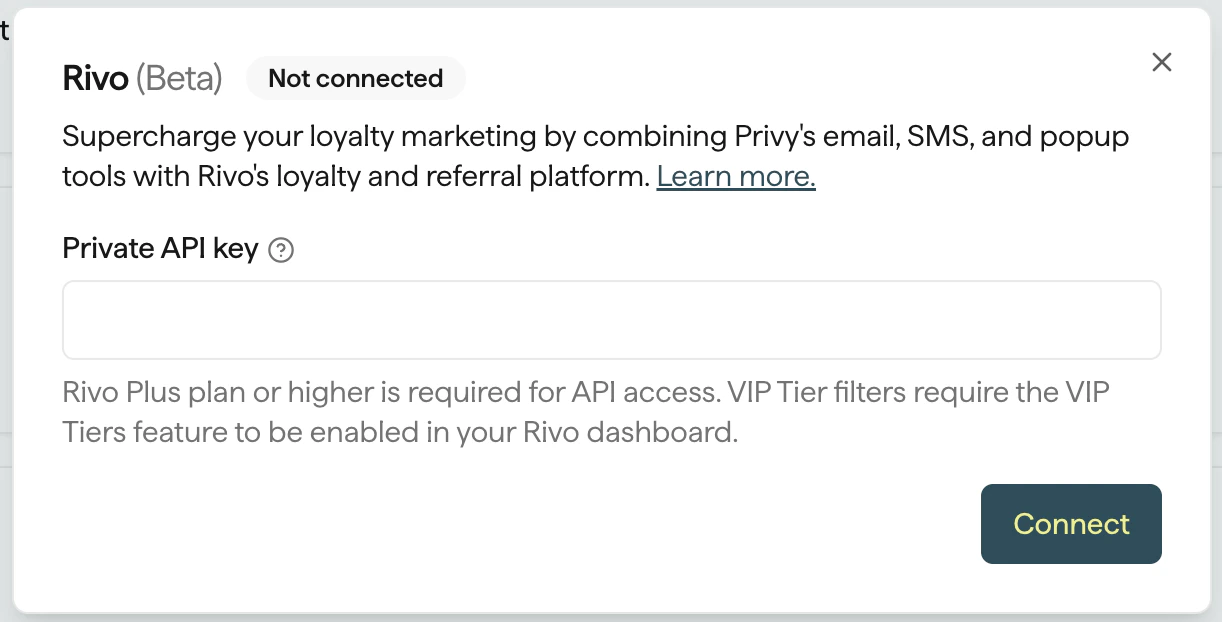
Locate the Rivo integration and click Connect, then confirm your decision.
Enter your Rivo API key to establish the connection.
Once you authorize the integration, Privy will import your Rivo customers in the background. Import times vary depending on the number of existing Rivo customers. It may take up to several days for a large customer set. New customers will be automatically synced in real time.
The following properties sync from Rivo to Privy in real time. You can use these properties to create segments and/or personalize your email and text message content.
You can use the properties from Rivo to create Custom Segments of your mailable and textable contacts in Privy. You can target these segments in your Email + SMS campaigns and Flows.To create a Custom Segment using Rivo properties:
Navigate to Contacts > Segments from the left side of your dashboard.
Click Create Segment in the upper right corner.
Name your Segment.
Click the Choose category dropdown and select one of the properties under the Rivo category.
Qualify your selection as needed.
You can add other conditions to your Segment, if desired. Click Create to save your new Segment!Saved segments that use Rivo criteria show those rules on the segment summary with clear Rivo: labels (for example, Rivo: Points Balance), so you can confirm the segment definition at a glance.
To inject personalized data from Rivo into your email, such as a contact’s points balance, use the Merge Tag function when typing your content. Once sent, your Merge Tag will populate to reflect the data associated with the recipient’s profile in Rivo. Use the {{ contact.rivo.* }} fields (for example, points or tier values) in contexts where contact merge tags are supported.
These fields will only populate if the recipient has values for the fields. Therefore, it’s recommended that you use segmentation that ensures a value is known. For example, the email above should be segmented to any contacts with a Rivo points balance greater than 1 to ensure a value will populate.
To inject personalized data from Rivo into your text message, such as a contact’s Loyalty Status, use the Merge Tag function when writing your message. Once sent, your Merge Tag will populate to reflect the data associated with the recipient’s profile in Rivo.
These fields will only populate if the recipient has values for the fields. Therefore, it’s recommended that you use segmentation that ensures a value is known. For example, the text message above should be segmented to any contacts with a Rivo points balance greater than 1 to ensure a value will populate.
The following events sync from Rivo to Privy in real time. You can use these events to trigger automated Email + SMS Flows and react to your customers’ actions with personalized messages.
Building a Flow that triggers after a Rivo event is a great way to automate your retention strategy. You can send personalized messages in response to milestones such as when a customer earns points or reaches a new VIP Tier.To build this Flow: