- During an import via Spreadsheet
- During an import via Linked Account
- Manually adding a contact via the Contacts dashboard
- During the checkout process (Shopify + Weebly stores)
Import via Spreadsheet
Format your data
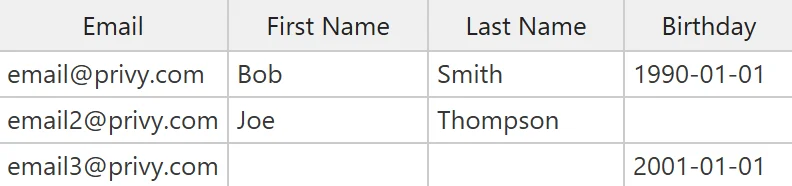
Before you upload a contacts file, you must have your data structured appropriately. An example file is available for download here. Please ensure your import meets the following criteria:- The file must use the CSV format.
- The file must include an email address or phone number column, depending on the type of import.
- The first row of the file must contain column headers. These headers are not case-sensitive and match the imported values with customer attributes (fields) in Privy.
- If you are importing some mailable and some non-mailable (unsubscribed) contacts, you should separate your contacts into two files—one for subscribed and one for unsubscribed contacts.
- Date columns must use the ISO 8601 format (YYYY-MM-DD) (e.g.,
2024-03-15).
- Contacts are only considered mailable or textable if they are identified as such during the import process and are also subsequently approved by the Privy Compliance team.
- If you upload a file that includes existing email addresses, the associated contact profile will update to include the most recent value(s) and any additional fields.
- All your columns with date information should be linked to Date Fields (you can identify those by the Date tag shown after the field name). This unlocks all available features for date information, including Flow Triggers and Segments.
Upload and Match Your Data
To upload your properly formatted contacts file:- Navigate to your Contacts page in your dashboard.
- On the Contacts dashboard, click on the Add Contacts option and select the CSV Upload option from the dropdown menu.
- Select whether you are importing Emails or SMS Numbers.
- Click Choose File to locate the CSV file on your computer. Once you have selected the file, click Next in the lower right corner.
- On the Match your Columns page, you will match the file’s column headers with customer attributes (fields) in Privy. Use the dropdown menus to select an existing attribute or click Create New Field to create a new custom field to store the information. Existing Date Fields appear in the dropdown with a Date badge, and columns whose header matches a Date Field’s name auto-map. To store a new column as a date, click Create New Field, check Is a date field?, and submit — the new Date Field appears in the dropdown immediately. After matching all of the fields and identifying one of them as the required email field, click Next.
- On the Choose Status page, select whether the file is a list of ‘Subscribed’ or ‘Unsubscribed’ contacts. Confirm your selection by typing out the status and then click Next.
- On the Tag page, you can apply a Privy Tag to every contact in the file to make filtering or segmenting for these specific contacts easier in the future. Tags are optional.
- Lastly, review and confirm your file upload by clicking Submit.
Compliance Review
After you’ve submitted the import, your contacts will initially appear in your account with an “unset: non mailable” status. These contacts will transition to a “mailable” or “textable” status following a review by the Privy Compliance Team. The review process is carried out during our business hours, which are from 9 AM to 5 PM EST, Monday through Friday. For imports initiated outside of these hours, approval will typically occur on the following business day. Once the import undergoes review, and if it gets approved, you will receive a confirmation email, and your contacts will become mailable or textable. In case our compliance team requires additional information before approving the import, they will reach out to you with further questions. Please keep in mind that the duration of this process may vary depending on the size of the import file. You can check the review status of the import in the Imports section under Contacts.Import via Linked Account
Some integrations, such as Shopify, allow you to import contacts directly into Privy from your dashboard. Before proceeding, make sure that you’ve already set up your integration in your account. To check if one of your linked accounts supports this functionality:- Navigate to your Settings in your Privy dashboard.
- Head to the Import Contacts page in the left navigation.
- Select a supported Linked Account from the dropdown menu and choose which list you’d like the import.
- Click Import Contacts.
Create contacts manually
- Navigate to your Contacts page from your dashboard.
- On the Contacts dashboard, click on the Add Contacts option and select the Add Contacts Manually option from the dropdown menu.
- You will be prompted for the contact’s email address, first name, and last name. Only the email address is required. After providing the desired information, click Save.
Create contacts during checkout
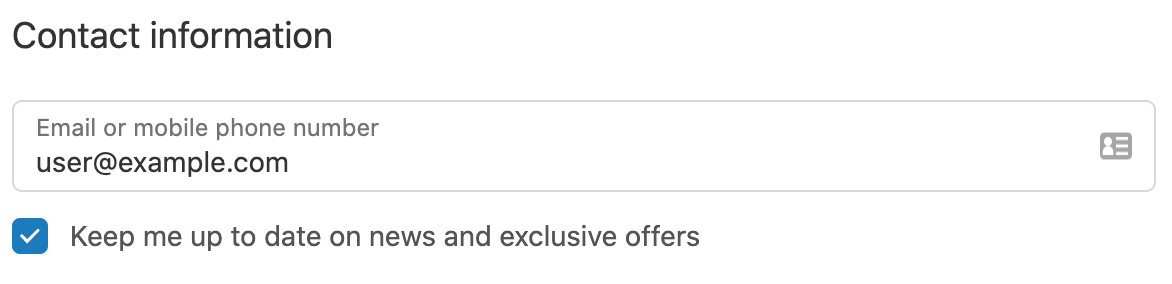
The Shopify, Shopify Plus, and Weebly integrations automatically create or update contacts in Privy when a customer’s email address is collected during your store’s checkout process. The email address used during checkout is captured in Privy as an ‘order’ and is used to generate or update a contact’s profile. An address is captured when the customer has either:- Completed a purchase.
- Reached the payment step of the checkout process.
Removing contacts
In Privy, we encourage the practice of maintaining list hygiene to ensure that you engage with your most active contacts. However, we advise caution when it comes to removing contacts. To prevent potential billing and compliance problems, please exercise care by only deleting contacts that you have no intention of re-adding, those that exhibit malicious behavior, or those who are no longer actively engaged. This approach helps maintain the health of your email list. Before removing contacts, consider referencing the following guides to better understand healthy list cleaning practices:Cleaning Your Email List
Follow this guide on safely removing cold or uninterested contacts from your list.
Removing Bots From Your List
Got bots? It happens. Follow this guide to learn how to identify bot email addresses and the most effective ways to remove them from your list.
Upload to Unsubscribe Contacts
If you’ve identified a large number of contacts that you’d like to unsubscribe from Privy, follow this guide on how to import the CSV as unsubscribed.
Delete contacts in bulk
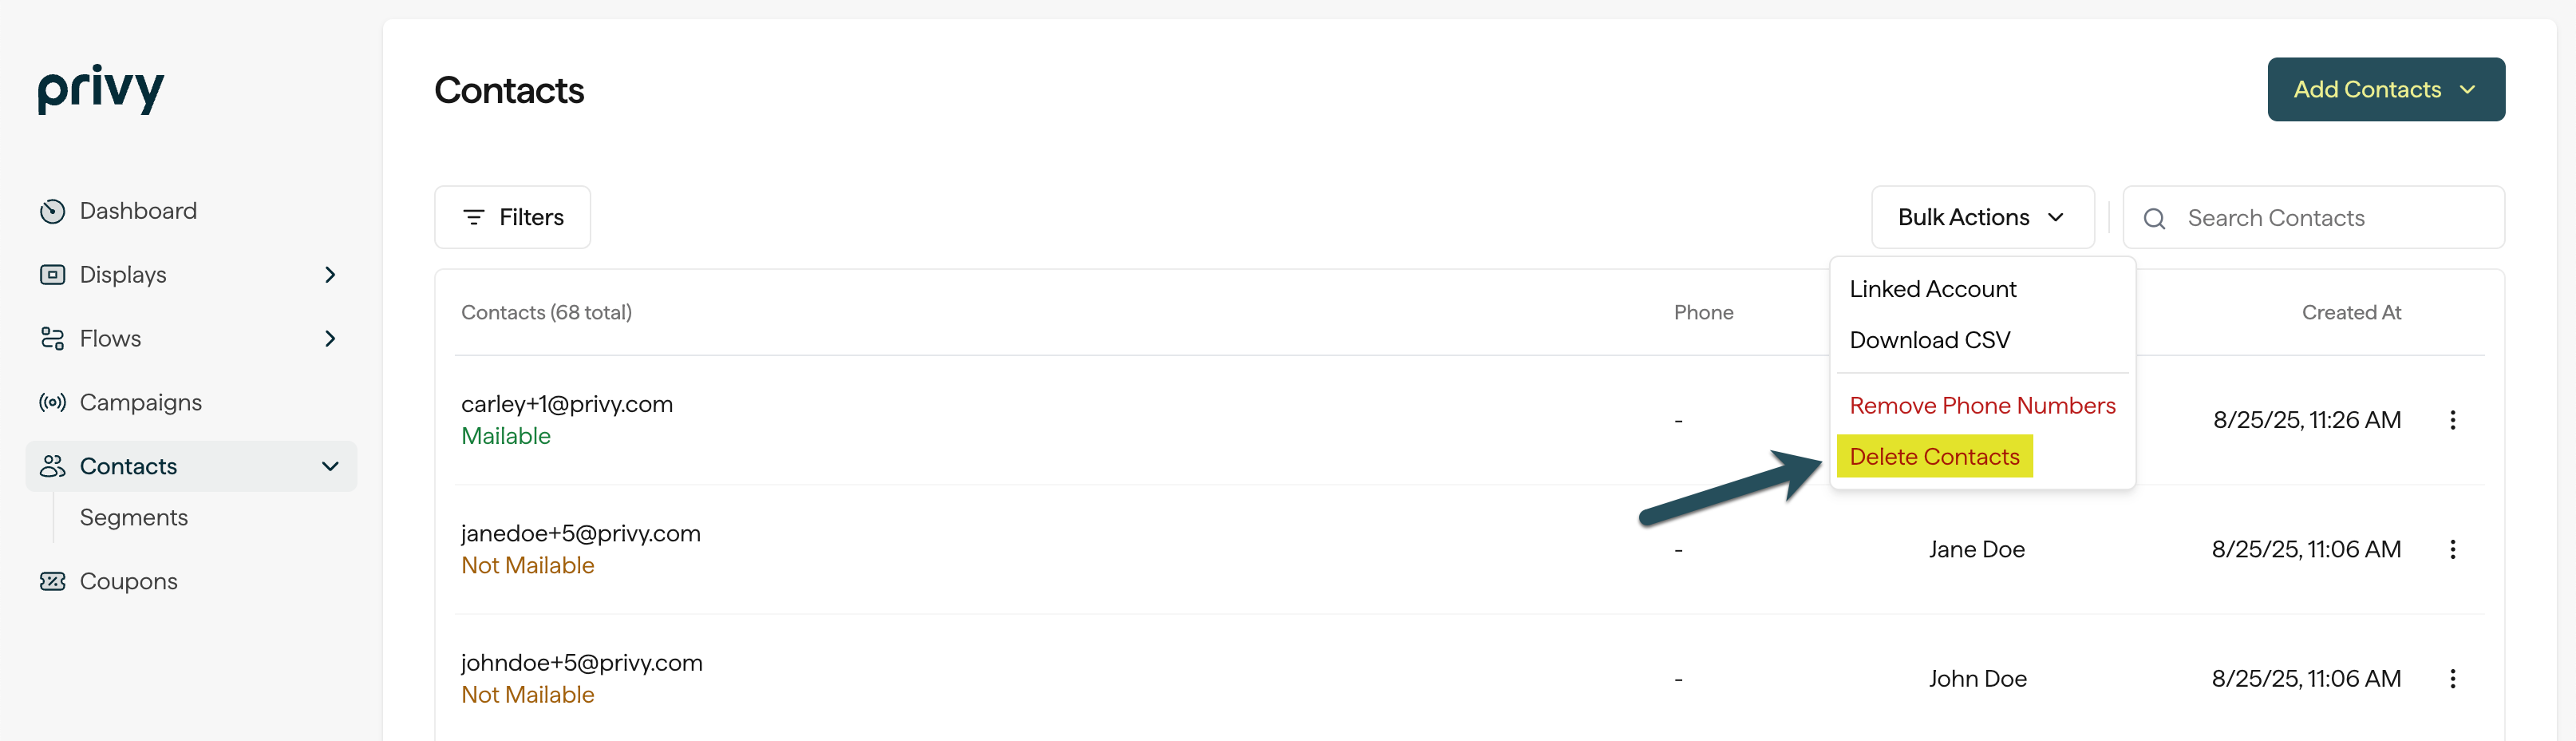
To delete a large amount of Contacts and all their data within Privy:- Head the Contacts tab on your Privy Dashboard.
- When removing a specific set of contacts, utilize the filtering options located on the left side of your Contacts table. Select and apply all preferred filters.
Delete contacts manually
To delete individual contacts in Privy:- Navigate to your Contacts page in your Privy dashboard.
- Use the search option to search for the specific contact email. Click on the contact once it’s found.
- In the contact’s profile, click on the Delete contact option in the upper right corner.